
Tabs
The Tabs macro allows you to add tabs to provide interactive, categorized, or isolated information to the page. A Tabs macro is added to your page for each tab you want to display when you publish the page, this lets you add and edit the content for each tab without having to open the editor. You can add all the tabs you need for a single group of tabs in one go. You can also add more than one group of tabs to a page to keep everything grouped and organized how you need it.
Create a new set of tabs
Navigate to the page you want to edit.
Click the Edit icon.
Click Insert > View More in the Confluence editor.
Select the Tabs macro in the Select Macro screen. (Alternatively, use
/and begin to typetabto access the macro via the quick insert menu.)When the editor opens, it contains two tabs. From this editor, you can:
- Give your tabs names.
- Select Save
- The macro placeholders for each tab appear on your page. Put your content inside and publish the page to see the final results.
Add Tabs to the group
To add more tabs to a group already on the page:
- Select a tab in the group and select the edit icon.
- In the editor, select the Add Tab button.
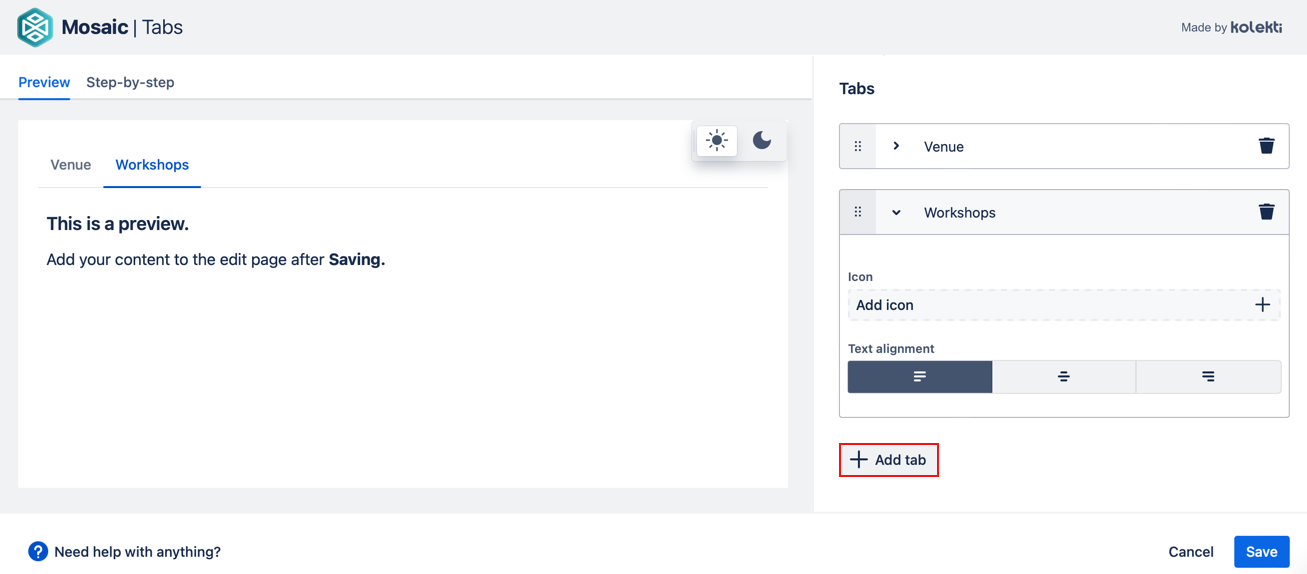
- Customize your tabs.
- Select Save.
- The macro placeholders for the new tabs appear on your page. Put your content inside and publish the page to see the final results.
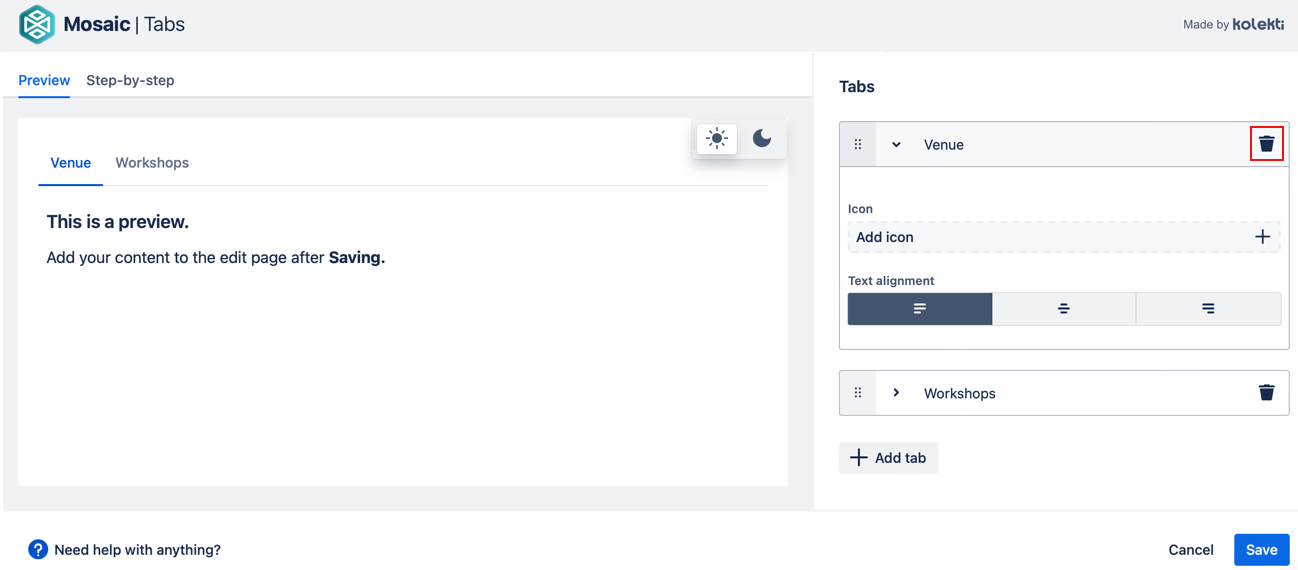
Delete a Tab
There are two ways to delete a tab: inside the editor or on the edit page.
Inside editor
You can use the trash icon to delete a tab from inside the editor. Once you select Save the macroplace holder for the deleted tab is removed from the page. All the content that was inside the tab is also deleted.
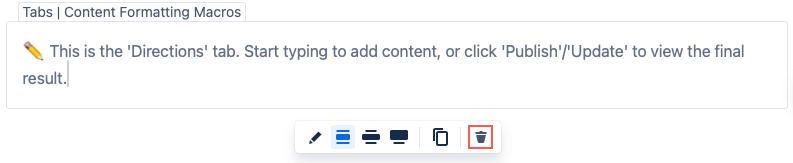
From the edit page
You can delete a tab from the edit page by selecting the placeholder for the macro you want to delete and then selecting the trash icon. The macro and all its content are deleted.
Rearrange tabs
We recommend rearranging tabs inside the editor. This makes sure your tabs stay in the same group. If you rearrange the tabs on the edit page, you can split them into different groups by moving the first tab.
Change the order of your tabs by dragging the tabs around inside the editor. Select the drag handle next to the tab you want to move, and then drag it to its new position.
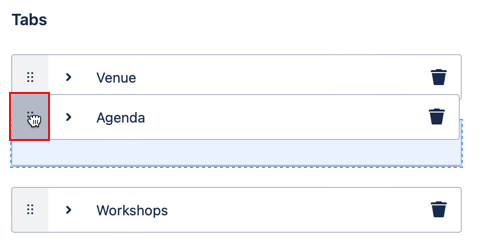
Select Save.
Customize each tab
Name your tabs
Adding or changing the name of a tab is done inside the editor. Each tab needs to have a name before you can save the tabs. You can change the name of a tab inside the editor.
- Select a tab in the group and select the edit icon.
- Select the name field of the tab you want to change.
- Enter the name of your tab.
- Select Save.
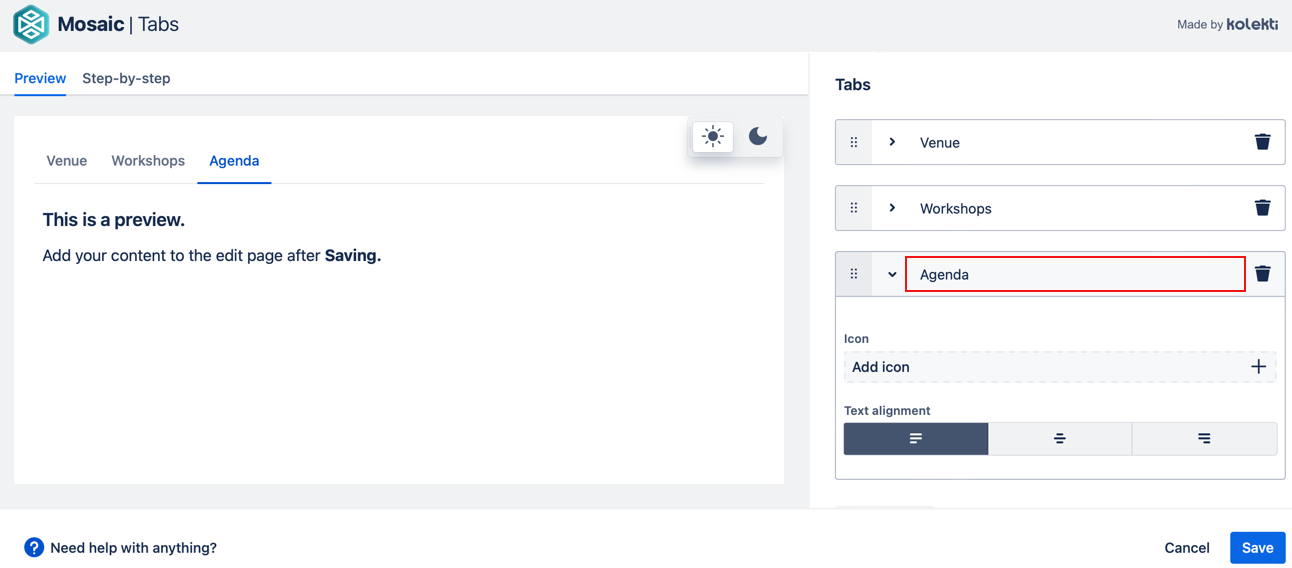
Edit or Delete an icon on a tab
To edit or delete the icon on a tab, you must open the editor for the tab you want to change. The icon is shown beneath the tab's name.
![]()
Select the pencil icon to choose a different icon.
Select the trash icon to remove it.
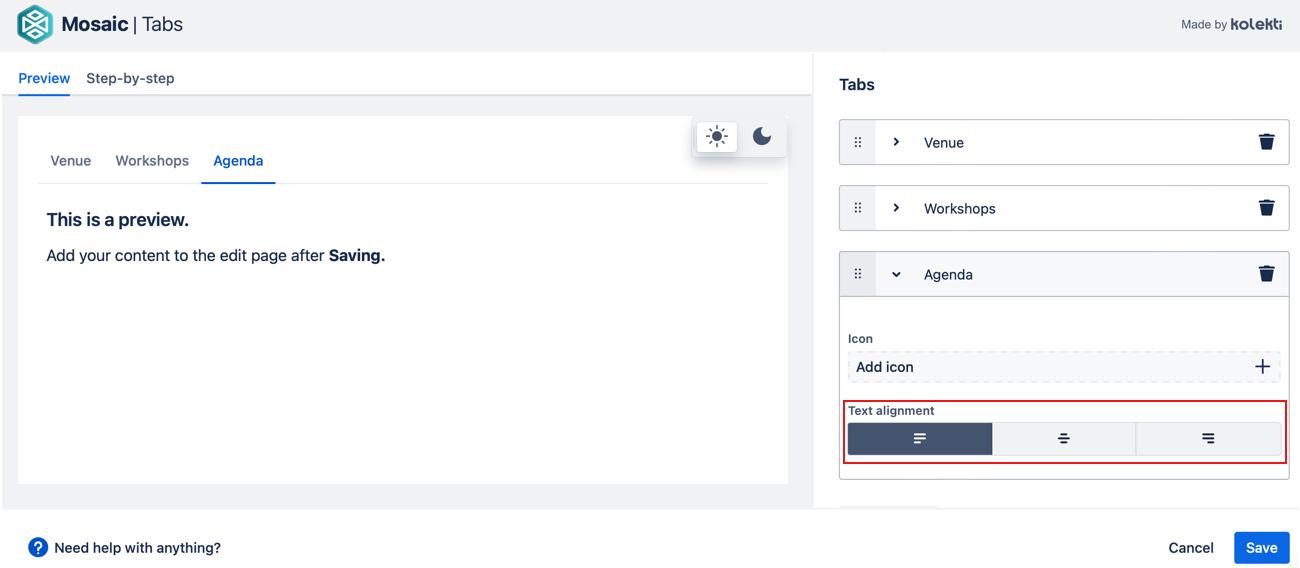
Align text in a tab
The alignment of the content inside each tab can be set inside the editor. Different tabs can have their content aligned in different ways. Use the alignment buttons for each tab to change how its content is shown.
Style your tabs
Any styling options you choose are applied to all the tabs in that group.
Change the header style
There are three possible header style options.
- Basic

- Filled

- Rounded

Change the accent color
You can change the color used in the header to suit your preferences, and you can also choose to add a border of the same color. Changing the color palette gives you different color options.
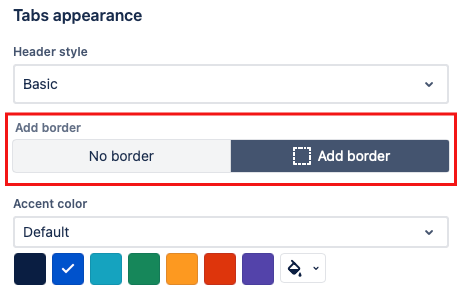
Put a border around your content
You can add a border to your tabs. This can be a good way to let your readers know when they've reached the end of a long tab. Select Add border from the toggle. The border color will be the same as the accent color.
Make Tab Headings Sticky
If your tabs contain a lot of content, you might want the tab headings to stay visible as you scroll down the content. You can turn this on in the first tab in the group by selecting the checkbox at the bottom of the editor.

Change the tab direction
There are two tab direction options. To switch between them, use the Tab group direction button.
Horizontal Arrangement

Vertical Arrangement

Edit your Tabs
To edit a tab group, select one of the tab placeholders and select the edit icon.
Add more tab groups
To add further groups of tabs to a page, add a new Tabs macro to the page and follow the same process.
FAQs
Q. Why is there a delay when I open the Tabs editor?
A. The tabs editor checks which tabs on the page belong to your chosen group. This takes a few moments but allows you to edit all the tabs at once.
Q. Can I have more than one group of tabs?
A. Yes, to start a second group of tabs, just add another Tabs macro to the page. The second group can have different styling than the first group.
Q. I moved my tabs around on the edit page, and now they are in different groups. What happened?
If you change the position of the first tab on the edit page, it can split the tabs into different groups. We recommend rearranging tabs inside the editor to ensure all your tabs stay together.
Q. What happens if I copy and paste tabs macros?
A. It depends on which tab you copy. If you copy the first tab in a group or a whole group of tabs, you will make a new group on the page. If you copy any other tab it will be added to the tab group above it on the page.
When you first open a tabs editor after copying and pasting tabs macros, it may ask you to confirm which tabs you are trying to edit. This is because the app can't tell which of the two identical tabs you are opening. After selecting Save in the macro editor this message will no longer appear.
Q. Does it matter which Tab I select to edit?
A. When you select the edit button for a Tab it opens the editor for the group that Tab belongs to. The editor will open the details for the tab you chose, but you can edit any of the tabs in the group.
Q. Can I link to a specific tab?
A. Yes you can. Right click on the tab you want, and copy the link. This link will take you to the page with the chosen tab open at the top of the screen.
Q Can I put other macros inside of Tabs?
A.
It is possible to put other macros inside this one. Some larger or more complex macros may not work, or work differently than expected.
When trying to figure out which macros can be put inside others it helps to identify the type of macro you are working with. There are two general types of macro:-
Rich Body Macros -There are macros that you can type in on the Confluence Edit page
Simple Macros - These are macros that you can not add anything to on the edit page, you can only affect them by opening them in the editor.
Typically Rich Body Macros, do not work as expected, or at all when put inside other Rich Body Macros.
Most, but not all Simple macros can be put inside a Rich Body Macro, and often work as expected.
See below for more information on what happens when you put various macros inside this macro.
| Macro | Works As Normal | Notes |
|---|---|---|
| Alert Macro |
| The alert will display each time that the macro holding it is opened. |
| Button Macro |
| |
| Button Group |
| This type of macro will not fit inside another macro. |
| BibTeX Reference Macro |
| References within tabs will only display in a Summary Macro in the same tab. |
| BibTeX Summary Macro |
| The Summary Macro will only list BibTeX references within the same tab. |
| ||
| Footnote Macro |
| Footnotes within tabs will only display in a Summary Macro in the same tab. |
| Footnote Summary Macro |
| The Summary Macro will only list Footnote references within the same tab. |
| LaTeX Macro |
| |
| Progress Bar Macro |
| Works as long as there is only one progress bar on a page. If there are multiple nested progress bars on a single page it can cause a failure. |
| Round Rectangle Macro |
| This type of macro will not fit inside another macro. |
| Tabs Macro |
| This type of macro will not fit inside another macro. |
| Tooltip Macro |
|
| Macro | Works As Normal | Notes |
|---|---|---|
| Action Item |
| You can add the macro, but it doesn't keep it's status while in the tab. |
| Attachments |
| This macro displays the attachements on the page. However the drag and drop upload function does not work. |
| Blog Posts |
| |
| Bullet List |
| |
| Code Snippet |
| |
| Contributors |
| |
| Contributors Summary |
| |
| Chart |
| This type of macro will not fit inside another macro. |
| Change History |
| |
| Children Display |
| |
| Content by Label |
| |
| Content Report Table |
| |
| Create From Template |
| |
| Date |
| |
| Decision |
| |
| Decision Report |
| |
| Emojis |
| |
| Error Panel |
| |
| Excerpt |
| This type of macro will not fit inside another macro. |
| Excerpt Include | ||
| Expand |
| If you wish to use this macro you can put it in the cell of a table, inside the macro. |
| Files and Images |
| |
| Gallery |
| |
| Iframes |
| |
| Include Page |
| |
| Info Panel |
| |
| Jira Charts |
| |
| Jira Issues |
| |
| Jira Legacy |
| |
| Jira Roadmap |
| Only displays a link. |
| Layouts |
| This type of macro will not fit inside another macro. |
| Labels List |
| |
| Link |
| |
| Mention |
| |
| Note Panel |
| |
| Numbered List |
| |
| Opsgenie Incident Timeline |
| |
| Page Index |
| |
| Page Properties |
| This type of macro will not fit inside another macro. |
| Page Properties Report |
| This macro works as normal except when the table contains any other macros. |
| Page Tree |
| |
| Page Tree Search |
| |
| Popular Labels |
| |
| Profile Picture |
| |
| Related Labels |
| |
| Recently Updated |
| |
| Recently Updated Dashboard |
| |
| Roadmap Planner |
| The roadmap displays, but the links do not display when you hover over the bars. |
| Shared Links Bookmark |
| |
| Spaces List |
| |
| Status |
| |
| Success Panel |
| |
| Table |
| |
| Table of Contents |
| |
| Table of Content Zone |
| This type of macro will not fit inside another macro. |
| Task Report |
| If you have enough tasks to result in multiple pages of tasks, you may not be able to scroll through the pages. |
| Team Calendars |
| |
| Trello Card |
| |
| Trello Board |
| Although the board will display in edit mode, it does not display in view mode. |
| User Profile |
| |
| Warning Panel |
| |
| Widget Connector |
|