
Alert
The Alert macro allows you to create a pop-up message that is displayed when visitors first come to your page. With this, you can alert viewers about the content of the page or highlight important information. There are a number of standard options for quick and easy implementation, or you can create your own custom version with your choice of content, image, and layout. You can also choose to make the alert appear every time a user navigates to the page, or it can be permanently dismissed so they only have to view the message once.
Add an Alert to your page
Navigate to the page you want to edit.
Click the Edit icon.
Click Insert > View More.
Select the Alert macro in the Browse screen.
Customize your alert. Changes you make will be shown in the dynamic preview of the editor.
Click Save. A macro placeholder is displayed.
Click Publish to see the Alert macro in action.
You can add more than one alert macro to a page. They will appear one after the other when a user views the page, however the order in which they appear will be random.
Change the style of your Alert
There are two different styles of alert you can choose from.
- Image Alert (the default option)
- Simple Alert
Below are the default versions of each type of alert in each of the styles. You can further customize any of these Alerts to suit your needs.
Image Alerts


Simple Alerts


Customize your Alert
Add an Image
There are two ways to add an image to your alerts. Both can be found by selecting the Add Image button.
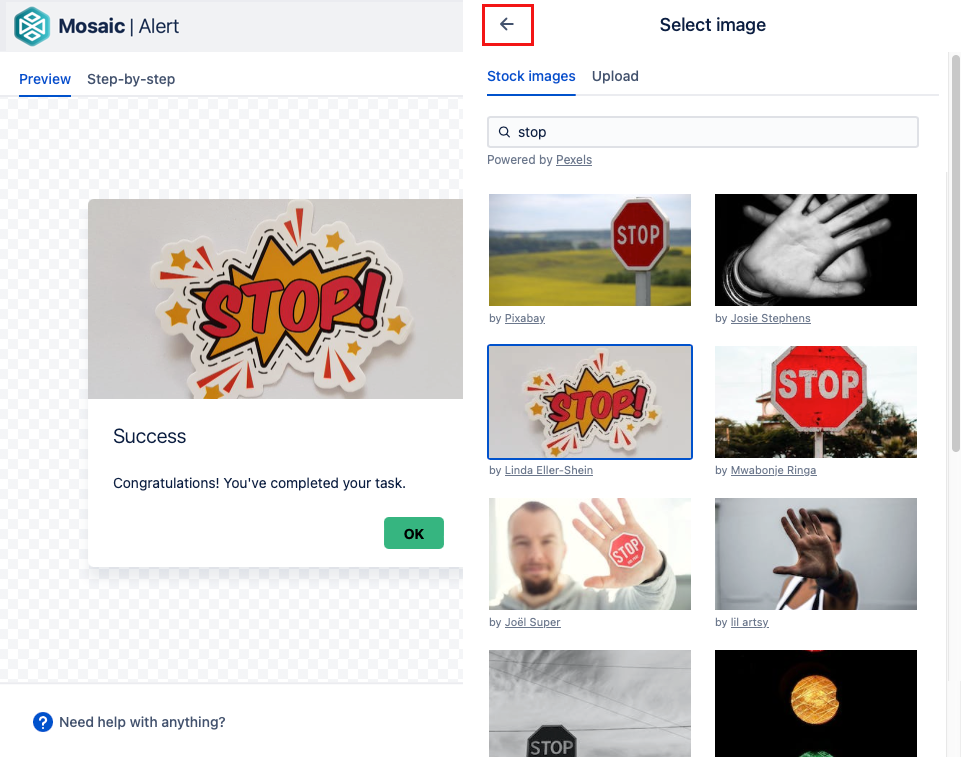
a) Stock image. This option allows you to search for an image from our free image library. Simply select an image and check the preview to see how it looks on your card. When you are happy with the image, select the back button.
a) Upload. This option allows you to add your own image. You can drag and drop an image file into the macro window or click Upload image to select an image file from your local file storage.
Accepted image formats: JPEG, PNG, GIF, ICO BMP, and WEBP
Maximum file size: 15 MB
Reposition an image
Once you have added an image to your alert you can change how it appears. You can zoom in so that only the part of the image you want is shown, and you can reposition it so that you have the focus exactly where you want it. To do this you first need to hover over the image to reveal the image toolbar. Then select the Crop and reposition button.

The buttons change to the editing options. Use the Plus and Minus buttons to zoom in or out. Drag and drop the image to change it's position.
Select the green done button when you are happy with your changes.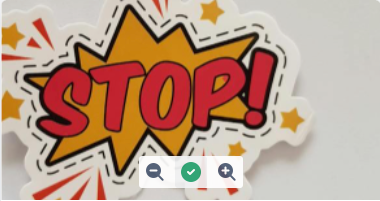
You can re-edit an image over and over until you are happy with the results.
Change or remove an image
There are two ways to change an image:
1. Select the pencil icon next to the image name. Then add an image as before.
To remove the image select the trash can icon.

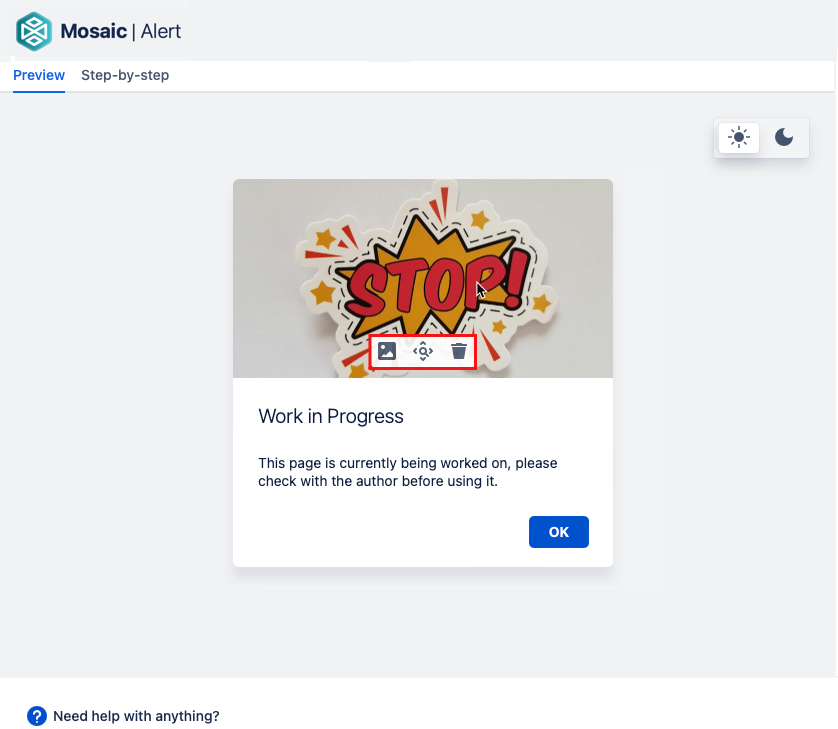
2. Hover over the image in the preview to reveal the image toolbar.
Select the change image icon to open the add image menu.
To remove the image select the trash can icon.
If you have changed the image on a default alert, removing the image will return you to the default image. To remove it completly change the alert style to Simple.
Add option to dismiss your Alert
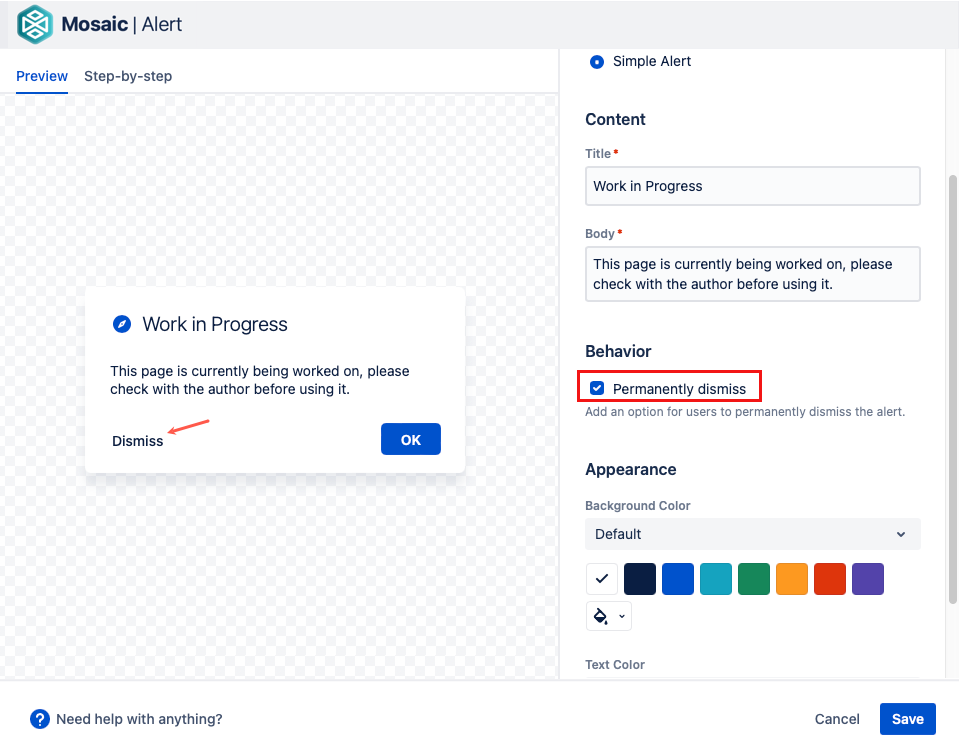
If you want to let users choose to only see an alert once you can use the Permanently dismiss option. When the option is checked a Dismiss button is added to the alert give users two options.
Change the color scheme of your Alert
Using the color palettes you can change the background and text color of your alert. You can use one of the options from the color palettes or select your own color. You access this by clicking on the paint bucket icon. This will open a color picker nearby.

Change the color palette
Changing the color palette will change the presented options for Background Color and Text Color.
Edit an Alert
To make changes to an alert after it is published, first display the page in Edit mode.
- Click the card, then click the Edit icon.
- Make your desired changes, then click Save. If you want to edit an alert image, you will need to upload it again.
Remove an Alert Macro
To remove an alert after it is published, first display the page in Edit mode, Then click the alert, then click the Trash icon.
Limitations
Due to Atlassian limitations, there are a couple of things that do not behave as you might expect:
- Copy paste: copying and pasting Alert macros that contain image attachments results in the same image ID being assigned to all copies.
- Google Chrome Incognito mode: Alert image attachments do not show if Confluence is opened in a Chrome Incognito tab.
Video Walkthrough
Watch our video walkthrough to see the Alert macro in action.