
Interactive Banner
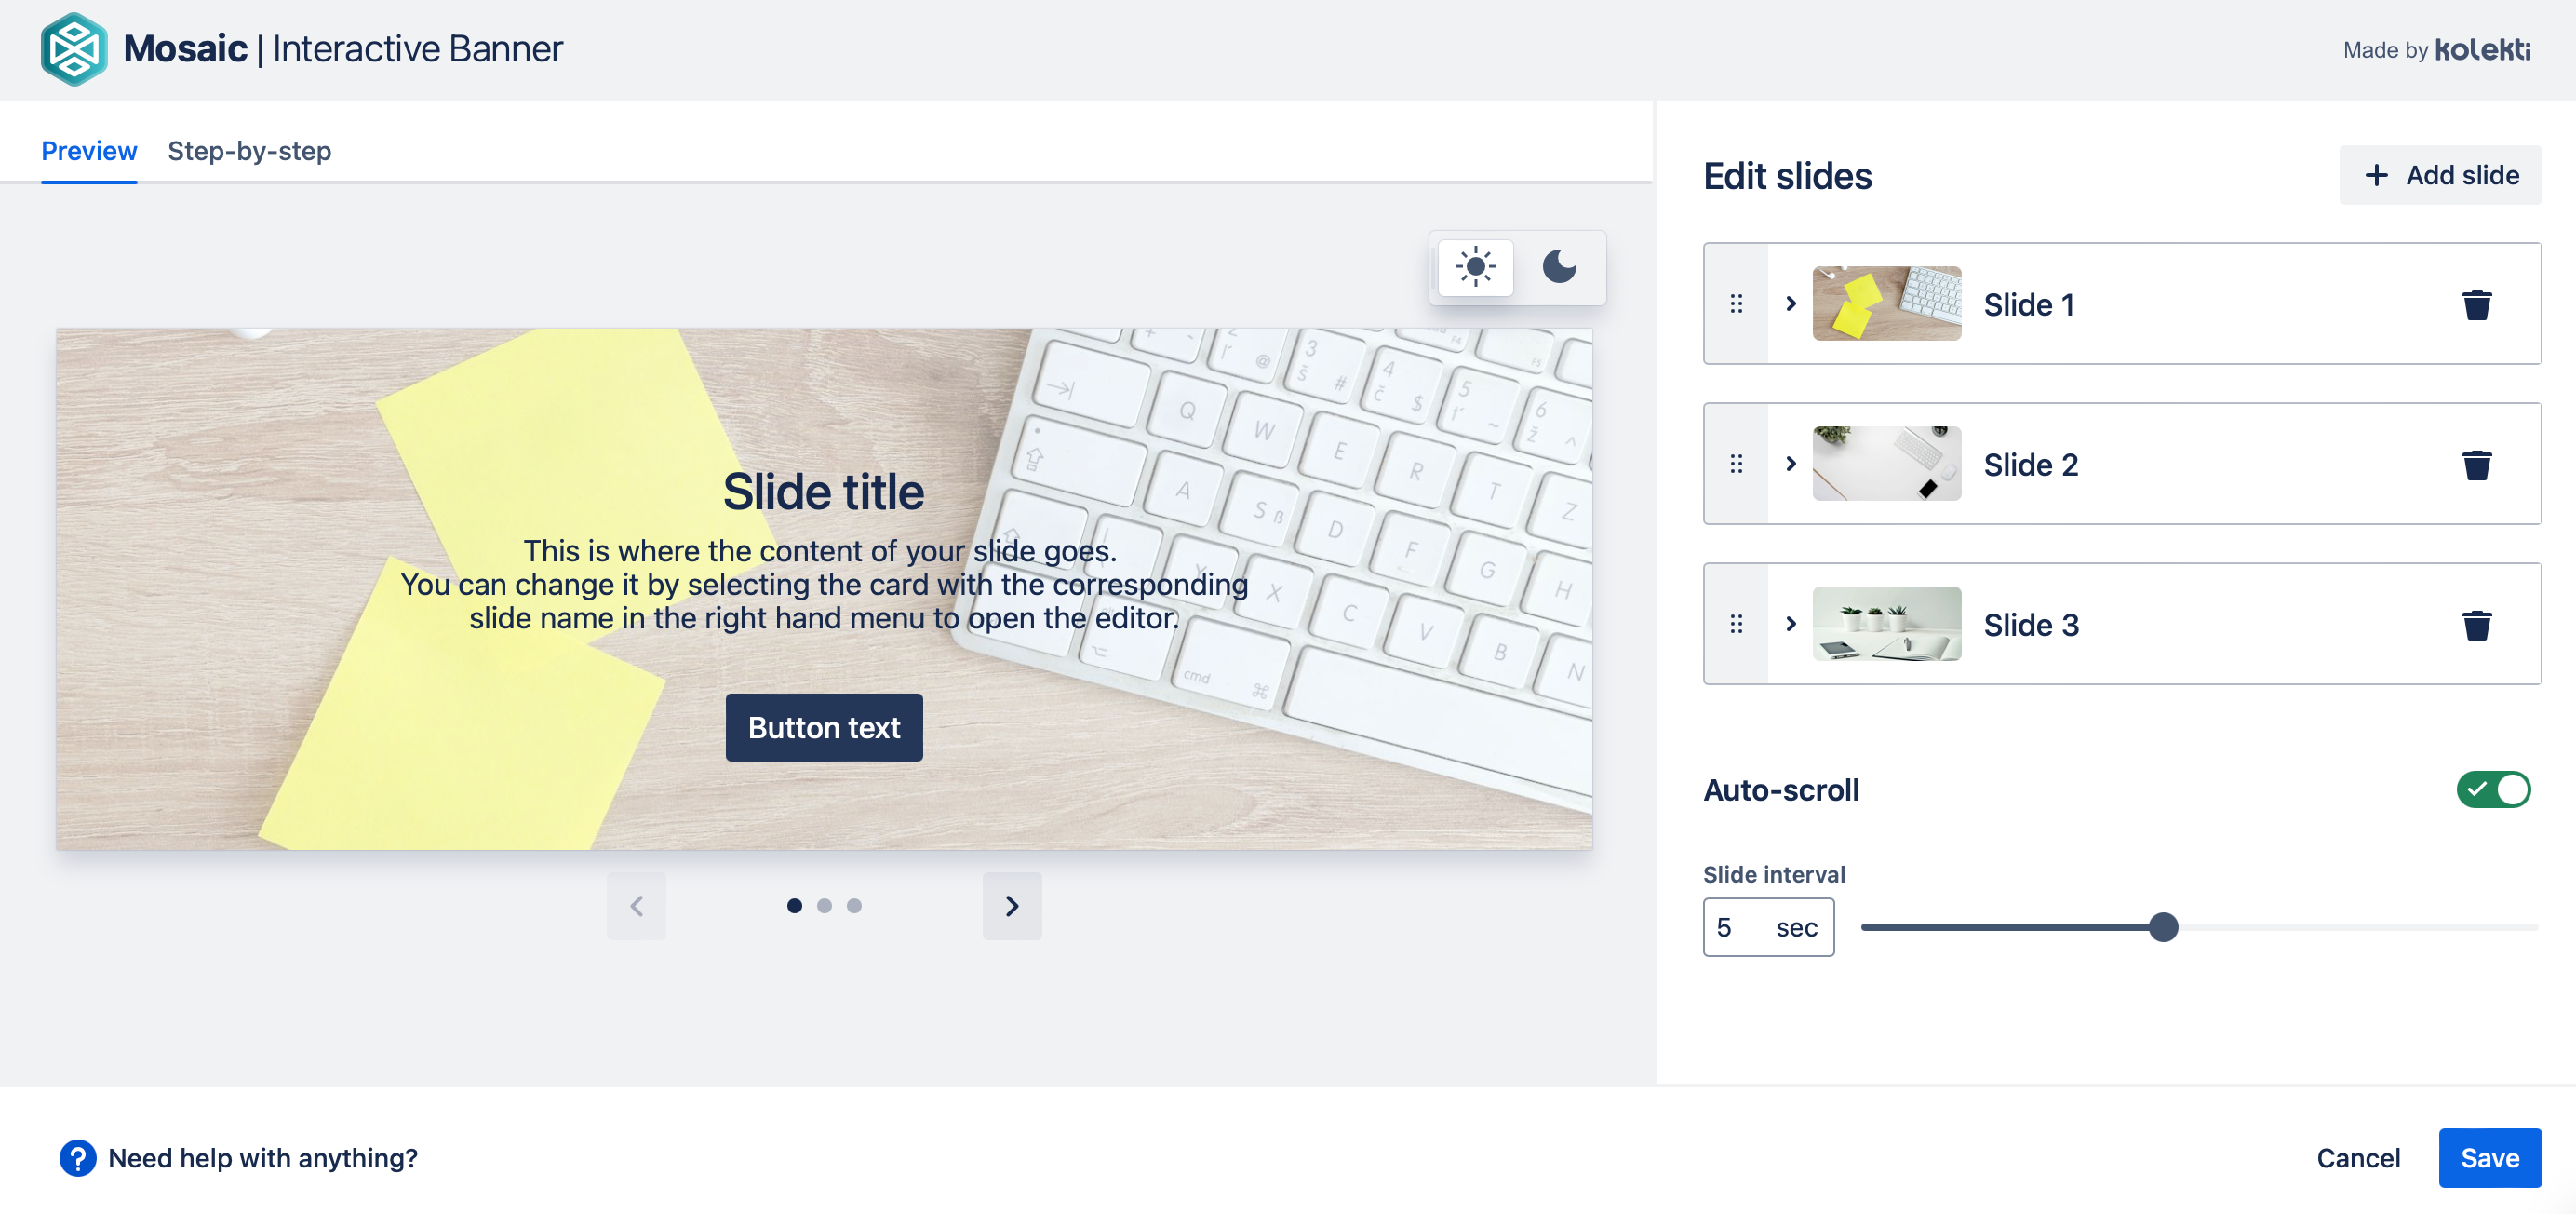
Interactive Banner is the ideal tool for displaying your most important content. It can hold up to 25 slides to let you highlight important content for your page viewers. Each slide can have any combination of a title, body, and button, all on a background of your choice. You can also use AI to help you quickly generate some content for your slides. This can save you time and give you a solid starting point.
Add a banner to your page
Navigate to the page you would like to edit.
Click the Edit icon in the top-right of the page or press
eon your keyboard to display the page in Edit mode.Click the position where you want to display your interactive banner.
Select Insert > View More in the Confluence editor.
Select the Interactive Banner macro in the Select Macro screen.
Customize your banner by using the options in the editor.
Add a new slide
To add a new slide, select Add slide. This will add a new slide with a default image and content. To change the content and appearance of the slide, select it to edit the slide.
You can have a maximum of 25 slides in your Interactive Banner.
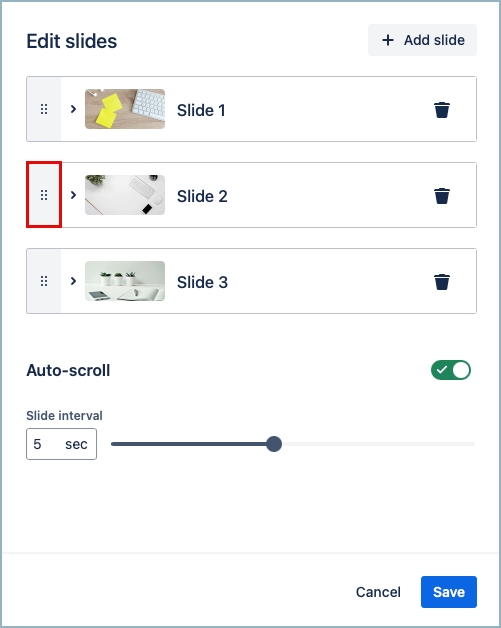
Change slide order
To change the order of you slides simply use the drag and drop handles. Select the handle of the slide you want to move, and then drag it to its new position.
Use AI quick start
To use AI quick start, select the slide you want to work on. This opens the edit menu and brings the slide to the front of the preview.
Using AI quick start will change the existing content of a slide.
Select AI quick start.

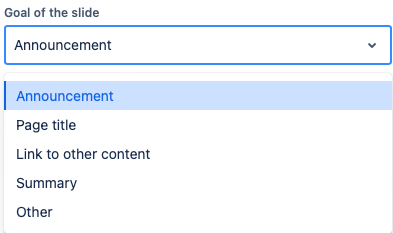
Use the drop-down to select the Goal of the slide. This will change the way your prompt is used to produce the output. The options are
- Announcement - good for catching attention and encouraging people to learn more.
- Page title - a good choice if you want to make an eye-catching page header.
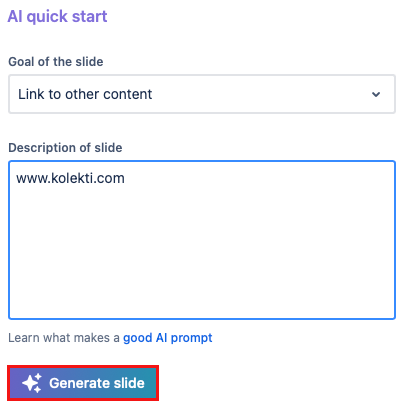
- Link to other content - copy and paste the page link, and you will get a slide that links to the content and describes the page content.
- Summary - add some long-form content to get a quick summary.
- Other
Whichever option you choose the AI makes a best effort attempt. This is especially true for the link option. It is a great way to get started, but always check what is created.
Use the text field to enter a description of the slide you need. You do not need to enter exactly what the slide should say. Describe what you need. The AI will craft you some appropriate content. When using AI the quality of the output depends on how you ask for what you need. A more detailed description will give you better results.
Select Generate slide.
The AI-generated content is created and added to the slide. You can then:
- Save the banner if you are happy with the content
- Edit the slide if it's not quite right - scroll in the editor menu to see the options.
- Regenerate the content to try again. Before regenerating, you can change your description or goal to get a more varied result.
Edit a slide
To edit a slide, select the slide you want to work on. This opens the edit menu and brings the slide to the front of the preview.
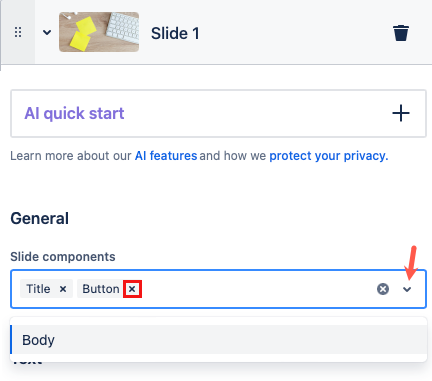
Each slide has a customizable background. You can add any combination of a title, body, and button to the background. All slides start with all three components. You can remove them by selecting the x by the component you want to remove.
To remove all the components from the slide, use the white x at the end of the field.
To add a component, use the drop-down menu.
Add a title
If you have chosen a title there is a text field for the title. This text appears centered at the top of the slide.
Add body text
If you have chosen body there is a text field for the main content of the slide. The text you enter into this field appears centered in the middle of the slide.
Change an image
To change a background image, select the pencil icon next to the current image.
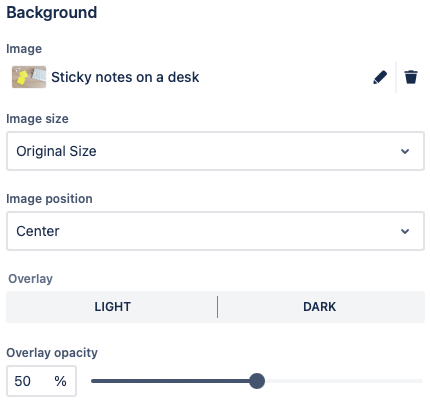
Then either choose an image from the library or Upload your own image. Once you have chosen an image, you can adjust it as follows.
Image size:
Original Size - Maintains the original size of the image.
Resize to fit into the container - This makes the whole image fit into the slide, but there may be some white space around the image.
Resize to fill the container - There is no white space left in the container, but the whole image may not be visible.
Change the image position
Choose how the image is positioned in the slide using the options from the drop-down menu.
Add an image overlay
Adding an image overlay offers you more options for how your image will appear. The options are light or dark. The text and button color change automatically to give the best contrast. Once you've selected an overlay you can change its opacity.
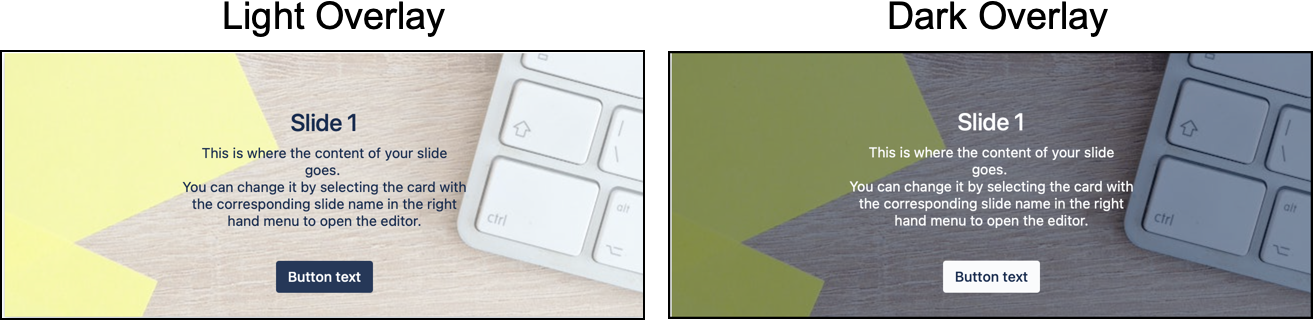
You can use overlays to control how prominent the background image is.
Add a button
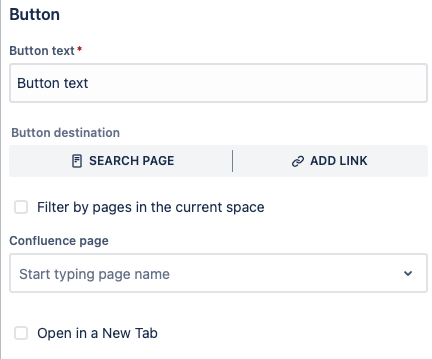
If you have chosen a button you can choose the text for the button and where it links to.
To link to a confluence page, select Search Page. Type the name of the page and select it from the list when you see it. Use the Filter by pages in the current space checkbox to limit the search.
To link to an external web page, select Add Link and then type in the full URL for the page.
For security reasons, some browsers may block URL paths pointing to files on a local file system or networked folders. This can be overridden in your browser’s security settings but should only be done as part of a comprehensive security strategy. In most cases, it is best to host such files on dedicated web servers that use other protocols, such as FTP. More information can be found in Atlassian’s documentation.
Delete a slide
To delete a slide, select the trash can icon next to the slide you wish to delete. Then confirm you wish to delete it. Once deleted, a slide can not be retrieved.
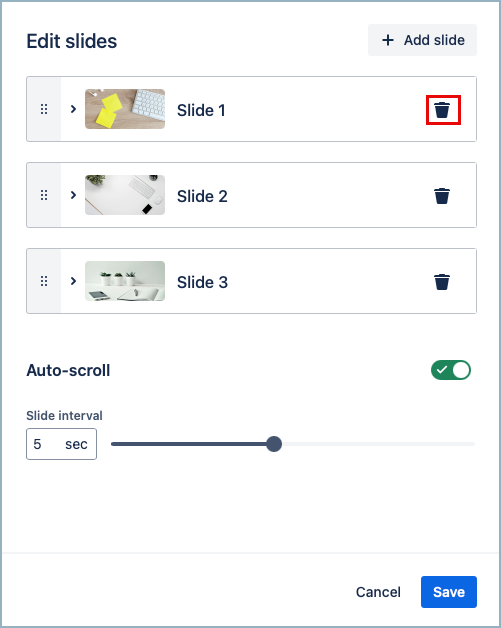
Use Auto-scroll
Turning on the auto-scroll toggle will automatically scroll your slides for your viewers. The slider lets you choose how long each slide is shown.
