
Progress Bar
The Progress Bar macro allows you to add a stylized progress bar to the page, providing your users with a level of context for the page within a process. A Progress Bar macro is needed for each step that you want to create. These are then added to each page within the process. It is helpful to start with a plan that includes the titles of the pages you want to link in the process.
You can add only one array of progress bars to a Confluence page. See our FAQ page to learn more.
Add a Progress Bar to your page
- Navigate to the page you want to edit.
- Click the Edit icon.
- Click Insert > View More.
- Select the Progress Bar macro in the Select Macro screen. (Alternatively, use
/and begin to typeprogressto access the macro via the quick insert menu.)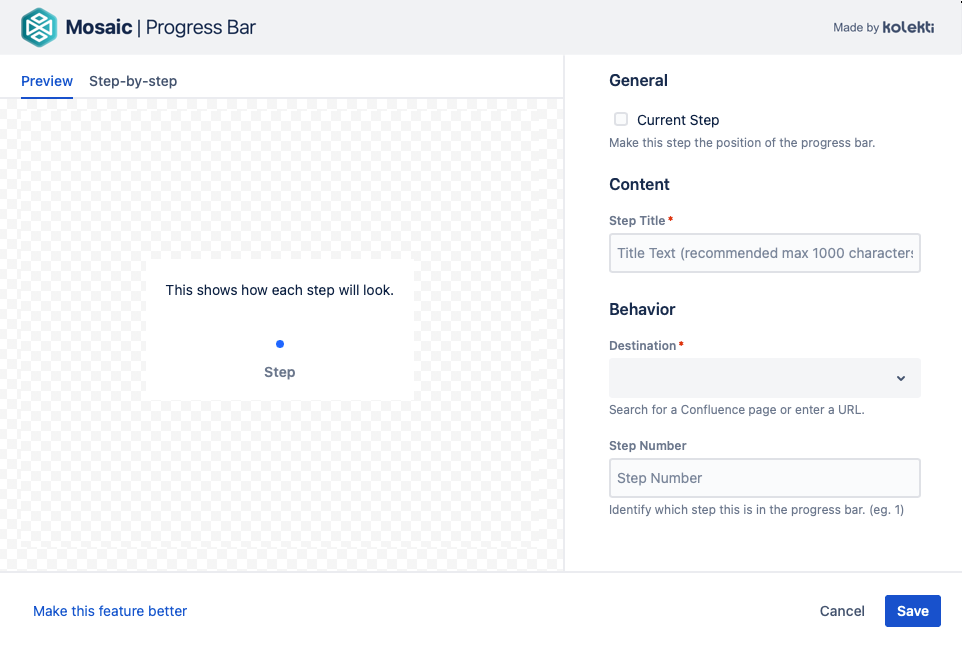
- The Progress Bar Macro screen appears. Customize it according to your needs:
- Current Step: Select this option to highlight the step when it is the current step in the progress bar.
Step Title: Enter the title or label for the step, e.g. Welcome.
- Destination: Enter the Confluence page title that is linked to this step; start by typing the title, then select the correct page from the corresponding results that display.
- Step Number: Choose which number step this is, e.g. 1 if it is the first step, 2, if it is the second step. If not specified, the step order might be unexpected.
Click Save. A macro placeholder displays.
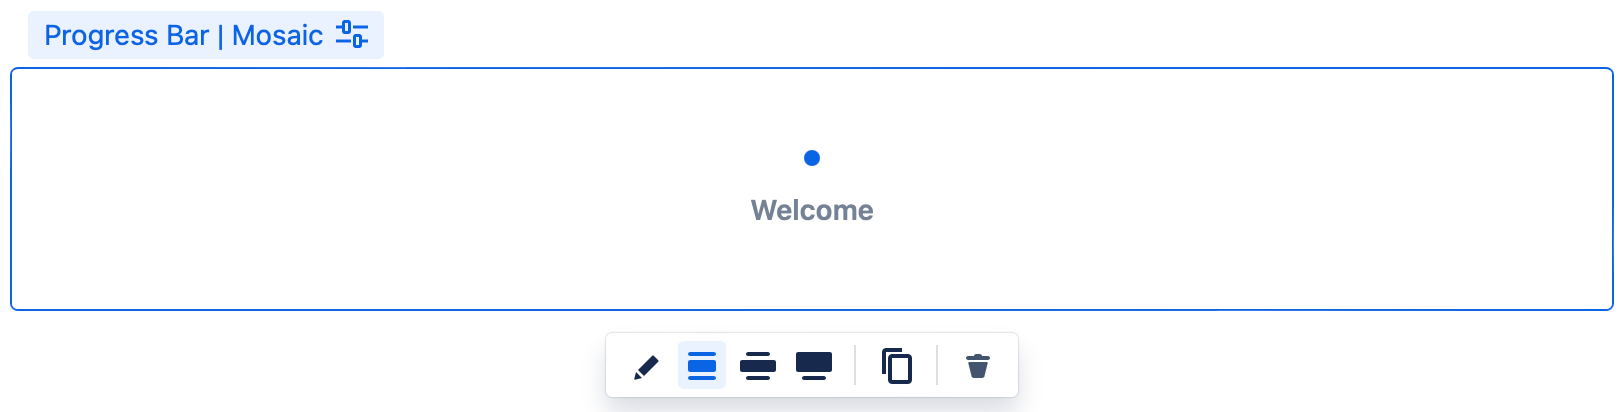
Add a Progress Bar macro for each step that you want to add, as described in steps 2-7, changing the page link.
Click Publish to see the progress bar rendered on the page.

- Repeat the process above on each page that is linked in the process. Remember to select the Current Step checkbox according to the current page. The example below displays the progress bar on the page for step 2 in the process.

The published page has a small space between the progress bar and any text you place underneath it. This is due to the position of the lower margin of the progress bar macro on the published page. To minimize the size of this margin, make sure there are no gaps between the progress bar macros on the edit page. The lower margin gradually increases along with the number of progress bar macros.
Edit the macro
To make changes to the macro, for example, to change the order of the steps, click the macro placeholder, then click the Edit icon. Make the required changes, then click Save.
Video Walkthrough
Watch our video walkthrough to see the Progress Bar macro in action.