

Get Started
Welcome to Workflow Steps for Jira!
Our little app complements Slack’s Workflow Builder and allows everyday users to create integrations and automations with all of their Jira instances, without any coding whatsoever.
Workflow Steps for Jira offers the following steps, which you can use to build awesome workflows:
- Submit a Request - Prompt and record service-request details to a new Jira issue without leaving Slack.
- Respond to a Bug Report - Create Jira issues by reacting to Slack comments with an emoji of your choice.
- Create Backlog Items - Allow your team to create issues for a Jira project backlog from Slack, and customize the required Jira-ticket details.
- Gather Feedback - Turn useful Slack feedback into comments on a Jira issue by reacting to Slack comments with an emoji of your choice.
- Assign Onboarding Tasks - Automate onboarding tasks, such as HR enrollment tasks or reading/posting assignments, to new members of a Slack channel.
- Status Report - Schedule status reports from any channel (or any individual) in Slack, and add those updates to specified Jira issues as comments.
Get started by downloading/importing our ready-made workflow templates. They include workflows for super-useful processes, like automating onboarding tasks, using emojis to turn Slack comments into Jira-issue comments, submitting and handling bug reports, and more. So easy!
You can configure connections and access your account details on the app home screen, where you’ll also find lots of ways to get in touch with us. We hope to hear from you!
Quick Start Guide: Jira Cloud Users ☁️
Jira Cloud users, follow these steps to get started with Workflow Steps for Jira ASAP!
Unsure if you have Jira Cloud or Jira Server? We can help you figure it out!
- Download and add the app to Slack.
On the app Home tab, click Jira Cloud, and follow the steps on the screen to authenticate.
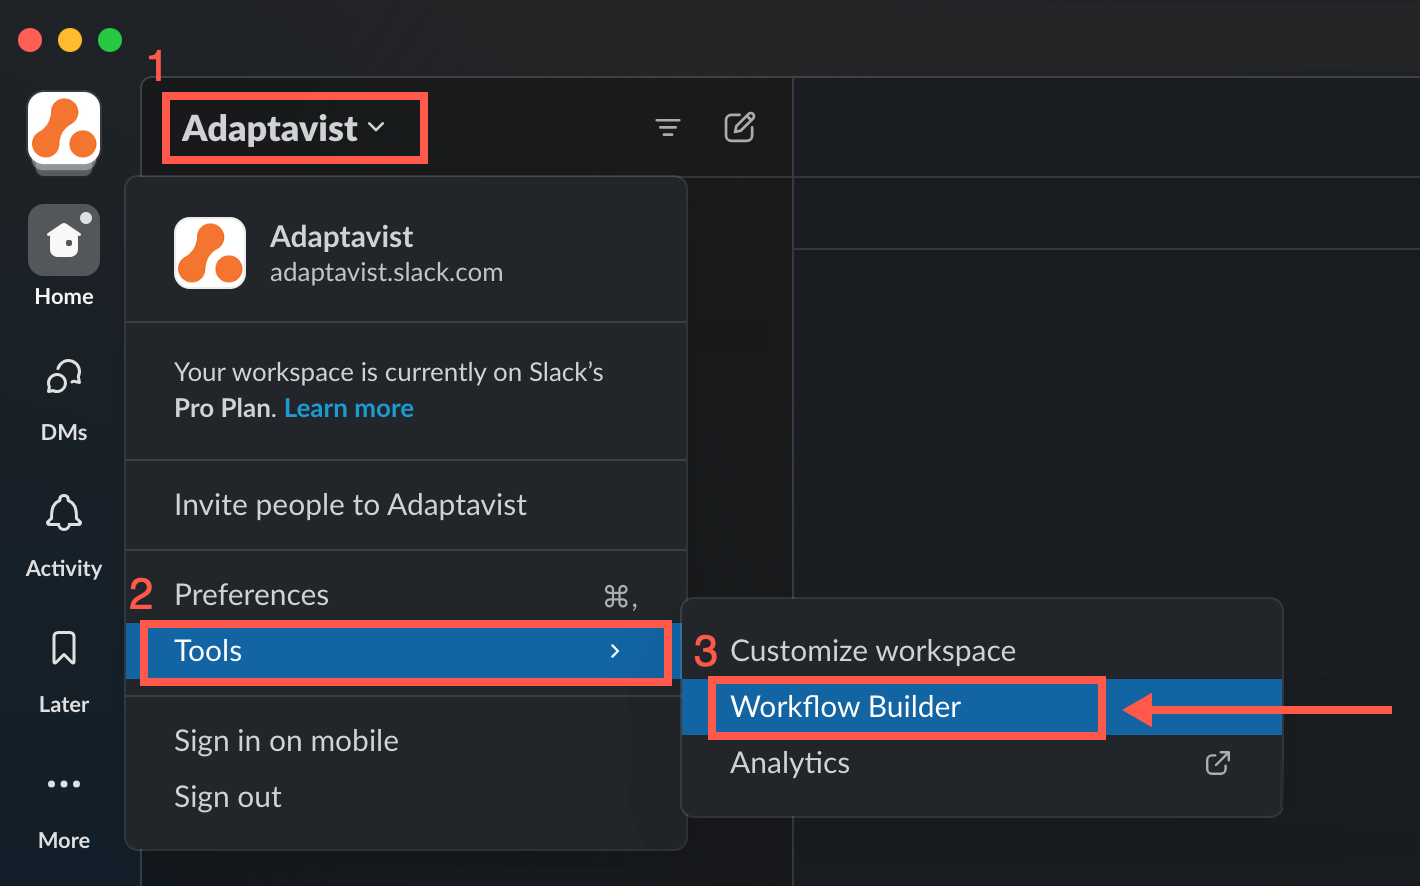
Once you've authenticated, click your Slack workspace name > Tools > Workflow Builder.
Workflow Builder opens in a new window.Not much experience using Slack's Workflow Builder? Check out our workflow templates, and import one into Workflow Builder to get a jumpstart! You may also want to review Slack's Guide to Workflow Builder.
Quick Start Guide: Jira Server/DC Users 🗄️
Jira Server/DC users, follow these steps to get started with Workflow Steps for Jira ASAP!
Unsure if you have Jira Cloud or Jira Server? We can help you figure it out!
- Download and add the app to Slack.
You may need to ask your Slack admin or IT team to complete this step. - Once the app is available in your Slack workspace, ask your Jira admin to create an app link.
Directions are on the app’s Home tab, and it only takes a minute. However, this must be done for others to authenticate. - With the app link created, click Jira Server/DC on the app’s Home tab.
- Follow the steps on the screen to authenticate with a Jira instance.
- Once you've authenticated, click your Slack workspace name > Tools > Workflow Builder.
Workflow Builder opens in a new window.Not much experience using Slack's Workflow Builder? Check out our workflow templates, and import one into Workflow Builder to get a jumpstart! You may also want to review Slack's Guide to Workflow Builder.
Get the App
Workflow Steps for Jira can be found in the Slack App Directory.
- Click Add to Slack.
- Once the app is added to your Slack, scroll to the Apps section of Slack.
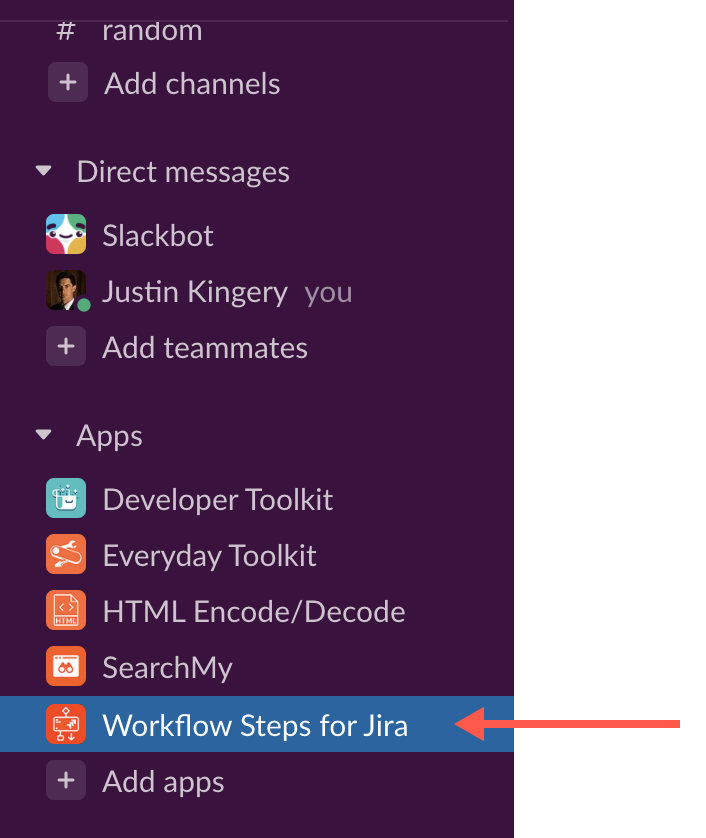
- Click Workflow Steps for Jira to view the three tabs: Home, Messages, and About.
- Click Home to read the welcome, and there you'll also be able to connect to and access all of your Jira connections.
Jira Server users only! Whitelist the Workflow Steps for Jira app so it can pass through your firewall and establish connections with Jira.
The IP address of the app is 3.229.126.67.