
Create and Edit Behaviours
Create a Behaviour
- Navigate to ScriptRunner → Behaviours.
If you have previously created behaviours, you will see a list displayed. You can edit or delete any of these via the Actions ellipsis next to the behaviour you want to modify or delete. Click the Create Behaviour button. The following screen displays:
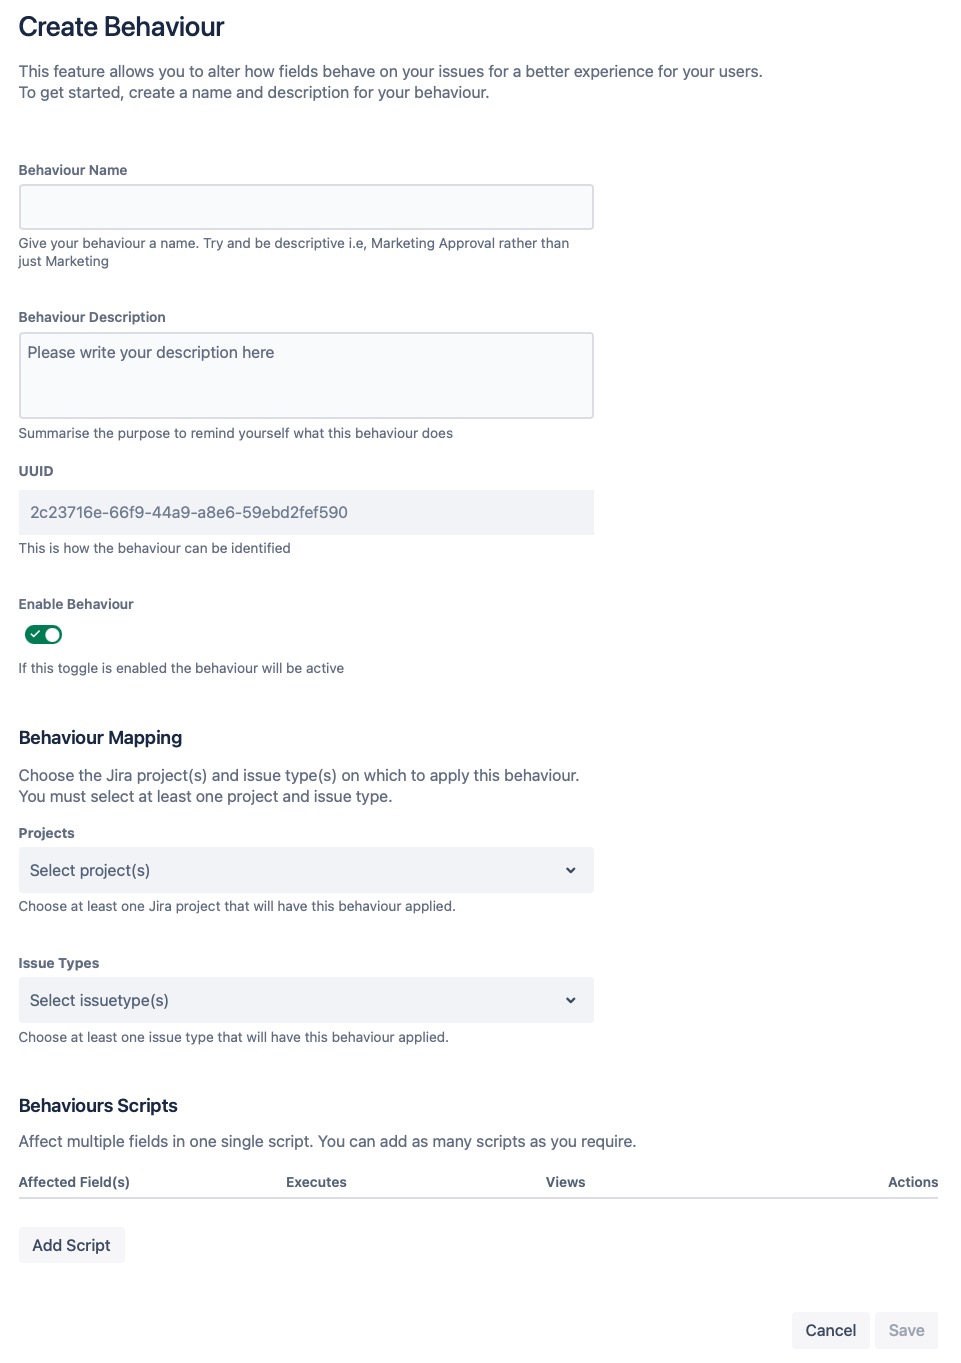
- Enter a name in the Behaviour Name field.
- Enter a brief summary of the behaviour's purpose in the Behaviour Description box.
- Check the Enable Behaviour option, as required. By default, the behaviour is set to Enabled, meaning that the behaviour is active as soon as it has been saved.
- Select the project(s) to which the behaviour will be applied from the Projects drop down list. At least one project must be selected, and you have the option to select All projects if required.
Select the type of issue you want to apply this behaviour to from the Issue Types drop down list. At least one issue type must be selected, and you have the option to Select all issue types if required, which displays the maximum issue types available.
Behaviours mapping note
You should note that when the 'All projects' option is selected, and a project is added or removed from your instance, it will still be mapped to all projects in that instance. However, if you select all current issue types to map to and a new issue type is created, you must manually add this to the mapping, as it is not automatically added.Click the Add Script button. You will see the Add Field Script pop-up window appear, where you can add the behaviour script.

Determine when the behaviour script will run by choosing either On load or On change (or both) from the Run the script options.
When Runs On load The script will run when the create screen initially loads.
You'll want to choose this option when you want the affected field to populate immediately upon opening the create screen.
For example, a field name or field description is changed, or a value is pre-populated into the field.
On change The script will run when the specified supported field change happens. You may want to run the script initially when it loads AND if a change has occurred.
You'll want to choose this option when you've added a condition to the logic and identified a trigger that will update the affected field. So, if you want to run the script after the user alters a field on the create screen, you should choose the On change option.
For example, initially, you could set the assignee field to Bob, so all new bugs are assigned to them, but if the user changes the priority to High, the assignee would auto-update to Jane.Choose to run the script on either the Create View, Issue View or Transition View (or multiple) from the and on the options. Refer to Supported Fields, as not all field types are supported.
Enable Transition View Per Screen
Selecting the Transition View option will enable the behaviour for all transition screens by default. If you want it to apply to a specific transition screen then you need to specify the transition ID of that specific screen. To find that ID, go to Settings and select Issues > Workflows > View and locate the Transition Id column where you will find the specific ID to use in your script.
For example,// The transition ID for Done const transitionToDone = 41; // Get current transition ID const transitionId = await getContext().then(context => context.extension.issueTransition.id); // If the current transition is to Done then do something if (transitionId == transitionToDone) { }- Enter your code within the script box, as required. Note that you can open the API documentation directly from here.
Alternatively, you can select an example script from the Example Scripts option and modify the code as required, ensuring that you:- edit any variables, like custom field names, roles, or groups, in the example code so it's relevant to your instance.
- choose the right time to run your script on load and/or change so that it runs when needed.
- Click Save Script to save your behaviour script, or you can Cancel. Once saved, you will see the details displayed within the Behaviours Scripts table:
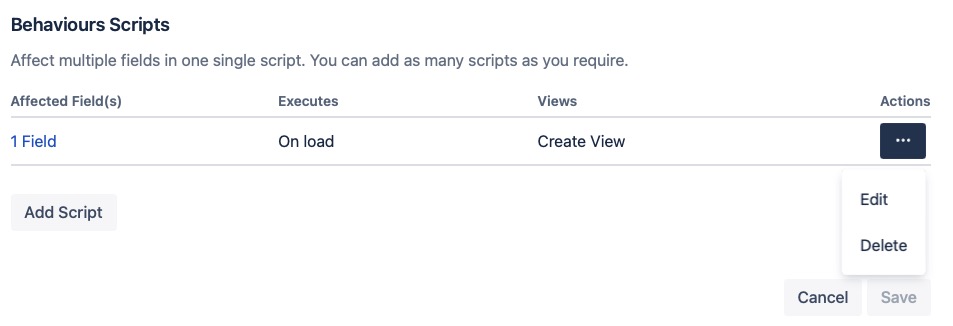
You can use the Action ellipsis menu to Edit or Delete the script. If you want to continue adding more behaviour scripts, these must be defined separately, as outlined in the steps above. You can continue to add these to the table and add the logic needed until your business requirements for this behaviour are met. - Click Save to confirm the configurations for your behaviour, or you can Cancel.
You can use the Behaviour Logs to view data related to ScriptRunner for Jira Cloud Behaviours that have run in your Jira instance.
Edit a Behaviour
Follow the steps below to edit a behaviour in ScriptRunner for Jira Cloud:
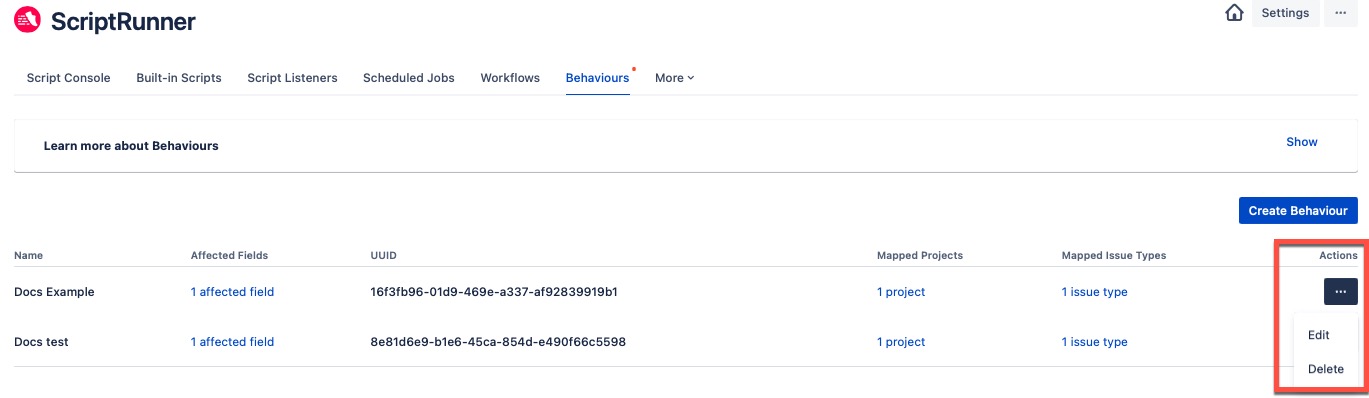
- Navigate to ScriptRunner → Behaviours. You will see a list of previously created behaviours.
- Click Edit from the Actions ellipsis next to the behaviour you would like to modify. From here, you can also Delete a behaviour.
You can open any links in the table to display a pop-up window that provides you with more information and an edit option. - Edit the fields, as required, from within the Edit Behaviour screen.
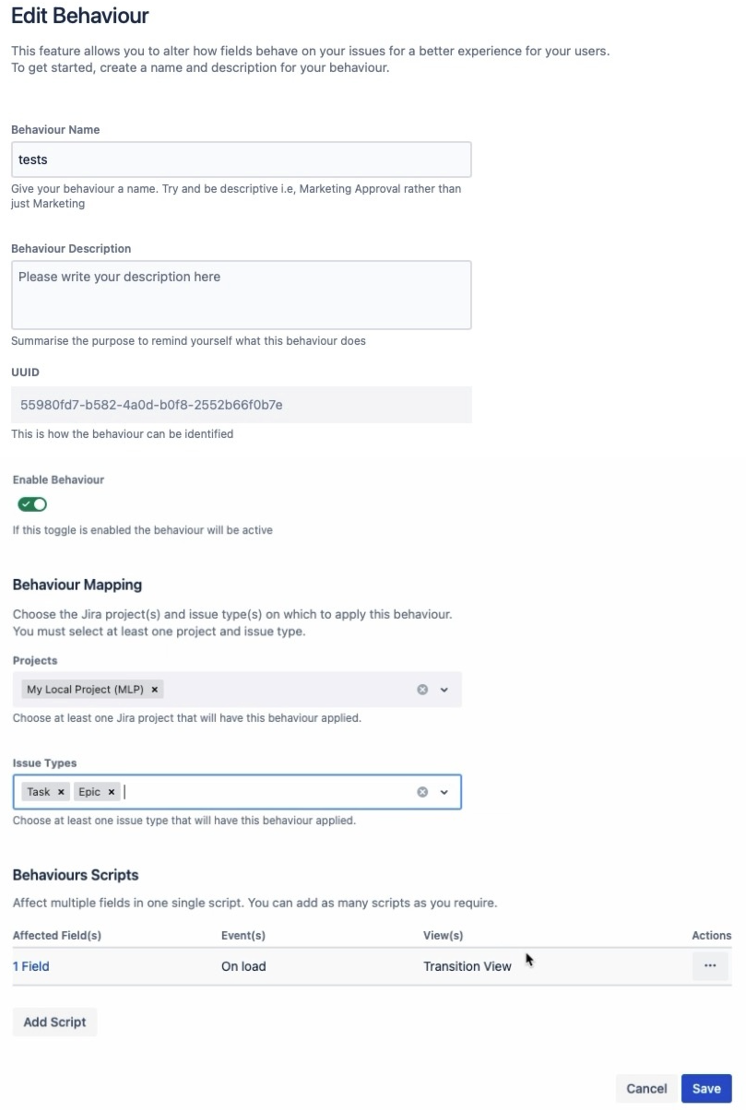
You can also delete each of the individual Behaviour Scripts via the Actions ellipsis - Click Edit next to the Affected Field you want to edit, and you will see the Edit Field Script window displayed:
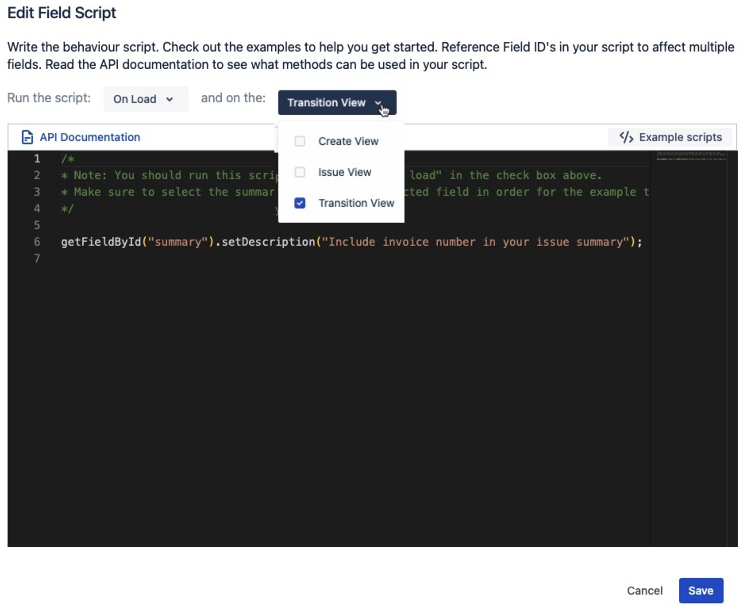
- Make your required changes, such as modifying when the script runs and the type of view used and/or editing the script code.
Enable Transition View Per Screen
Selecting the Transition View option will enable the behaviour for all transition screens by default. If you want it to apply to a specific transition screen then you need to specify the transition ID of that specific screen. To find that ID, go to Settings and select Issues > Workflows > View and locate the Transition Id column where you will find the specific ID to use in your script.
For example,// The transition ID for Done const transitionToDone = 41; // Get current transition ID const transitionId = await getContext().then(context => context.extension.issueTransition.id); // If the current transition is to Done then do something if (transitionId == transitionToDone) { } - Click Save to confirm the configurations for your behaviour, or you can Cancel.