Create Custom Macro
Script macros allow you to include dynamic content.
Create a Custom Macro
Follow these steps to create a custom macro:
Select the Cog icon, and then select General Configuration.
Scroll to the ScriptRunner section in the left-hand navigation, and then select Macros.
Select the Create Macro button.
Select the Custom Script Macro link.
Fill out the following fields:
- Key: Enter a unique key for your macro.
- Name: Enter a name for your macro.
- Description: Enter a description for your macro. This appears in the macro window.
Body Type: Use None, Plain Text, or Rich Text to type in the body of the macro.
If you choose Rich Text, you'll want the script to return some HTML. As noted here, use Groovy's Markup Builder and sanitize any input you get from the users, such as macro parameters.
import groovy.xml.MarkupBuilder def writer = new StringWriter() def builder = new MarkupBuilder(writer) builder.strong(body) writer.toString()- Output Type: Use Block or Inline to change the layout flow of the macro.
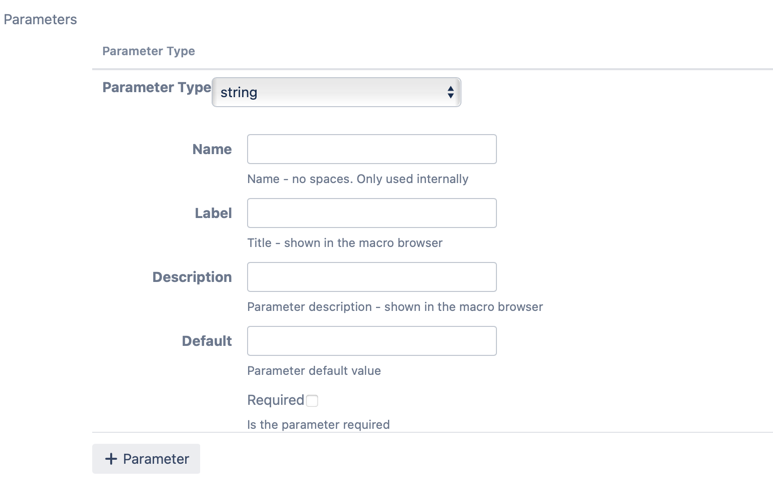
- Parameters: If you choose to add a parameter, select + Parameter.
The following fields appear:
- Choose your Parameter Type.
- Enter your parameter Name.
- Enter your parameter Label.
- Enter your parameter Description.
- Enter the parameter Default.
- Check Required or leave it blank if the parameter is optional.
Macro Code: Use to change the content of the macro.
Macro JavaScript Code (optional): Use to change the behaviors of the macro.
Macro CSS Style (optional): Use to change the style of the macro.
If you use the File tab here, the script directory in your home directory (or the directory you use for the CSS) needs to be set up as a web resource directory. See Web Resource for more information.
Lazy Loaded: Check this box if the macro takes a few seconds to load.
Lazy Loaded Macro
If you have a macro that takes more than a second or so to run, consider checking the Lazy Loaded box. The Lazy Loaded box means that the rendering of the page is not delayed until the macro has executed. Instead, the traditional "spinning gears" icon appears, and the macro content is loaded asynchronously via Representational State Transfer (REST). For an example of a macro that needs Lazy Loaded, check out the Macro Tips example.
- Select Add.
Use a Custom Macro
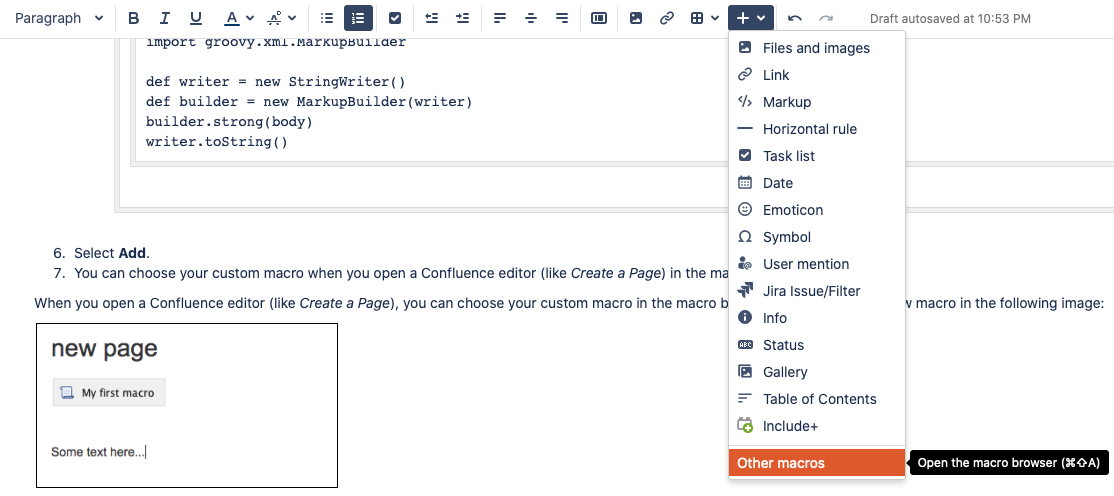
You can choose your custom macro when you open a Confluence editor (like Create a Page) in the macro browser.
Select the macro browser, and then select Other Macros.
Find your macro in the list, and click on it.
Enter any required information in the window that appears.
If you already had the editor open, you need to shift-refresh after editing macros definitions.
Any parameters that you
- Select Insert.
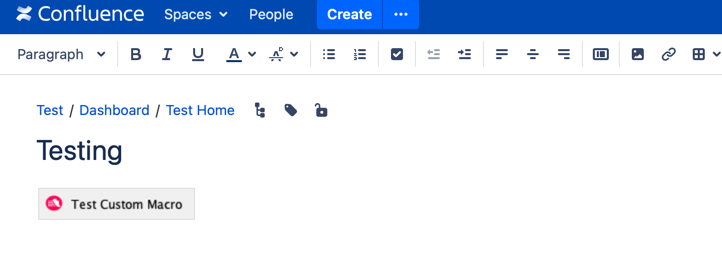
The macro appears where you are working. For example, Test Custom Macro appears on the Testing page.
Use Binding Variables
Your script has access to the following binding variables, without the need for them to be declared:
parameters: AMap<String, String>for accessing user-provided macro parameters. The map’s keys are the parameter keys, so to get thecolorparameter useparameters.color.body: The body of the macro. The value isnullif there is no body.context: A ConversionContext contains information about the current page and output device type (desktop, mobile). Use this for methods of XhtmlContent.
For an example of a macro that uses binding variables, check out Create a Macro with Parameters.
Further Reading
For more information about custom macros, check out the following documentation:
- Security and Best Practices
- Reuse Existing Macros
- Create a Macro with Parameters
- CQL Search Macro
- Display SQL Results from an External Database
- Macro Tips


