
Creating an Issue in Jira by Submitting a Form in Confluence
As a support manager, I want to allow users to submit a form using Forms for Confluence, which will be sent to ScriptRunner on a Jira instance. Once received, ScriptRunner creates a new issue with the information submitted. The form submission must also be recorded locally in Confluence in the internal database. |
|---|
This scenario describes the situation where a submitted form can be handled in the usual way and then submitted to ScripRunner for Jira where some processing can be done on the submitted form and an issue created.
Please note the following instructions are for demonstration. Each Confluence and Jira instance can have their own security policies and custom configurations that should be taken into consideration. This is just a small demonstration of what steps would be required to get basic functionality working. The powerful combination of ScriptRunner for Jira and Forms for Confluence is capable of much more.
Instructions
Setting up the application link between Confluence and Jira
In this step, we set up an application link that will link Confluence and Jira.
- In Confluence, navigate to Confluence Administration > General Configuration > Application Links. The location of Application Links in Jira depends on the version of Jira.
Enter the URL of the relevant Jira instance in the Application field and click Create New Link.
 You might be required to validate your credentials at this point.
- Tick the relevant boxes and continue. If you are an administrator on both instances make sure you select the associated checkbox. This can save some time as the remote application link will automatically be created on the Jira instance (username and password should be the same on both instances).
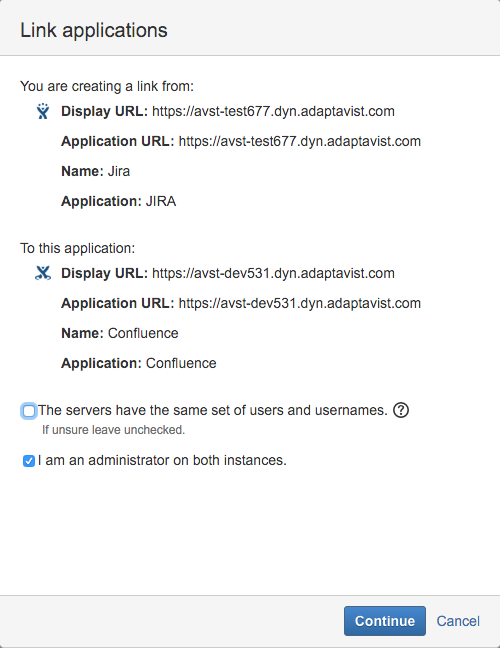
- You should see a message asking you to wait whilst being redirected to the Jira instance.
- You will once again be presented with a window to validate your credentials, but this time it is for Jira.
- The next window will display some information about the link that will be created in Jira (similar to the one above). Once Continue is clicked, the link will be created in Jira and you will be redirected back to Confluence.
A success message should be displayed, and the application link will appear.

Setting up the authentication between the two application links
- Click Edit on the application link, in the Application Links section.
- Both outgoing and incoming authentication need to be set up. For the purpose of this demo we will be using 2-Legged OAuth. If there are problems with setting up the authentication such as the page not loading properly, try logging out and back in to Jira/Confluence.
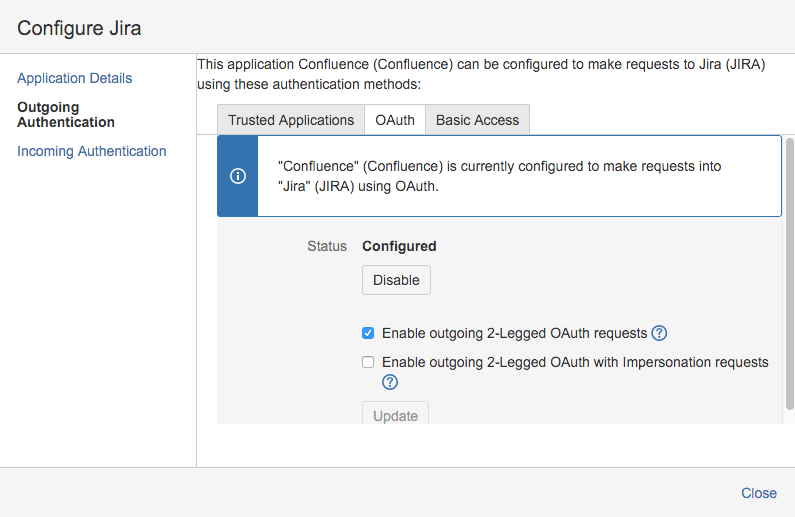
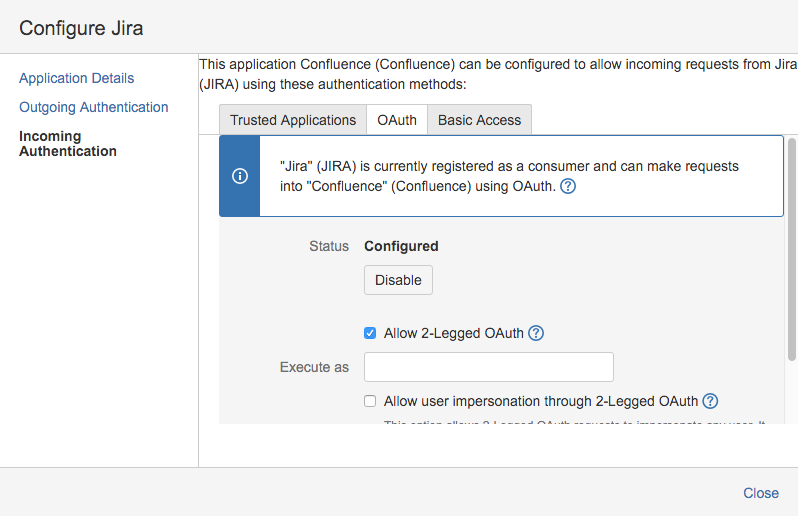
- Do the same authentication configuration for the application link in Jira and Confluence.
Setting up the ScriptRunner REST endpoint in Jira
- More information about ScriptRunner REST endpoints can be found in Adaptavist's ScriptRunner documentation.
- Navigate to Add-ons > ScriptRunner > REST Endpoints.
- Click Custom Endpoint and add some code that will process the form that will be submitted from Confluence.
Our custom endpoint is below with imports omitted. It captures the submitted form which contain the following fields: Project, Summary and Description. The issue is then created and a message sent back to Confluence which the user who submitted the form will see as an info message.
groovyimport com.atlassian.jira.component.ComponentAccessor import com.atlassian.jira.issue.IssueInputParametersImpl import com.onresolve.scriptrunner.runner.rest.common.CustomEndpointDelegate import groovy.json.JsonSlurper import groovy.transform.BaseScript import javax.ws.rs.core.MediaType import javax.ws.rs.core.MultivaluedMap import javax.ws.rs.core.Response @BaseScript CustomEndpointDelegate delegate receiveFromForms(httpMethod: "POST", groups: ["jira-administrators"]) { MultivaluedMap queryParams, String body -> def params = new IssueInputParametersImpl() def issueService = ComponentAccessor.getIssueService() def constantsManager = ComponentAccessor.getConstantsManager() def forms = new JsonSlurper().parseText(body) as Map<String,String> def projectManager = ComponentAccessor.getProjectManager() def project = projectManager.getProjectObjByKey(forms.project) // Get a user who has permissions to create issues // This must be changed to an existing user on your instance def user = ComponentAccessor.getUserManager().getUserByKey("admin") params.setProjectId(project.id) // Defines the Type of Ticket to create. Please note all Jira types doesn't support all issue types, that is you can not create a "Bug" in Jira Core. params.setIssueTypeId(constantsManager.allIssueTypeObjects.findByName("Task").id) params.setReporterId(user.name) params.setSummary(forms.summary) params.setDescription(forms.description) def createValidationResult = issueService.validateCreate(user, params) assert !createValidationResult.errorCollection.hasAnyErrors() def issue = issueService.create(user, createValidationResult).issue log.debug "Created issue : ${issue.key}" return Response.ok("Thanks for creating an issue").type(MediaType.TEXT_HTML).build() }- Note that in this case if the form submitted does not contain these exact fields, an error will be shown to the user who submitted the form.
Setting up a ScriptRunner Form Id in Confluence
- Navigate to Confluence Administration > General Configuration > Forms for Confluence.
- Click Add a New Form Configuration.
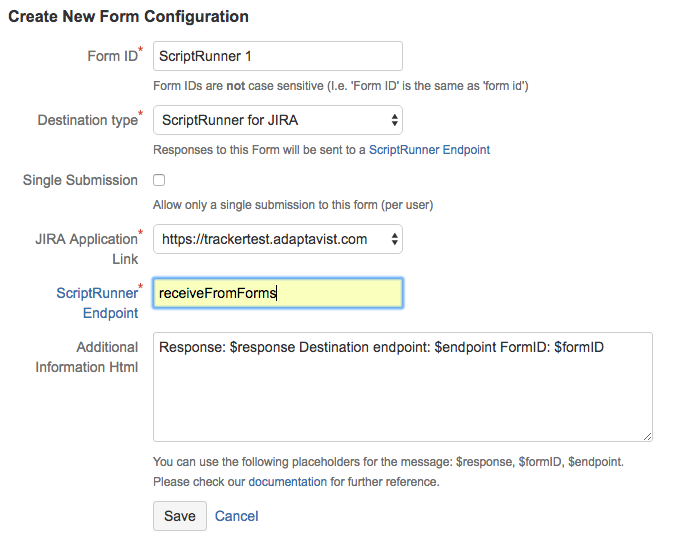
- Set up a new Form ID using ScriptRunner as the destination.
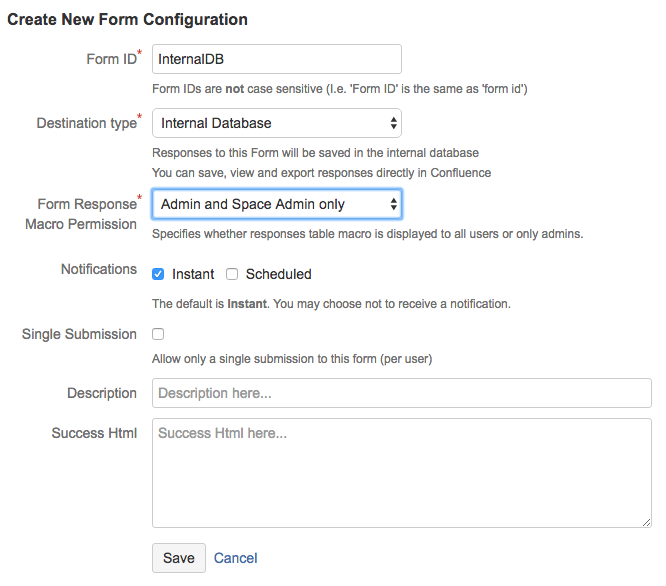
- Set up another unique Form ID with destination type set as Internal Database. This one will be use to store the submitted form on Confluences internal database.
Setting up a Form in Confluence
- Create a new page.
- Add a Form to a page.
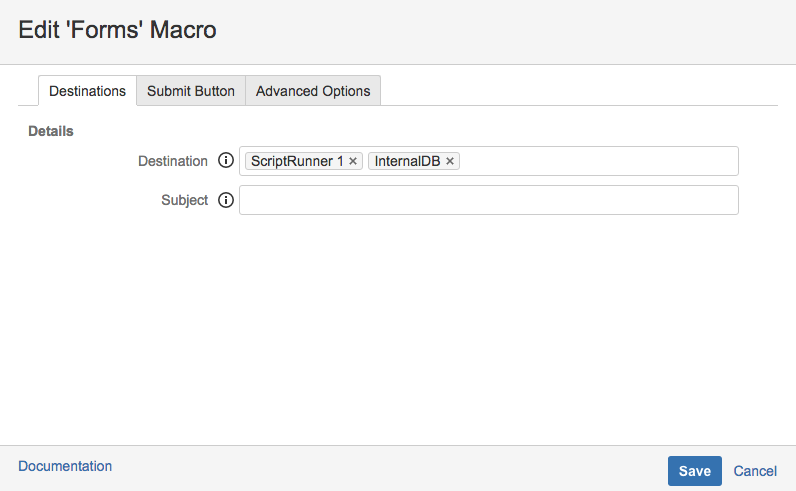
- Edit the Forms macro and enter the two Form IDs created in the previous step.
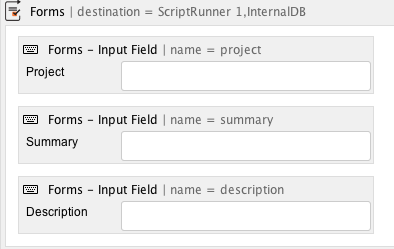
- Create the input fields in the Form that the ScriptRunner REST endpoint is expecting to receive, in this case it is Project, Summary and Description. They are case sensitive.
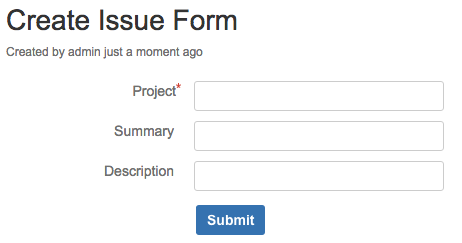
Populate the fields with some values. In this case the project input field value must match an actual project key in Jira. In this example our project in Jira is an Agile project. Other types of projects might not work with the REST endpoint in this example.
On first submission you might be required to authenticate.

- Follow the link and click Allow.
- Submit the Form again.
- If all went well the user should receive a message back from the Jira instance. In this case we show a message containing a link to the Jira issue created.

Note that all responses from ScriptRunner, as above in the info message, will be saved in the internal database for Confluence through the associated Form ID. This can be accessed by navigating to Confluence Administration > General Configuration > Forms for Confluence > ScriptRunner Responses.
