
Creating Form IDs
As an administrator, you can set up Form IDs that can be used when creating forms, helping simplify the creation and use of forms. Form IDs are reusable and editable, making it easier to bulk edit the behavior of several forms. Form IDs are created in the Form administration section and provide several benefits such as:
- Control the behavior of the responses to a form
- Track the usage of a Form ID
- Update several forms that use the same ID at the same time
- Link the responses to a Form to the Form ID Internal Database.
It is unnecessary to use Form IDs, and you can set direct destinations in the Forms for Confluence macro. However, the Form ID is a powerful mechanism used to administer and manage the use of Forms for Confluence more efficiently and is a good option when creating forms that are designed to be more permanent.
Form IDs can be configured to manage responses using either the Internal Database or specific email addresses.
Prerequisites
- Install Forms for Confluence
- Login in as an Administrator
If setting up a Form ID for ScriptRunner:
- Configure the required application link and REST endpoint in Jira.
Create Form IDs for an email relay
Form IDs with the collector type set to Email Relay will send responses to a form to an email address.
Instructions
- Navigate to the Administrator console.
- Select Forms Administration from the left navigation panel.
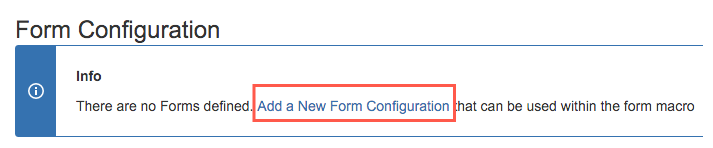
- Click Add a New Form Configuration.

- Complete the Create New Form ID Configuration fields.
- Provide a unique identifier in the Form ID field.
- Set Destination type to Email Relay.
- Enter the email address(es) to receive results from the configuration.
- Optional: Select the Single Submission checkbox to send an email only once to the provided email addresses.
- Optional: Check the Submission Override checkbox if you want to allow the user to override previous submissions.
- Optional: Provide information about this configuration in the Description field.
- Optional: Provide a message to senders after submitting their form in the Success HTML field.
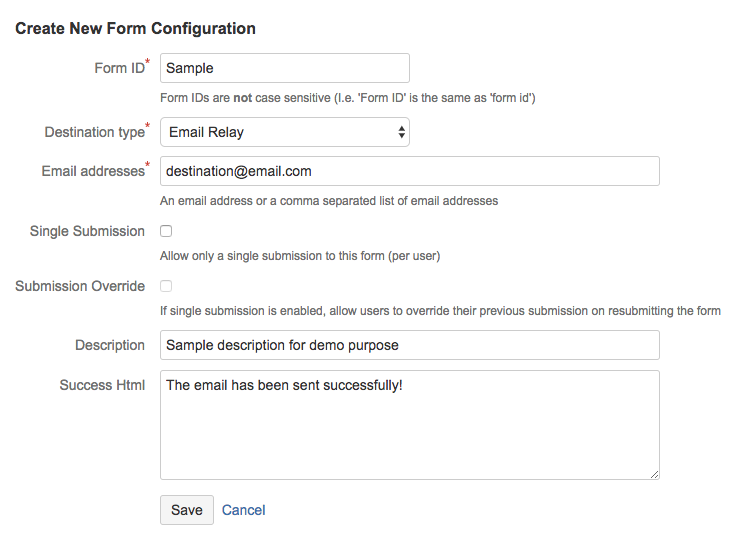
Click Save to create the new Form ID Configuration.

The new Form ID will appear in your list. You can now use this form mail as a parameter for the Forms for Confluence macro.
Creating Form IDs for internal database
Form IDs with the collector type set to Internal Database will store responses from a form in the Forms for Confluence Internal Database. Responses can be viewed, managed, and exported directly in Confluence.
Instructions
- Navigate to the Administrator console.
- Select Forms Administration from the left navigation panel.
- Click Add a New Form Configuration.
Complete the Form ID Configuration.
Provide a unique identifier in the Form ID field.
Select Internal Database as the Destination type.
Select desired specifications in the Form Response Macro Permission field.
Optional: Select the Scheduled checkbox in the Notifications section to receive periodic responses.
Notification preference is personal to the user editing the form configuration and will not influence other users' notification preferences. Notifications may be disabled for the user editing the form configuration.Optional: Deselect the checkbox option for Single Submission if allowing multiple submissions from a single user is desired.
Optional: Check the Submission Override checkbox option if you want to allow the user to override previous submissions.
Optional: Provide information about the configuration in the Description field.
Optional: Provide a message to be displayed to senders after having submitted their form in the Success HTML field.
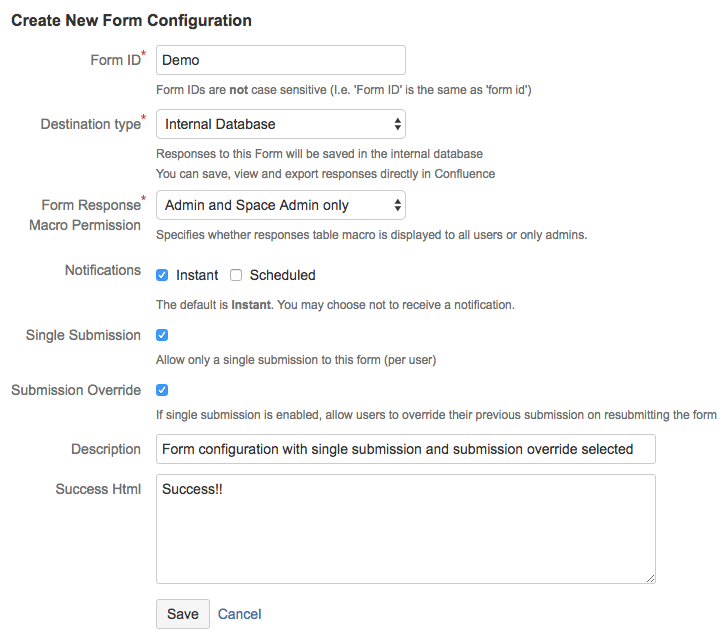
- Click Save to create your Form ID Configuration.
The new Form ID will appear in your list. You can now use this form mail as a parameter for the Forms for Confluence macro.
Creating Form IDs for ScriptRunner for Jira
Instructions
- Navigate to Confluence Administration > General configuration > Forms for Confluence.
- Click Add a New Form Configuration.
- Complete the Create New Form ID Configuration fields.
- Provide a unique identifier in the Form ID field.
- Set Destination type to Email Relay.
- Enter the email address(es) to receive results from the configuration.
- Select the Jira Application Link associated with the Form ID from the ashown in the drop-down list. See the Atlassian documentation for instructions on setting up an application link between Confluence and Jira.
- The ScriptRunner Endpoint identifies the specific endpoint configured using ScriptRunner REST endpoints in Jira. This is simply the exact point to where the form will be sent. The ScriptRunner REST endpoint will be responsible for processing the submitted form. One form can be submitted to multiple Jira instances, and each Jira instance can have several endpoints. See the ScriptRunner documentation for setting up a REST endpoint.
- Optional: Select the Single Submission checkbox to send an email only once to the provided email addresses.
- Optional: Check the Submission Override checkbox to allow the user to override their submission.
Optional:
Provide a message
"Info Html" in ScriptRunner Form Configuration is customizable, and at present, Info Html supports the following placeholders:
$endpoint: Input value of the "ScriptRunner Endpoint" text box.
$formID: Input value of the "Form ID" text box.
$response: Received response of a successful call.
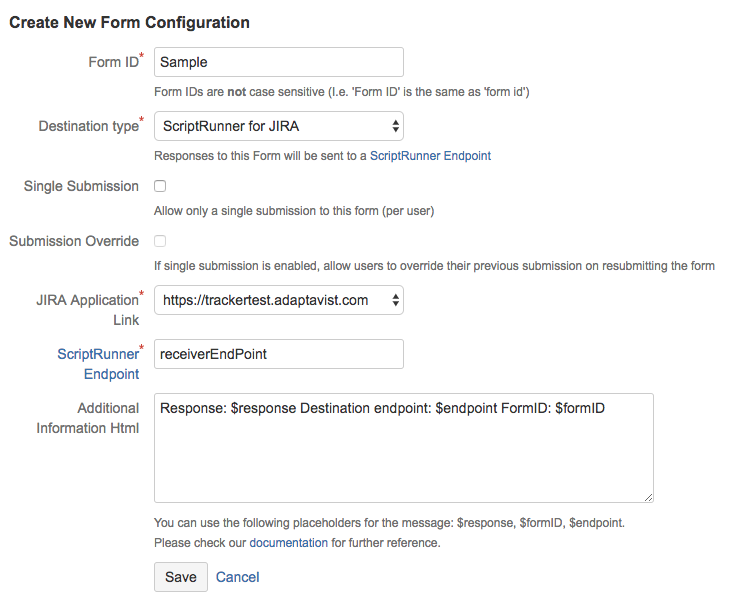
Click Save to create the Form ID Configuration.
The new Form ID will appear in the Form Configuration list.

The Form ID can now be used as a Forms for Confluence macro parameter.
Check out our example use cases for more information.