
Using Tabs on a Legacy Page
Due to a limitation of the Atlassian legacy editor, the more recent updates to the tabs macro don't work with the legacy editor. The experience of creating tabs is different when using the legacy editor. If you are not working on a page you migrated from DC you should consult the Tabs documentation instead.
The Tabs macro allows you to add tabs to provide interactive, categorized, or isolated information to the page. A Tabs macro is added for each tab that you want to display.
You can add more than one group of tabs to a Confluence page.
Create a new set of tabs
Navigate to the page you want to edit.
Click the Edit icon.
Click Insert > View More in the Confluence editor.
Select the Tabs macro in the Select Macro screen. (Alternatively, use
/and begin to typetabto access the macro via the quick insert menu.)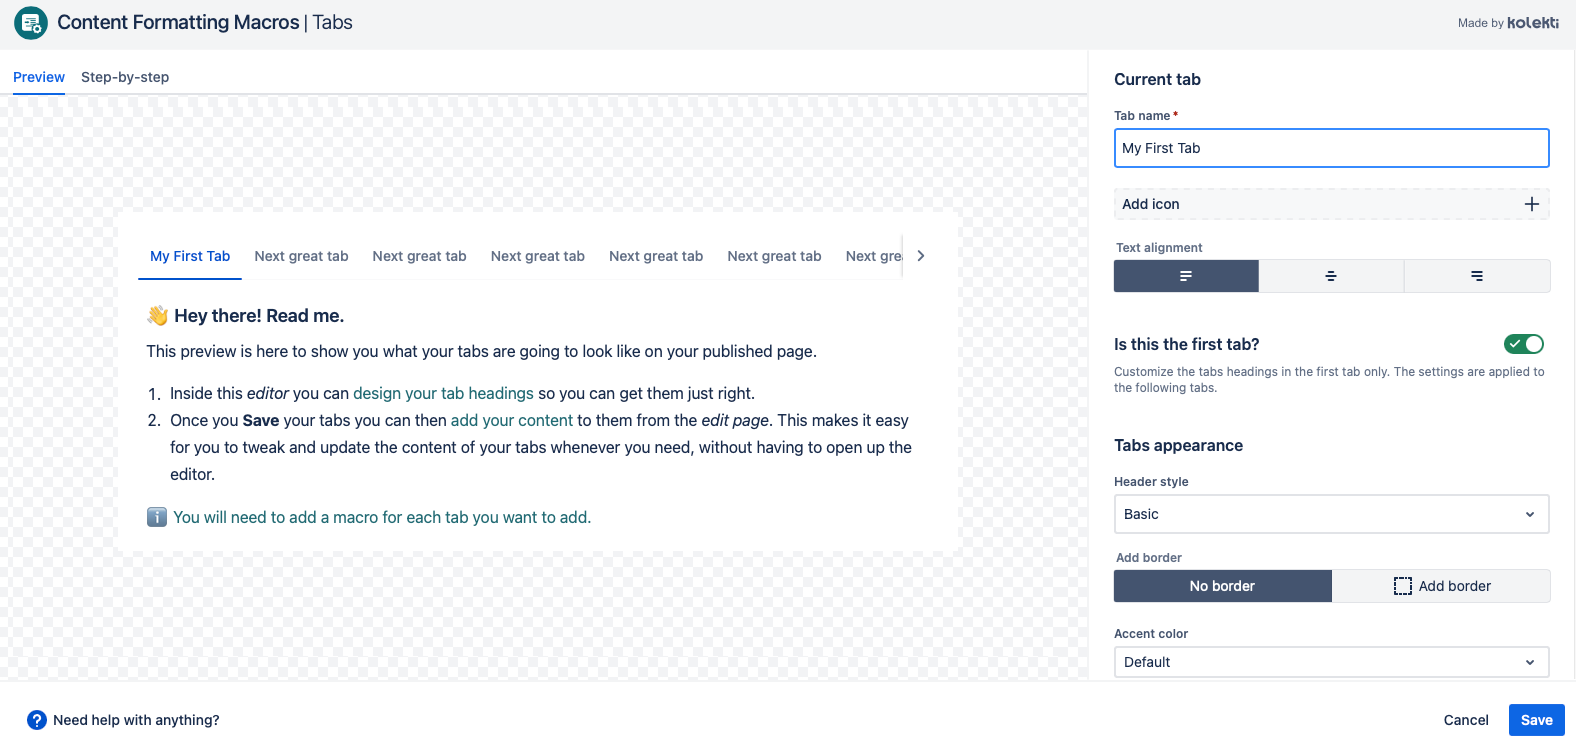
Give your tab a name.
- (optional)Select an icon to appear at the beginning of your tab. You can choose an icon from four different libraries
- Atlassian
- Emojis
- Font Awesom
- Material Design
- (optional) select the text alignment. This affects how any text inside the tab is shown. By default this is set to left align.
- Ensure that the Is this the first tab? toggle is turned on.

The first tab on the page
For the first tab on the page, this will already be turned on. However, for any subsequent tabs, you will need to turn it on to start a new group of tabs.
9. (optional)You can add styling to all the tabs that will follow from this first tab
10. Select Save.
11. Add another tab macro for each tab you want to see on the page.
Add a second tab
Navigate to the page you want to edit.
Click the Edit icon.
Click Insert > View More in the Confluence editor.
Select the Tabs macro in the Select Macro screen. (Alternatively, use
/and begin to typetabto access the macro via the quick insert menu.)Give your tab a name.
- (optional)Select an icon to appear at the beginning of your tab. You can choose an icon from four different libraries
- Atlassian
- Emojis
- Font Awesom
- Material Design
- (optional) select the text alignment. This affects how any text inside the tab is shown. By default this is set to left align.
- Ensure that the Is this the first tab? toggle is turned on.

9. Select Save.
Style your tabs
Any styling options that you choose for the first tab will automatically be applied to the rest of the tabs in that group. There are currently three main ways you can change the appearance of your tabs.
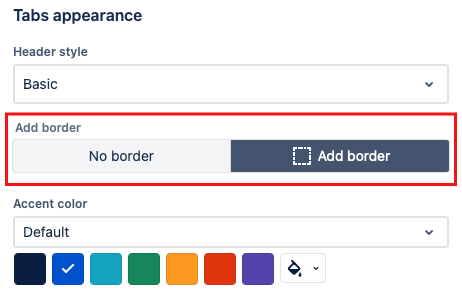
Change the header style
There are three possible header style options.
- Basic

- Filled

- Rounded

Change the accent color
You can change the color used in the header to suit your preferences and you can also choose to add a border in the same color. Changing the color palette gives you different color options.
Put a border around your content
You can add a border to your tabs. This can be a good way to let your readers know when they've reached the end of a long tab. Simply select Add border from the toggle. The color of the border will be the same as the accent color.
Make Tab Headings Sticky
If you have a lot of content in your tabs you might want the tab headings to stay visible as you scroll down the content of the tab. You can turn this on in the first tab in the group by selecting the checkbox at the bottom of the editor.
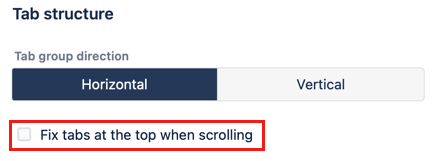
Change the tab direction
There are two options for the tab direction. You switch between the two options use the Tab group direction button.