
Use the Tabs Macro
The Tabs macro allows you to add tabs to provide interactive, categorized, or isolated information to the page. A Tabs macro is added to your page for each tab you want to display when you publish the page, this lets you add and edit the content for each tab without having to open the editor. You can add all the tabs you need for a single group of tabs in one go. You can also add more than one group of tabs to a page to keep everything grouped and organized how you need it.
Create a new set of tabs
Navigate to the page you want to edit.
Click the Edit icon.
Click Insert > View More in the Confluence editor.
Select the Tabs macro in the Select Macro screen. (Alternatively, use
/and begin to typetabto access the macro via the quick insert menu.)When the editor opens, it contains two tabs. From this editor, you can:
- Give your tabs names.
- Select Save
- The macro placeholders for each tab appear on your page. Put your content inside and publish the page to see the final results.
Add Tabs to the group
To add more tabs to a group already on the page:
- Select a tab in the group and select the edit icon.
- In the editor, select the Add Tab button.
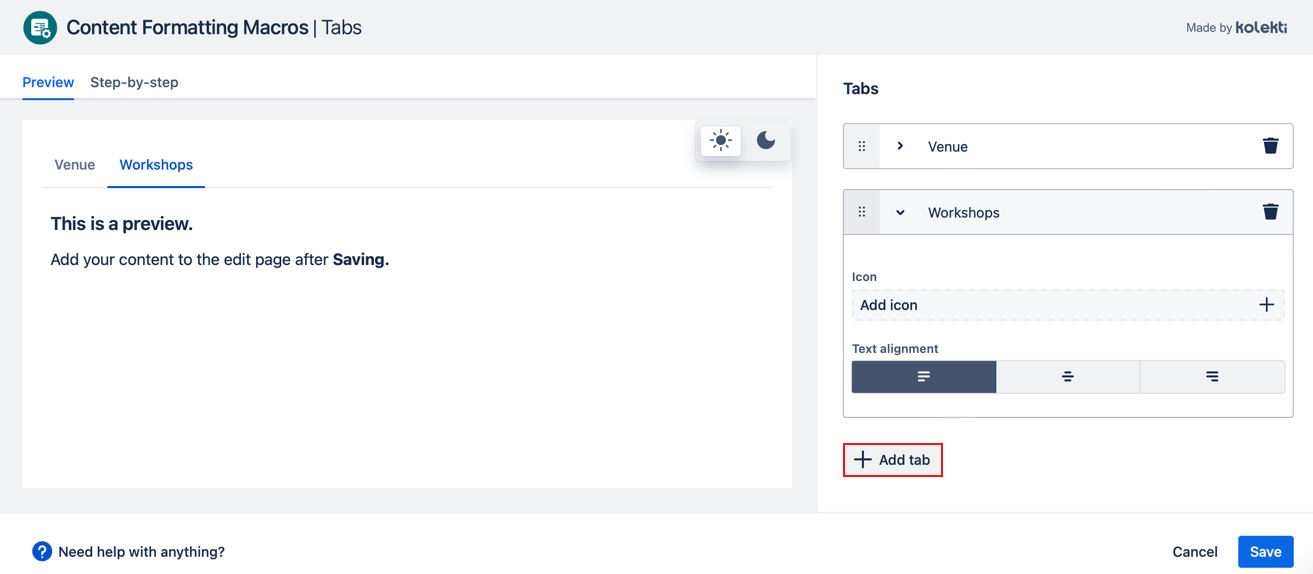
- Customize your tabs.
- Select Save.
- The macro placeholders for the new tabs appear on your page. Put your content inside and publish the page to see the final results.
Delete a Tab
There are two ways to delete a tab: inside the editor or on the edit page.
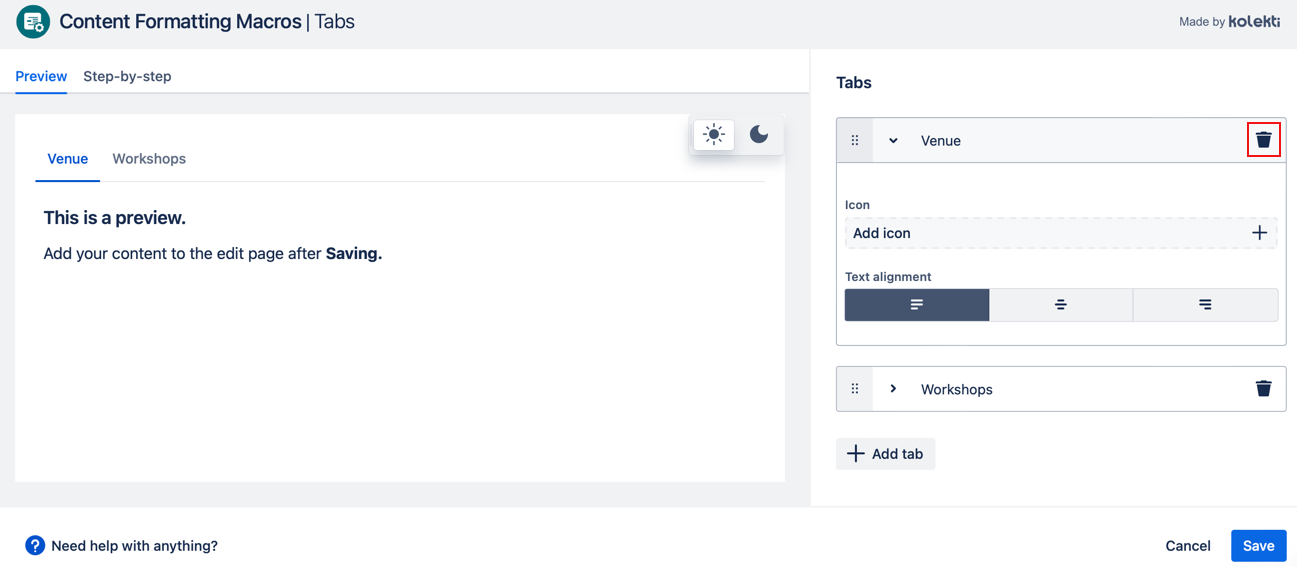
Inside editor
You can use the trash icon to delete a tab from inside the editor. Once you select Save the macroplace holder for the deleted tab is removed from the page. All the content that was inside the tab is also deleted.
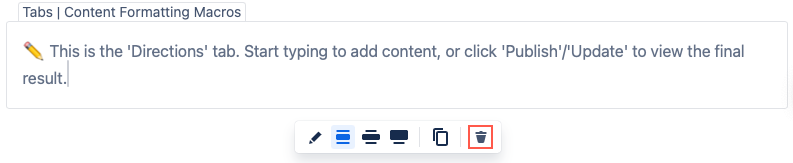
From the edit page
You can delete a tab from the edit page by selecting the placeholder for the macro you want to delete and then selecting the trash icon. The macro and all its content are deleted.
Rearrange tabs
We recommend rearranging tabs inside the editor. This makes sure your tabs stay in the same group. If you rearrange the tabs on the edit page, you can split them into different groups by moving the first tab.
Change the order of your tabs by dragging the tabs around inside the editor. Select the drag handle next to the tab you want to move, and then drag it to its new position.
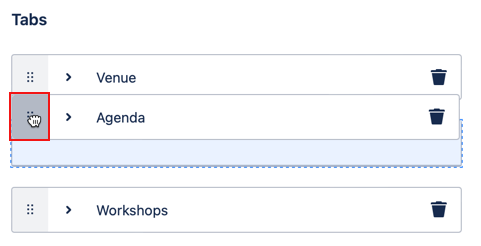
Select Save.
Customize each tab
Name your tabs
Adding or changing the name of a tab is done inside the editor. Each tab needs to have a name before you can save the tabs. You can change the name of a tab inside the editor.
- Select a tab in the group and select the edit icon.
- Select the name field of the tab you want to change.
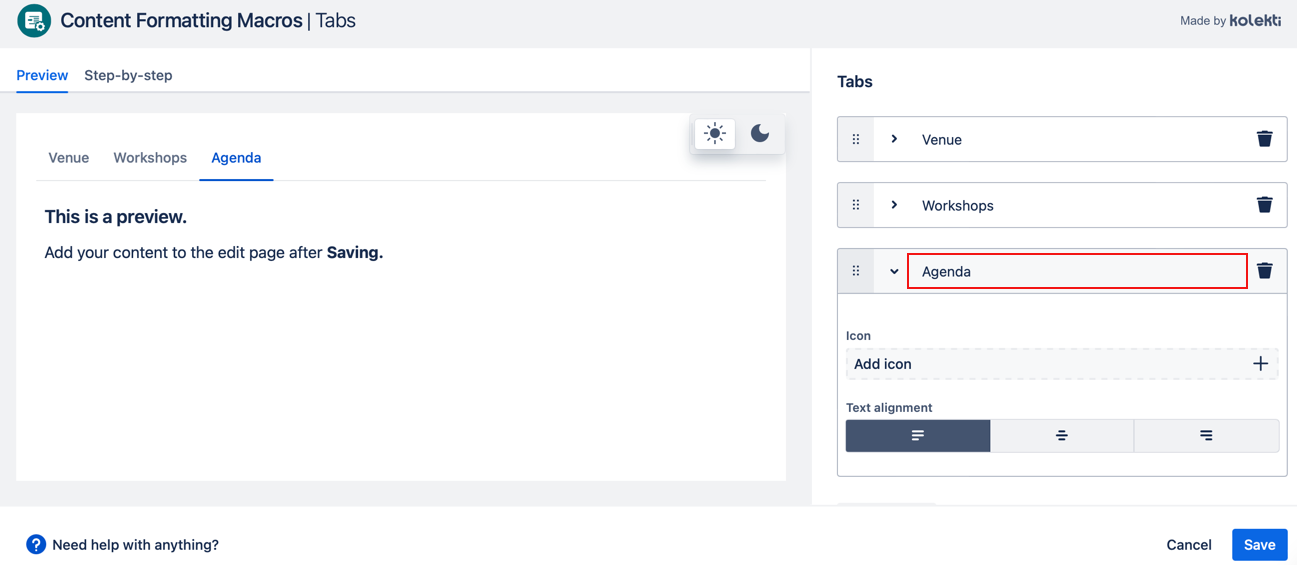
- Enter the name of your tab.
- Select Save.
Edit or Delete an icon on a tab
To edit or delete the icon on a tab, you must open the editor for the tab you want to change. The icon is shown beneath the tab's name.
![]()
Select the pencil icon to choose a different icon.
Select the trash icon to remove it.
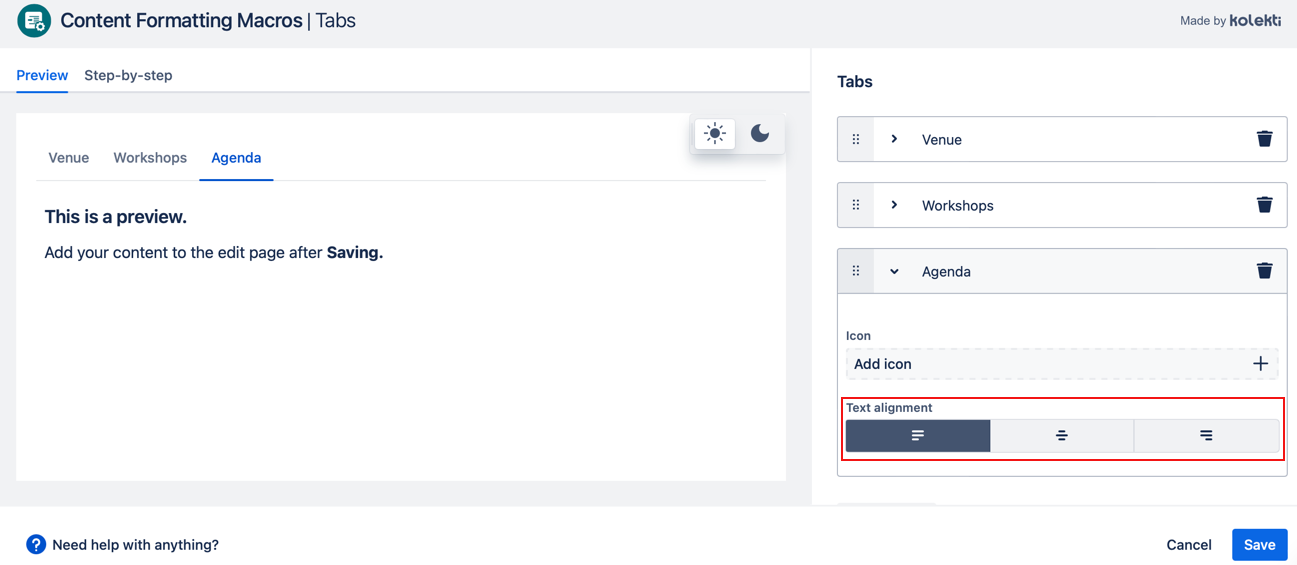
Align text in a tab
The alignment of the content inside each tab can be set inside the editor. Different tabs can have their content aligned in different ways. Use the alignment buttons for each tab to change how its content is shown.
Style your tabs
Any styling options you choose are applied to all the tabs in that group.
Change the header style
There are three possible header style options.
- Basic

- Filled

- Rounded

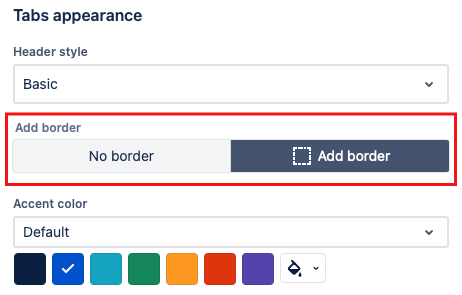
Change the accent color
You can change the color used in the header to suit your preferences, and you can also choose to add a border of the same color. Changing the color palette gives you different color options.
Put a border around your content
You can add a border to your tabs. This can be a good way to let your readers know when they've reached the end of a long tab. Select Add border from the toggle. The border color will be the same as the accent color.
Make Tab Headings Sticky
If your tabs contain a lot of content, you might want the tab headings to stay visible as you scroll down the content. You can turn this on in the first tab in the group by selecting the checkbox at the bottom of the editor.

Change the tab direction
There are two tab direction options. To switch between them, use the Tab group direction button.
Horizontal Arrangement

Vertical Arrangement

Edit your Tabs
To edit a tab group, select one of the tab placeholders and select the edit icon.
Add more tab groups
To add further groups of tabs to a page, add a new Tabs macro to the page and follow the same process.