Samples (New feature)
The Pro version of Calendar for Confluence allows users to add numerous projects or filters to one calendar. This function not only streamlines users' workflow but also enhances its usefulness by enabling coloring for each project or filter.
Please note that the free version of Calendar for Confluence has limitations, allowing you to configure only one Project or Filter. To bypass this limitation and enjoy unlimited samples (adding an unlimited number of Projects/filters), consider upgrading to the Pro version of Calendar for Confluence.
Adding
To add an additional project or Jira filter in the Calendar for Confluence, follow these steps:
- Enter the 'Edit' mode of your Confluence page.
- If a Calendar for Confluence is already present, open it in 'Edit' mode. If not, add a new Calendar for Confluence macro to the page.
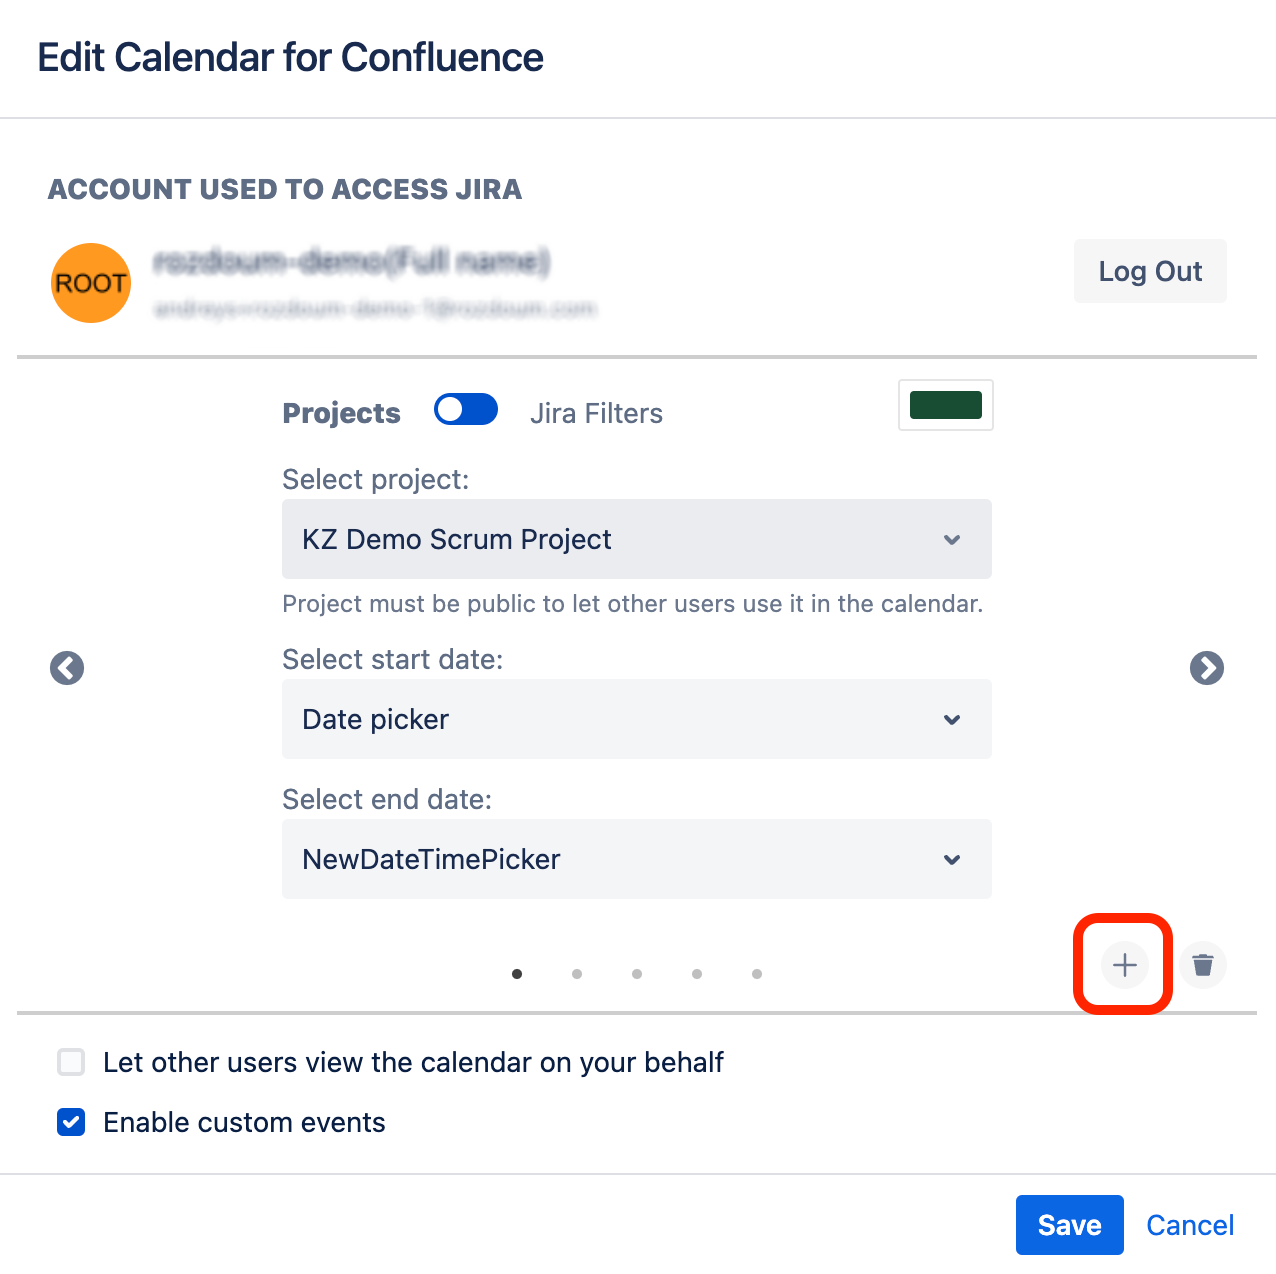
- Once in the Calendar 'Edit' mode, locate the "+" button on the right side of the interface. Click this button to add and configure a new project or Jira filter.
Configure
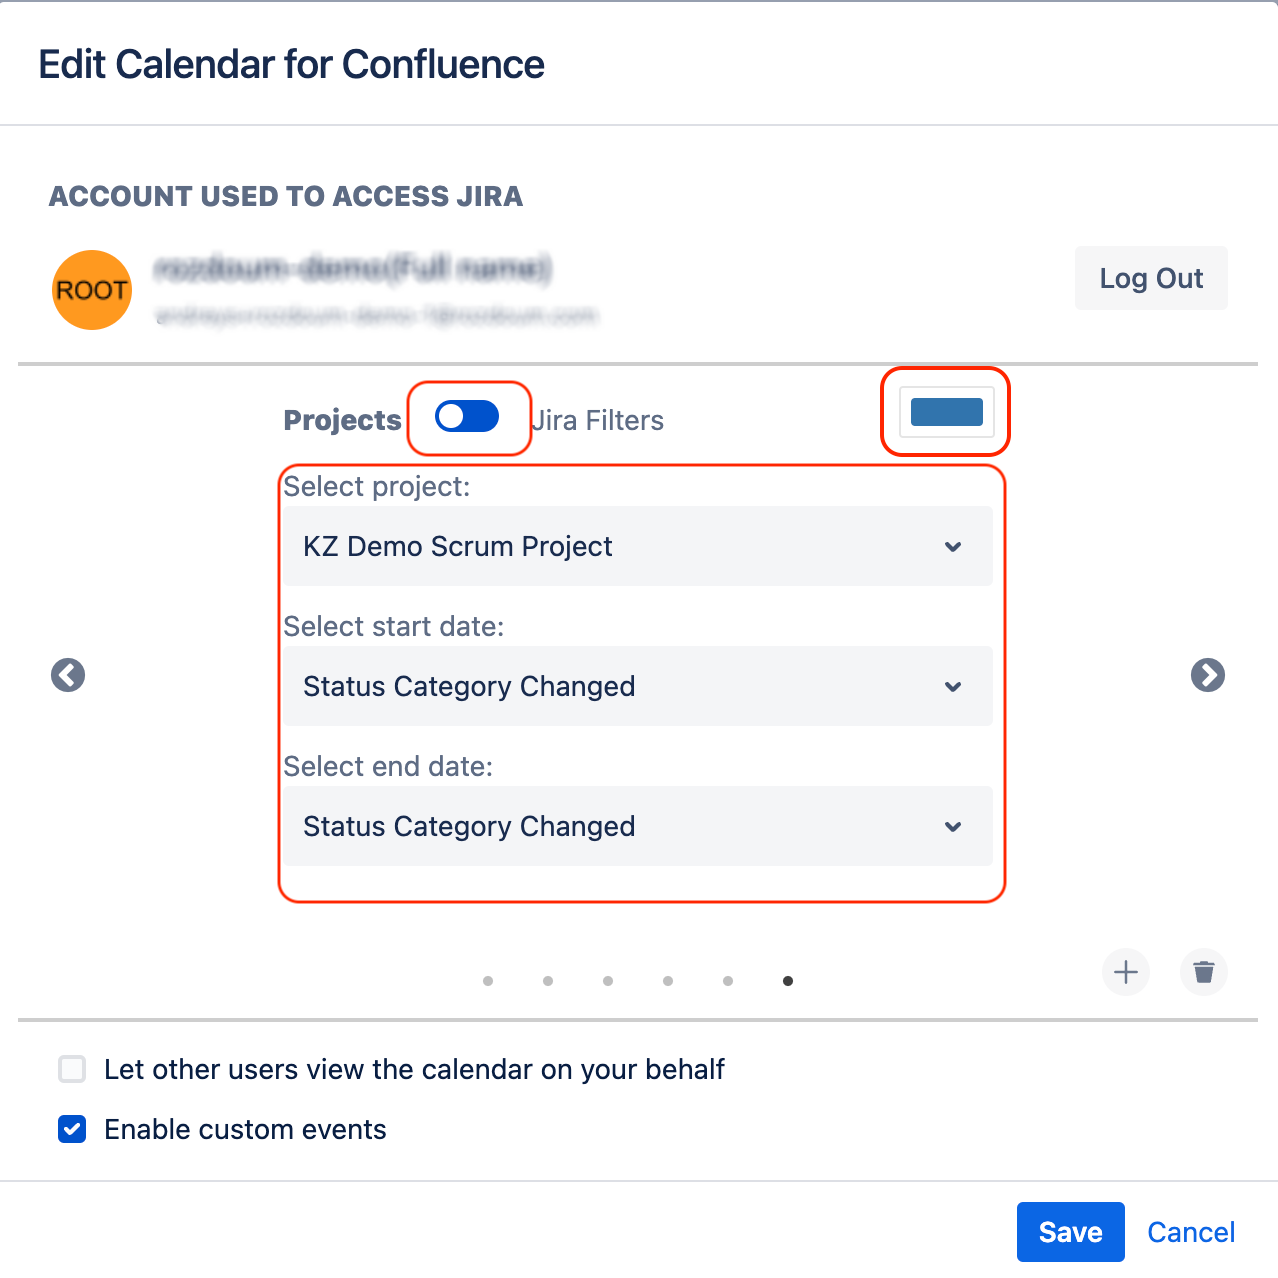
Setting up samples is customizable according to your preferences. You have the option to choose either 'Project' or 'Filter' by using the switcher. In the dropdown fields, select the desired values. Specify the start and end dates for displaying issues. To enhance visual identification, you can assign a color to each sample—more info.
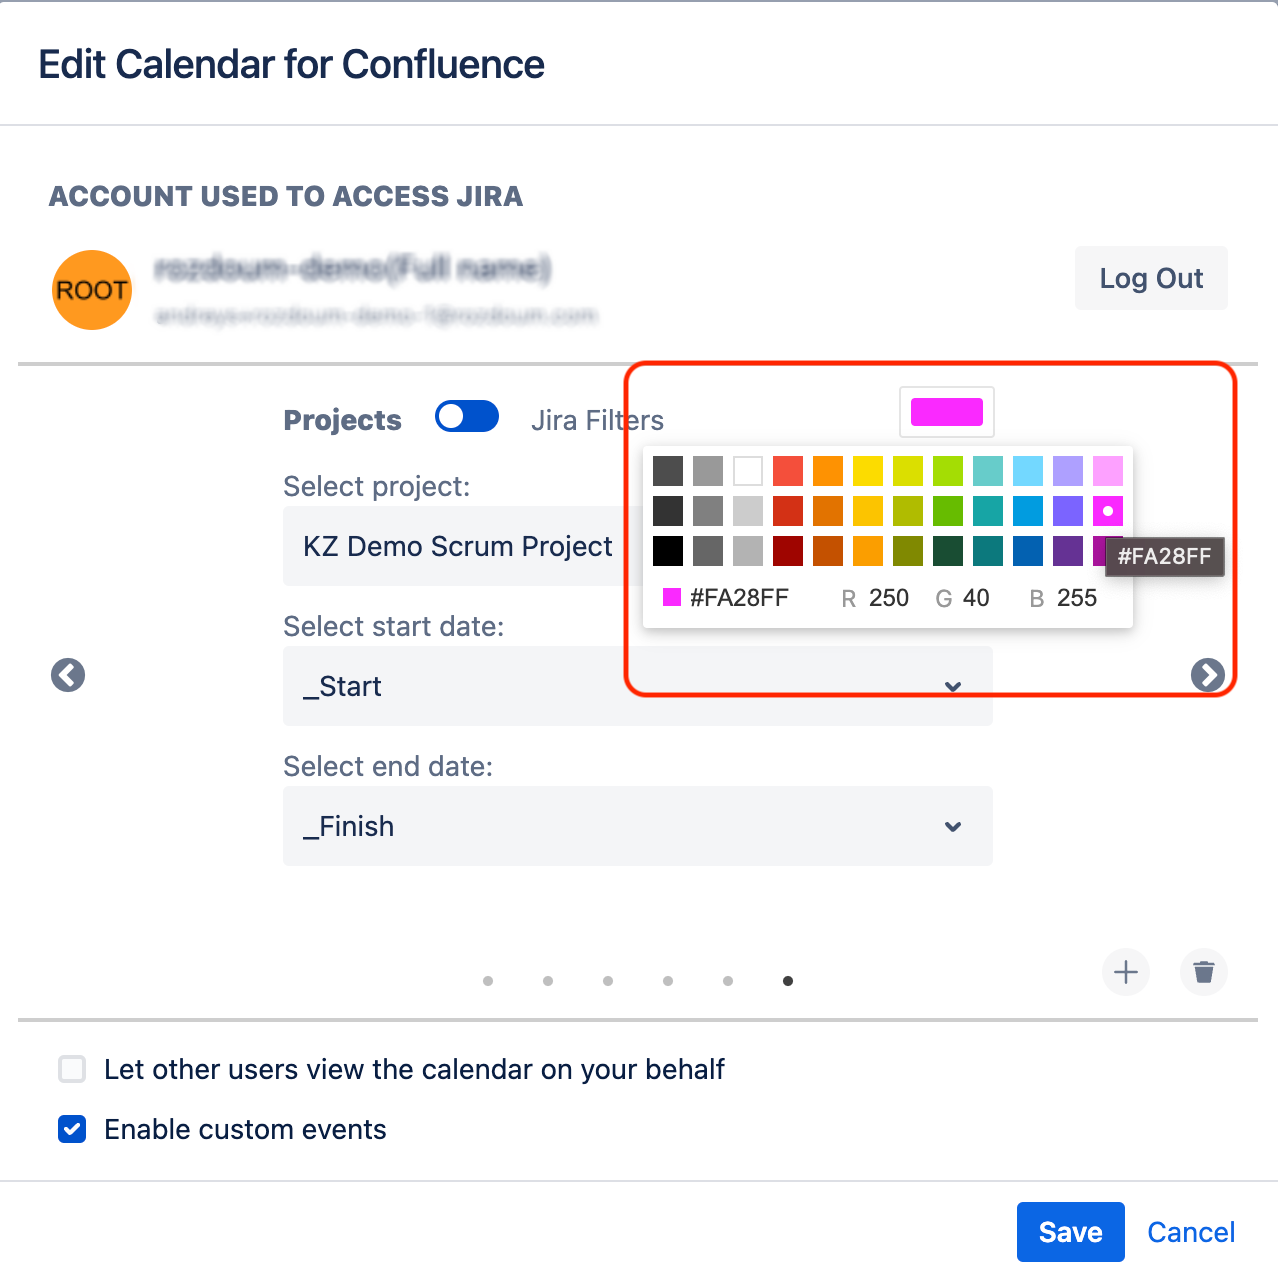
While in the 'Edit' mode of Calendar for Confluence, click on the color picker in the top right corner to bring up the color selection menu. From this menu, choose the color you wish to assign to the current sample.
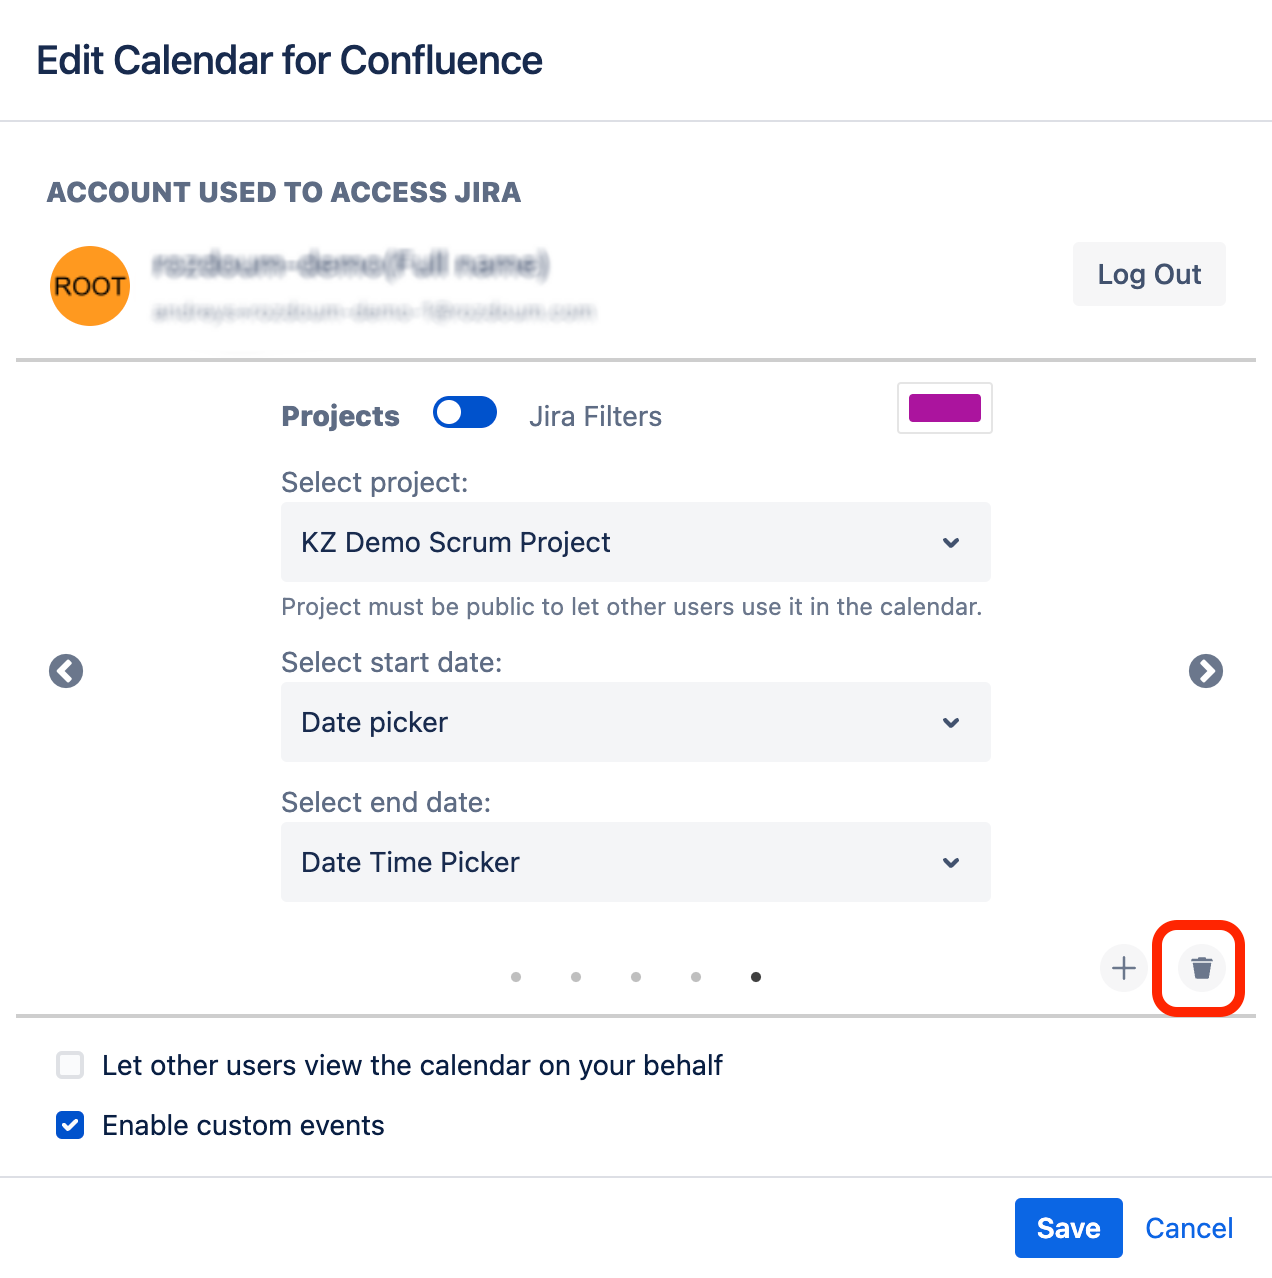
Delete
To remove a sample, simply click on the trash icon located on the right side.
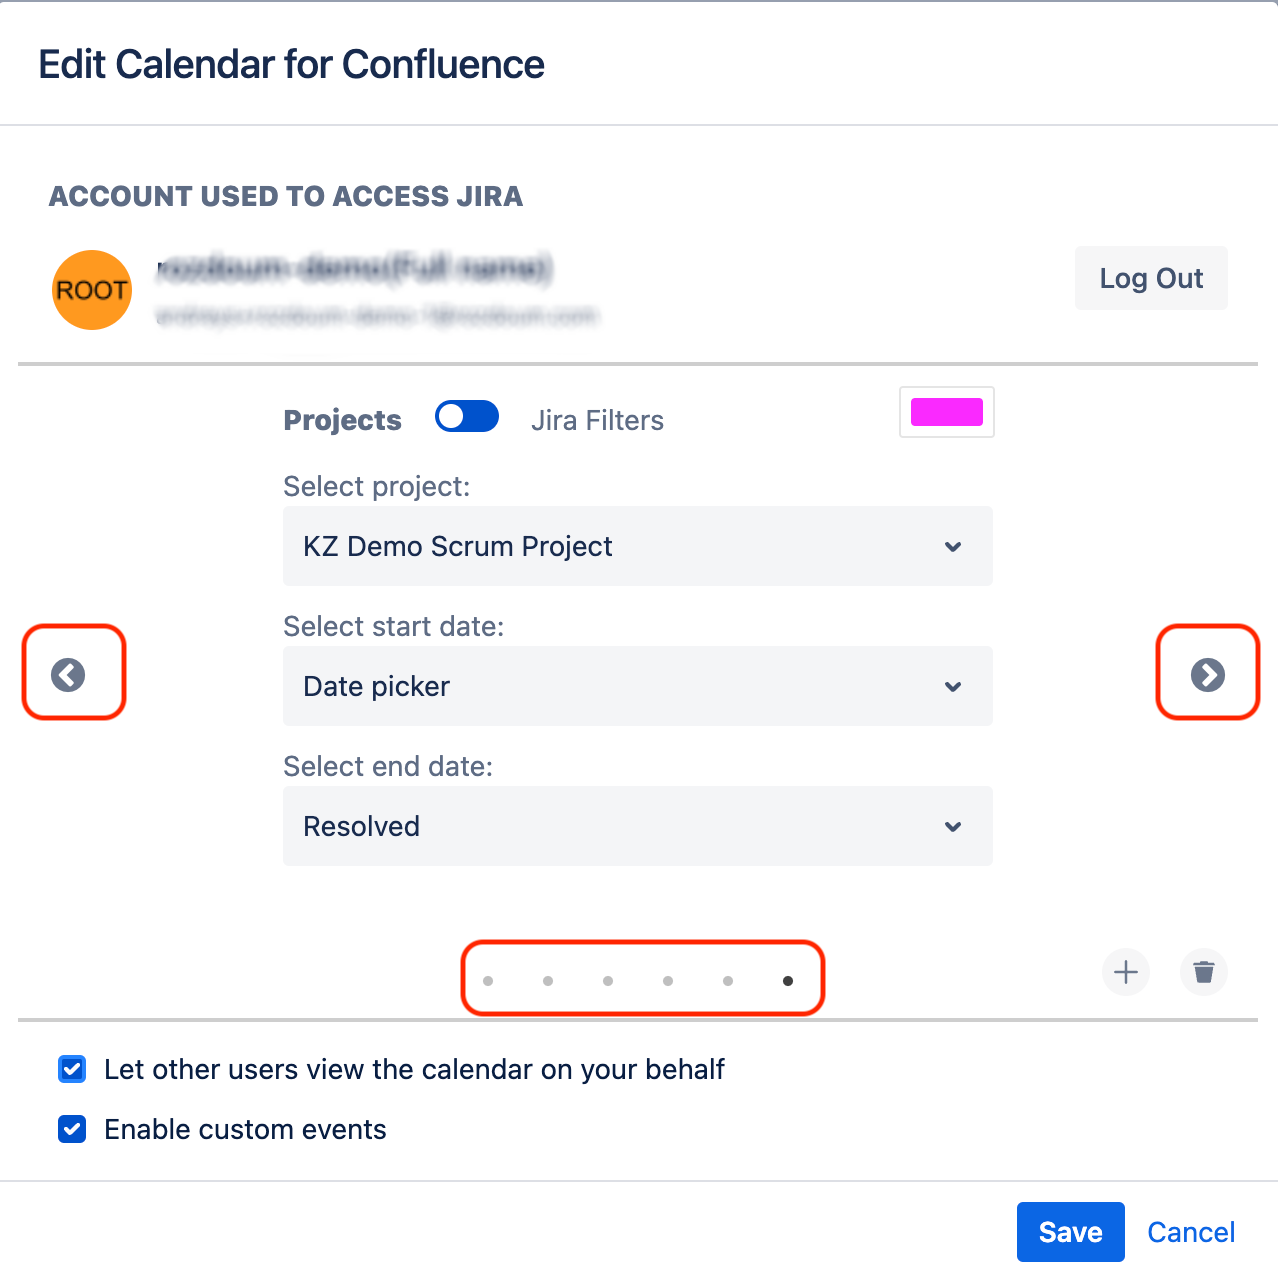
Navigation
You can utilize the slider's 'slide nav-previous' and 'slide nav-next' controls to move between samples. Alternatively, you can use the slider to browse through the pull setting list. This slider includes a dotted visualization panel that displays the total count of pull setting entries and your current position within the list.
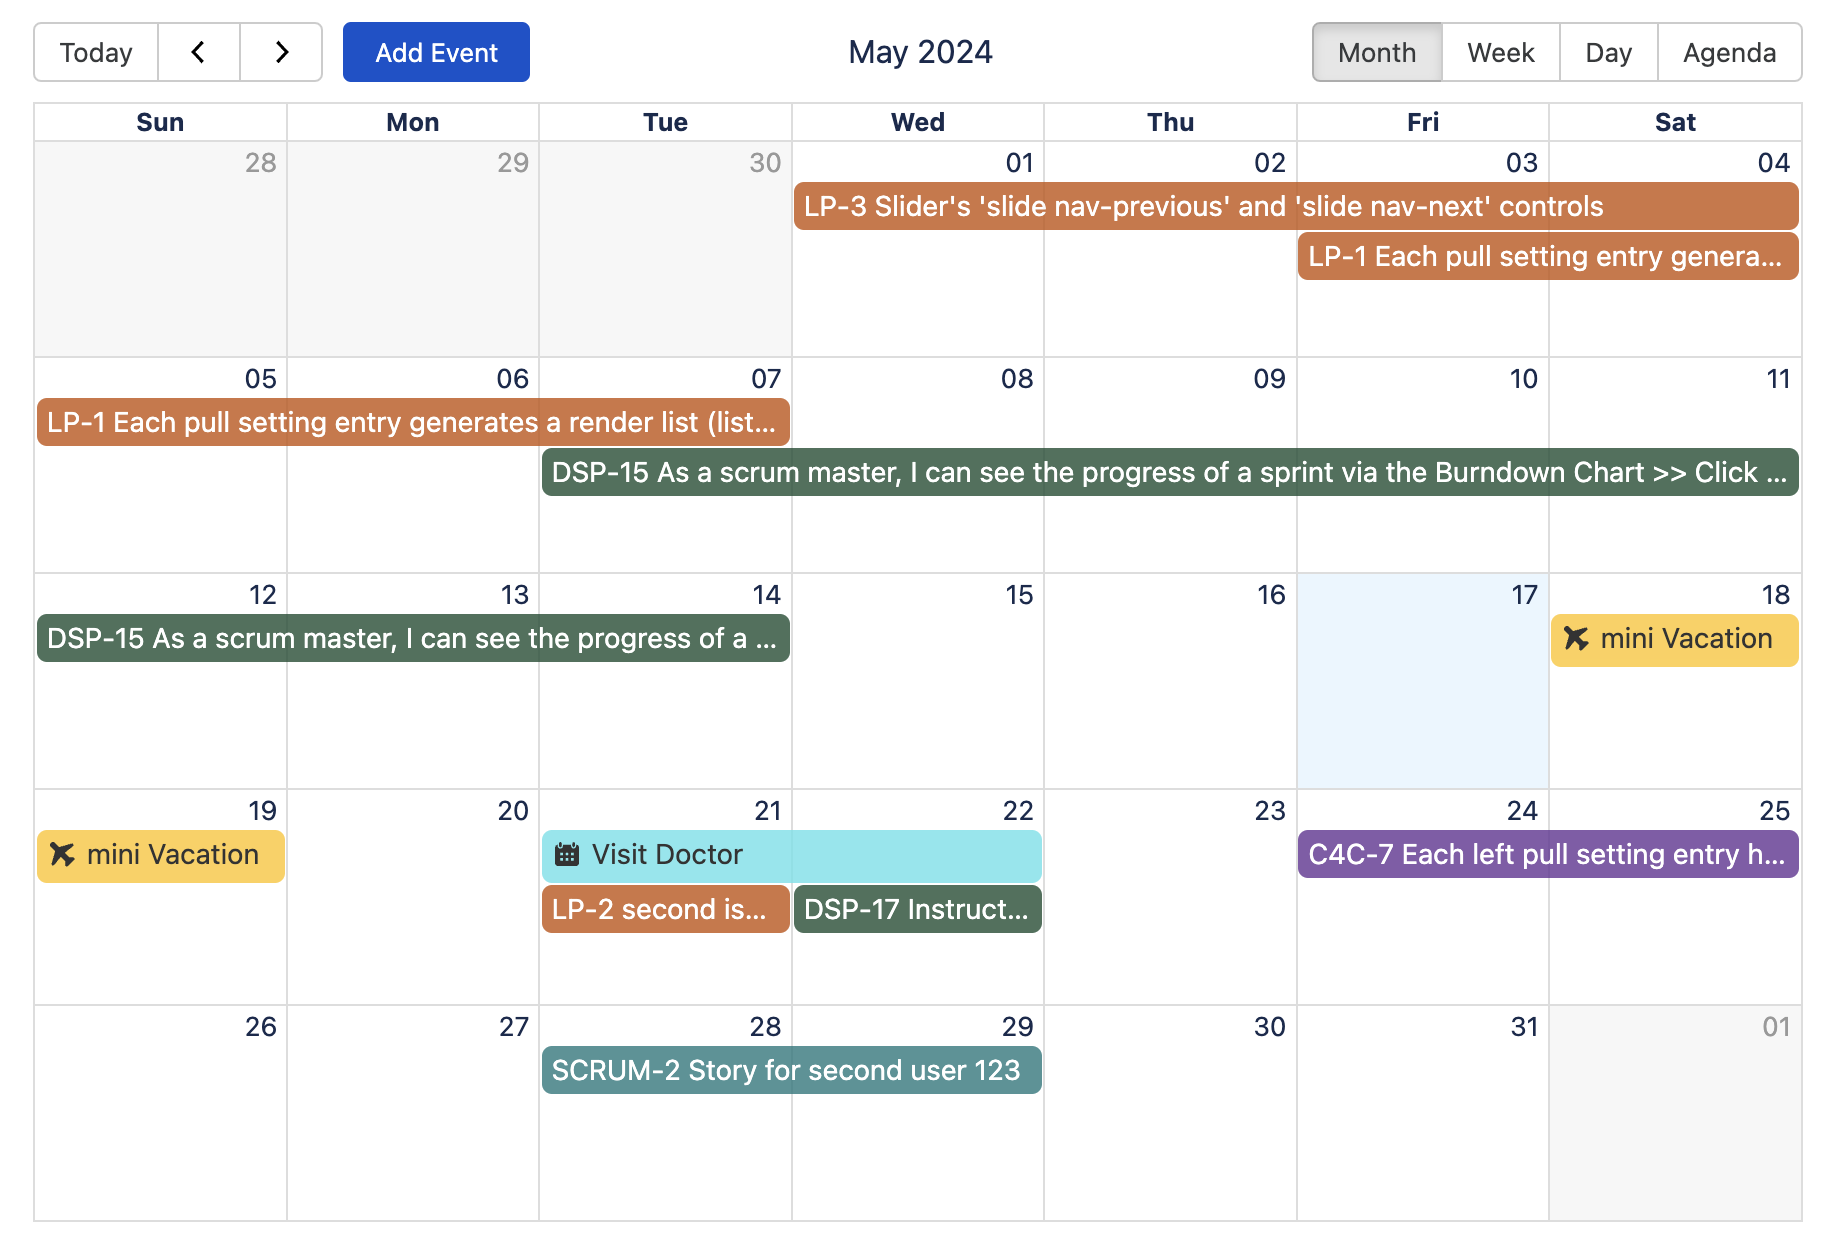
Example
Here's a demonstration of the configurations you can establish with multiple samples.