
Assign Onboarding Tasks
Preparing onboarding materials so new team members can hit the ground running is essential to efficient team management. This workflow template allows you to automatically assign onboarding tasks to new members of a Slack channel.
Download the Template
Click here to download the Assigning Onboarding Tasks template file.
Importing a Template to Your Slack Workspace
The following steps describe how to import the template from your computer into Workflow Builder.
Prerequisite
Ensure you've downloaded a workspace template to your local machine. If you haven't, you can find the download link near the top of this page.
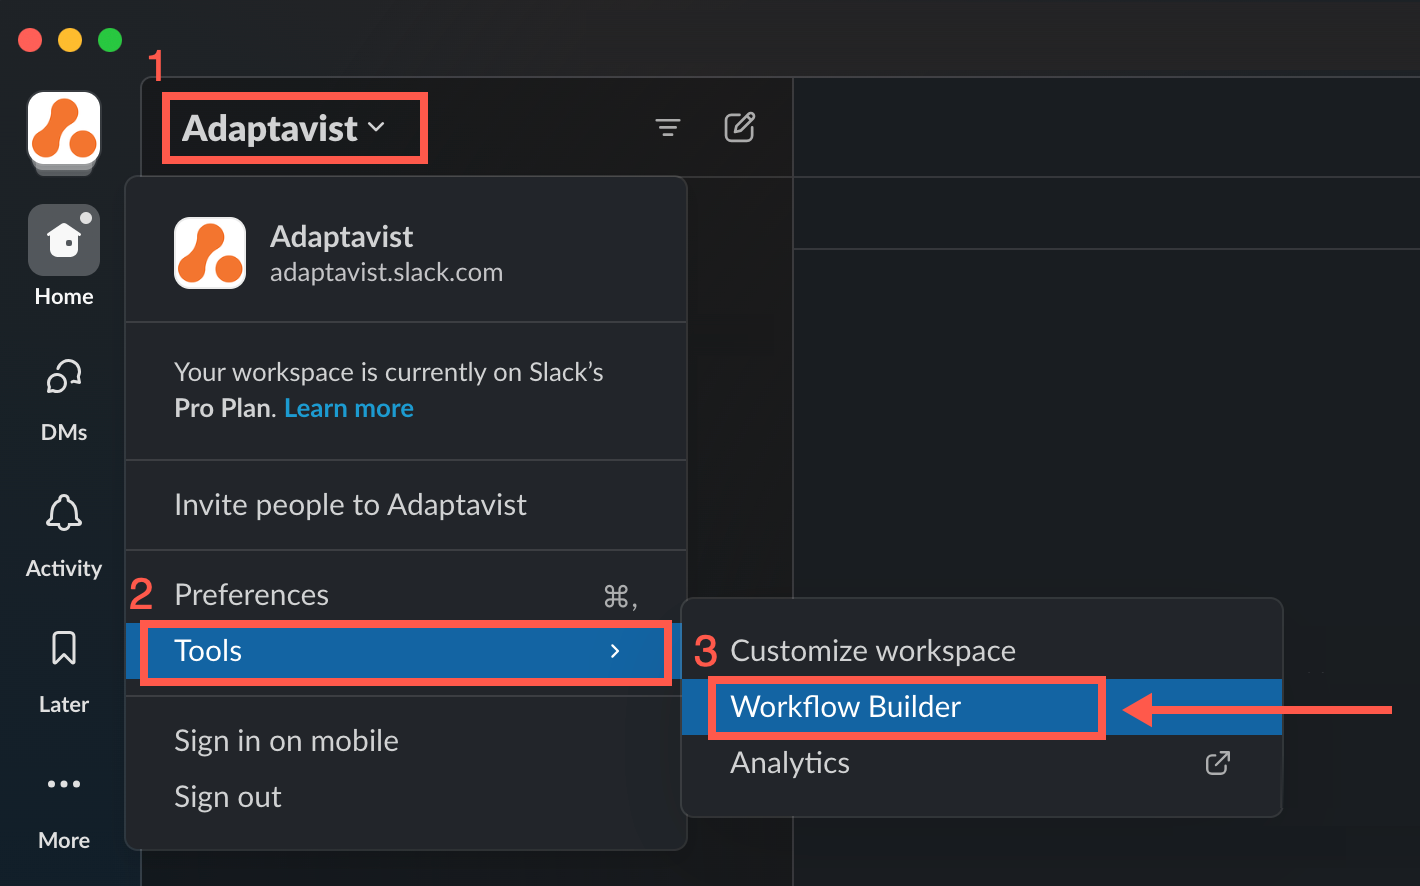
- In Slack, click the workspace drop-down menu in the upper-left corner, and select Tools > Workflow Builder.
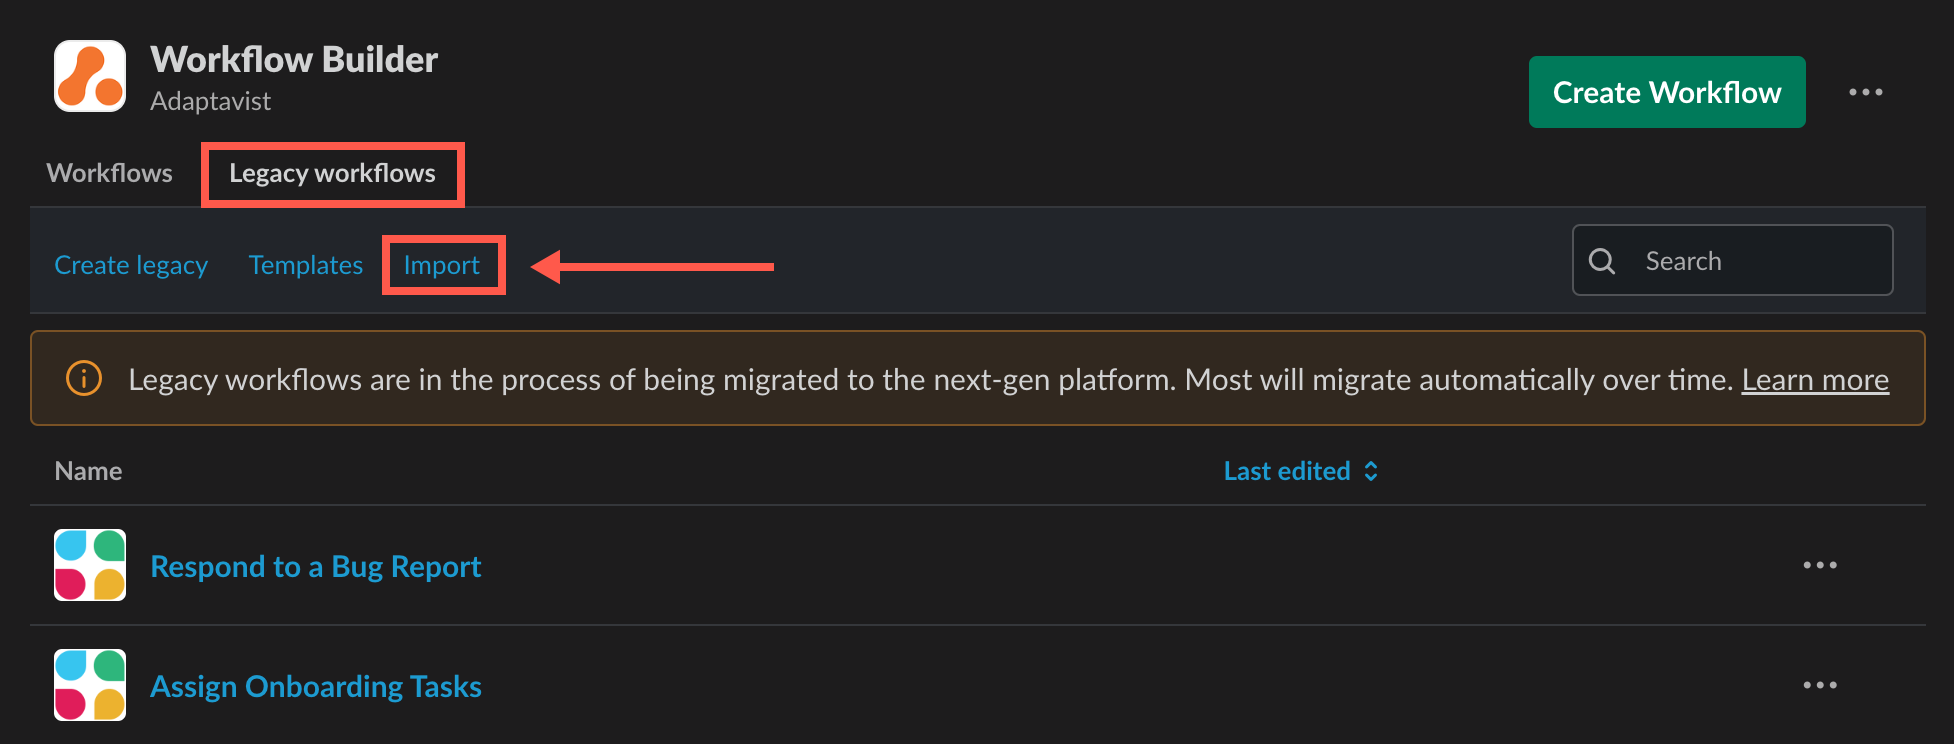
Workflow Builder opens in a new dialog. - Click the Legacy workflows tab, then click Import.
- Navigate to and select the workflow template on your local machine, then click Open.
You are prompted to edit the workflow's name. - Click Next.
A success message appears, and the template is imported to the Your Workflows tab. Click Got It to close the message.
The imported workflow and its steps appear, ready for you to review and customize the steps.
Customizing the 'Assign Onboarding Tasks' Workflow
After you download and import the template, fine-tune the workflow by evaluating and making adjustments to each step. You'll likely need to make some changes to perfect the workflow to meet your specific needs.
With the template imported, open the workflow so all the steps are visible.
- Click Edit next to each template step to review and update the contents.
Here's a summary of each step in the workflow and details you may want to customize:
New Channel Member Workflow Trigger
This workflow kicks off each time a new member joins a specified Slack channel.
Click Edit and select the Slack channel in which you want the workflow to exist, then click Save.
Prompt for Jira Fields
This step allows you to share field values between Jira and Slack and ensures that new Slack channel members will have onboarding tickets assigned to them.
Create Jira Issue
Edit this step to select your desired Jira instance and project in which the new onboarding task is to be created.
When asked if you want to Prompt the user who starts the workflow for Jira fields, select No.
Update the template's Summary and Description text with details about the onboarding tasks.
Update Jira Issue
This step declares the type of update you want to make to the Jira issue (comment, status, or assignee), and it defines the Jira issue that's to be updated.
As noted in the app, it's useful to use this step in conjunction with the Prompt for Jira Fields step, so Jira values can be used as variables.
Create a Jira Issue
The same instructions apply to this step as the previous Create Jira Issue step.
Add another Create Jira Issue step for each additional task you want to assign to a new channel member.
Update Jira Issue
The same instructions apply to this step as the previous Update Jira Issue step.
Add an Update Jira Issue step for each Create Jira Issue step you use in the workflow.
Send Message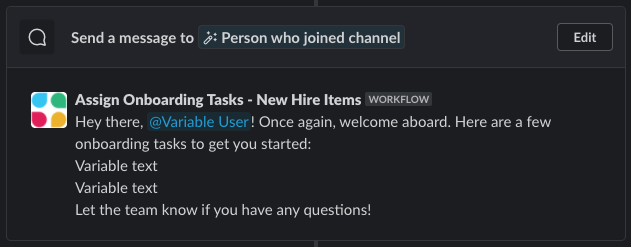
This step contains the message to be sent to new additions to the Slack channel.
Review the default message, and customize it with specific tasks to best fit your workflow needs. - When you're finished fine-tuning the template, click Publish Changes at the top-right of the dialog.
- Test the workflow in Slack!
It's always best to test the workflow before introducing it to your coworkers. Ensure that the steps are pulling the right info from Jira and working as you'd expect them to.