
Horizontal Menu
How to Add a Menu Panel in ThemeBuilder
This tutorial will show how to add a horizontal menu below the header area in Confluence using ThemeBuilder.
Instructions
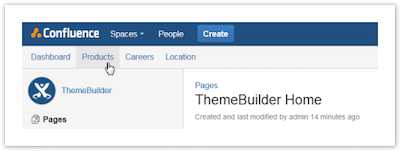
Go to ThemeBuilder.
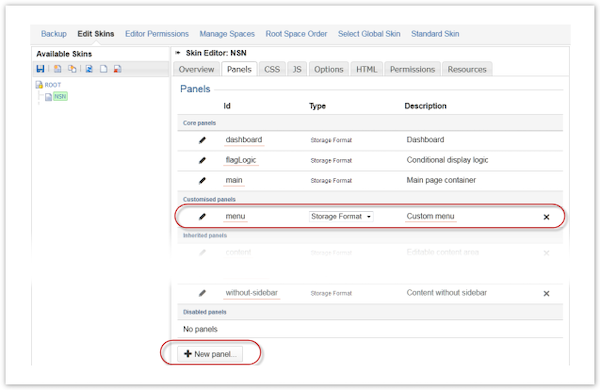
Click Edit Skins in the Confluence Administration section.
Create a new custom panel called menu.
After all, other code in the Header panel, add the Include Panel macro to import the new menu panel.
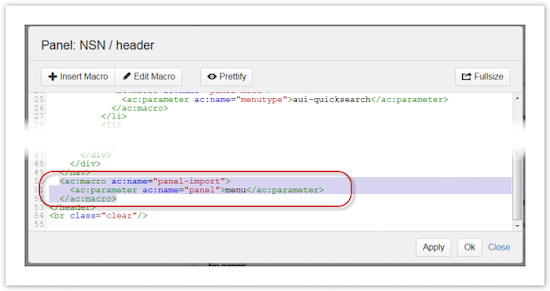
Code:
<ac:macro ac:name="panel-import">
<ac:parameter ac:name="panel">menu</ac:parameter>
</ac:macro>
Edit the menu panel and add this code to form the base for your menu:
<nav class="aui-navgroup aui-navgroup-horizontal">
<div class="aui-navgroup-inner">
<div class="aui-navgroup-primary">
<ul class="aui-nav">
<li>
<!-- add your menu items -->
</li>
</ul>
</div>
</div>
</nav>
You can use the Panel Link macro, Panel Sitehome macro, or HTML to add links to internal pages or external sites. Add the links between the HTML <li> tags.
Example
<nav class="aui-navgroup aui-navgroup-horizontal">
<div class="aui-navgroup-inner">
<div class="aui-navgroup-primary">
<ul class="aui-nav">
<li>
<ac:macro ac:name="panel-sitehome">
<ac:parameter ac:name="target">dashboard</ac:parameter>
<ac:rich-text-body>Dashboard</ac:rich-text-body>
</ac:macro>
</li>
<li>
<ac:macro ac:name="panel-link">
<ac:parameter ac:name="link">SPACEKEY:Page Name</ac:parameter>
<ac:rich-text-body>Confluence Page Name</ac:rich-text-body>
</ac:macro>
</li>
<li>
<a href="http://www.adaptavist.com">adaptavist.com</a>
</li>
</ul>
</div>
</div>
</nav>
This should give you a horizontal link menu that displays just below the page header, as shown in the image for step 3.