
Conditions Tutorial
Before you start this tutorial, make sure you've read the Workflow Functions Tutorial page to understand what workflow functions are, for an overview of ScriptRunner workflow functions, and for details on how to access workflow functions.
For this tutorial, we assume you already have basic knowledge of how Jira workflow functions work.
What is Great Adventure?
Great Adventure is the fictitious company we use to help provide use cases and examples of concepts covered. Great Adventure has the same problems and issues faced by most companies and needs to automate more of their processes using ScriptRunner.
Overview of ScriptRunner workflow conditions
A condition checks to make sure that a requirement has been met before you can see the next workflow transition. For example, you can add a ScriptRunner workflow condition that checks all subtasks have a set resolution before the parent task can be transitioned. Depending on what your organization requires, you may want to use workflow conditions provided by ScriptRunner. These conditions allow you to do more in your workflow, providing extra control or information. ScriptRunner includes built-in conditions that you can use right away, but you can also create your own Simple scripted condition. For a full list of our conditions, check out the available ScriptRunner workflow conditions.
Navigate to ScriptRunner workflow conditions
All of the ScriptRunner workflow functions are found alongside Jira workflow functions.
You can add a ScriptRunner condition to a workflow transition as follows:
- Go to Administration > Issues > Workflows.
- Select Edit on the workflow you want to add a condition to.
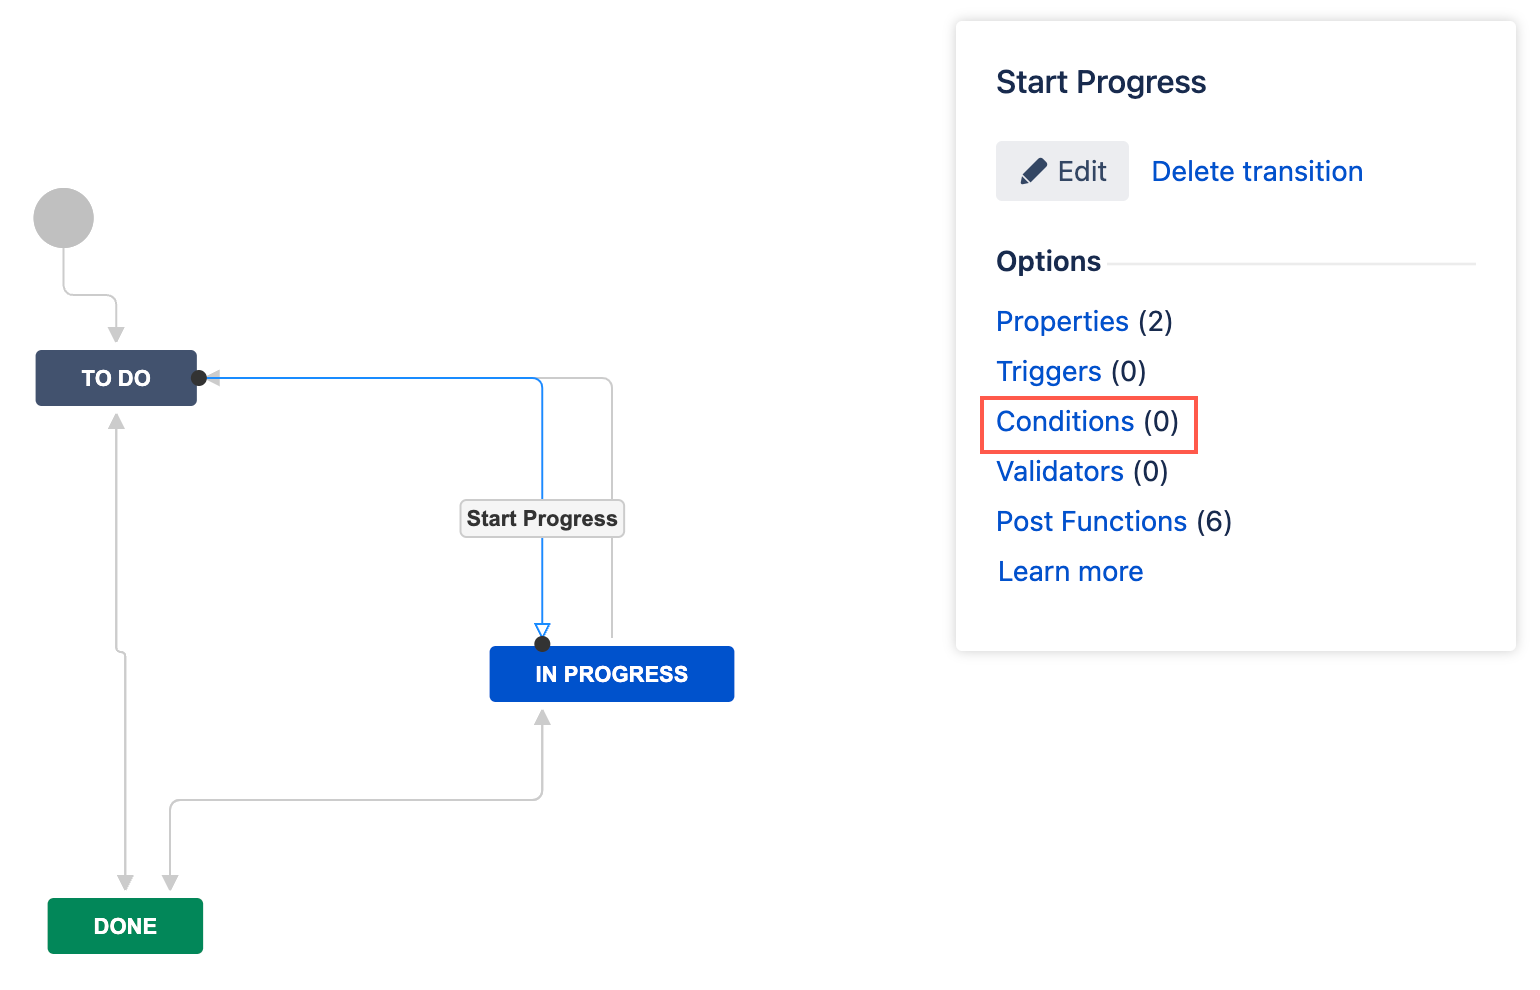
- Select the transition to which you wish to add a condition.
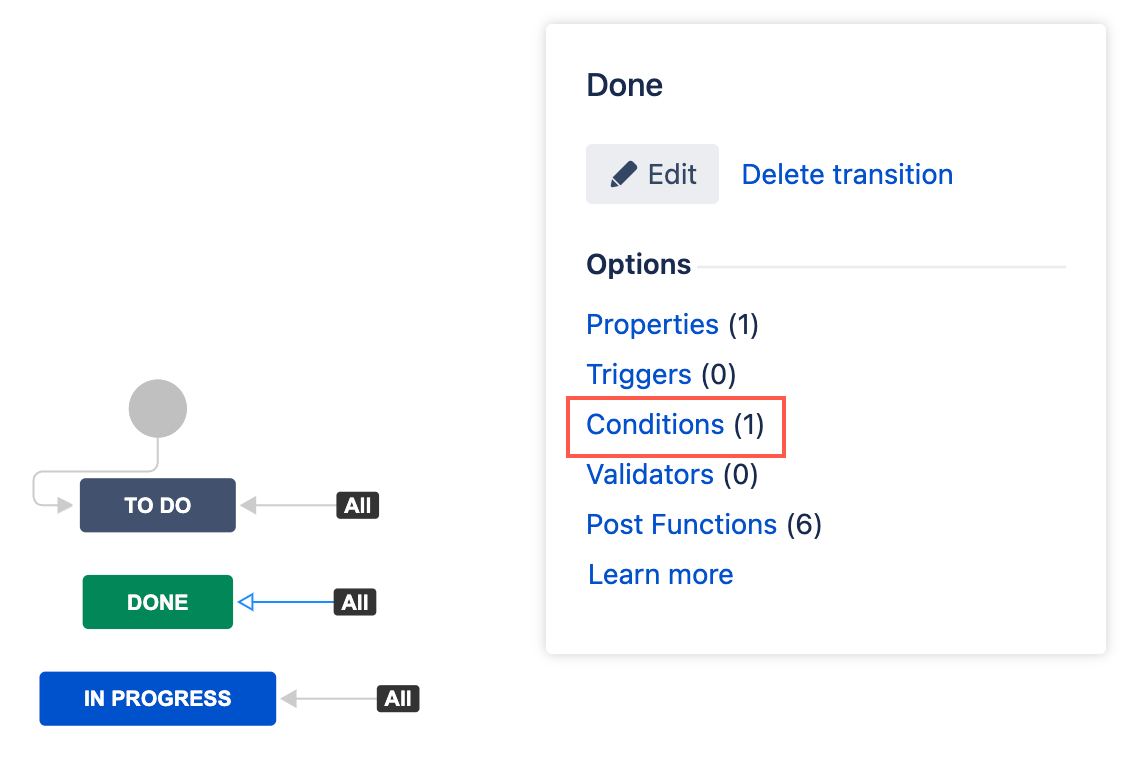
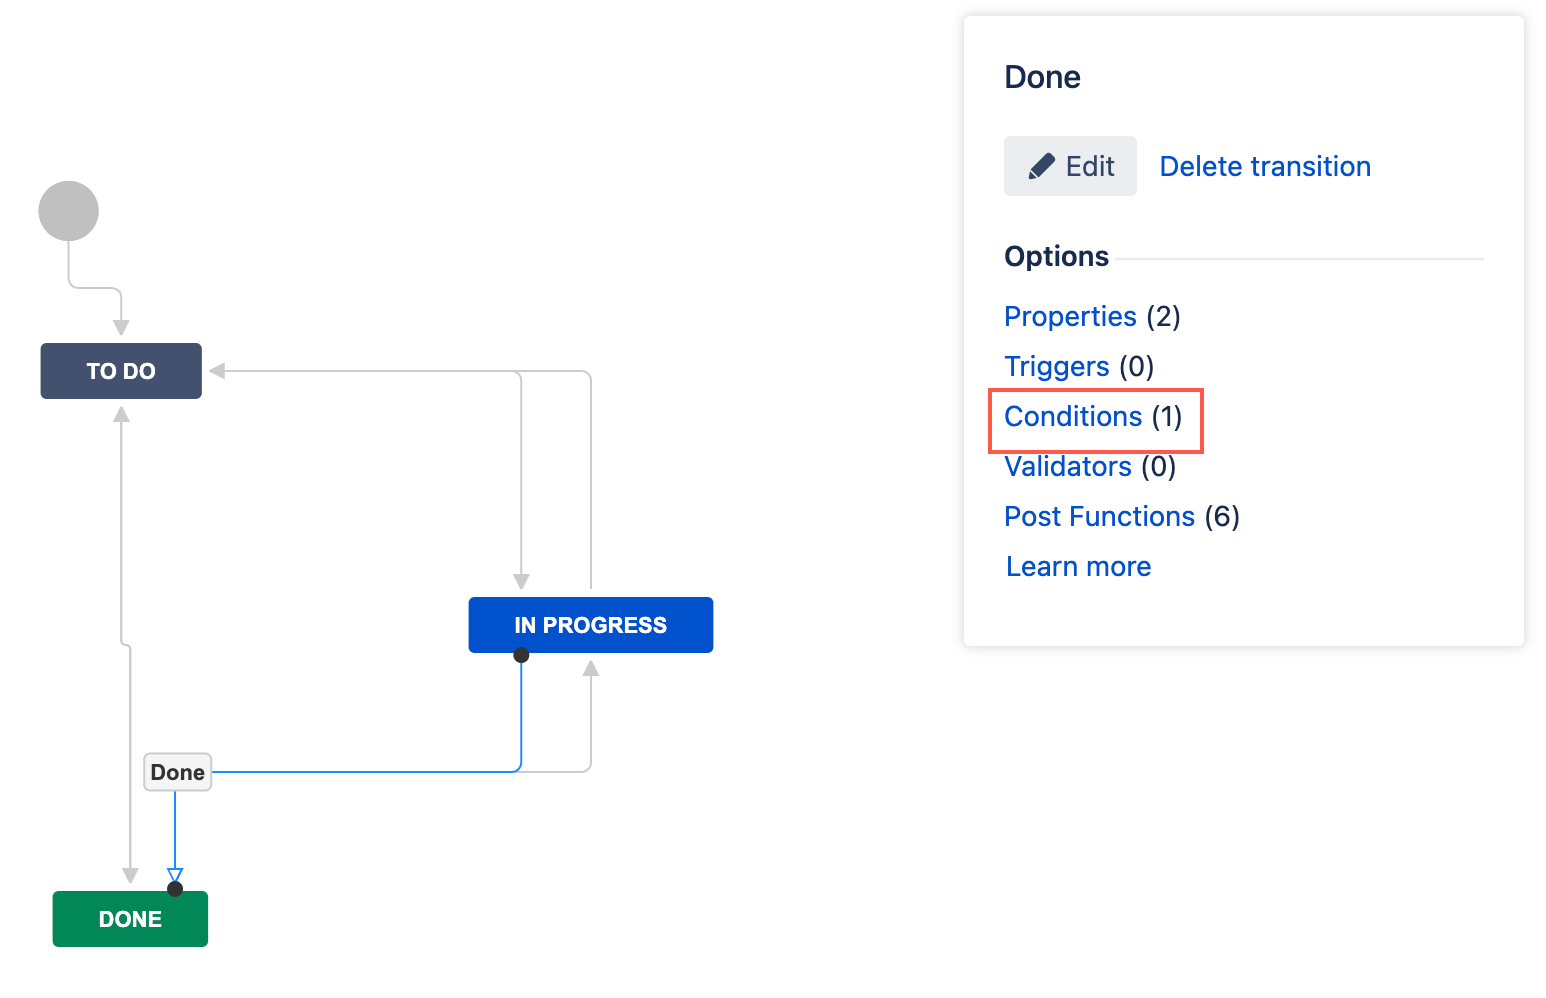
- Under Options, select Conditions.
- Select Add condition.
All available ScriptRunner conditions display along with all other available conditions. ScriptRunner post functions have a suffix of [ScriptRunner].
Examples of ScriptRunner workflow conditions
Below are some easy-to-follow examples that will help you understand how ScriptRunner workflow conditions work.
We recommend that you do any script testing in a test instance and not your production instance.
We recommend you set up and use a sample project for the following examples. See the Tutorials page for more information on creating a sample project.
Built-in ScriptRunner workflow condition examples
All sub-tasks must be resolved condition
Before you start this example, make sure you have a suitable workflow that includes a transition to a Done or similar completed status.
In addition, when issues in this project are transitioned to Done, make sure the Resolution automatically sets to the required state (in this case Done) using a post-function. This post-function is normally already set in most sample project workflows; see the Jira Knowledge Base article on Resolutions for more information.
Great Adventure has an onboarding process that requires several steps for a new team member's first day. Those steps are all represented as sub-tasks for the onboarding issue and include: meeting with the manager, attending company orientation, setting up their workstation, and updating their calendar. Great Adventure want to make sure all onboarding sub-tasks have a Resolution of Done before a new team member can mark their onboarding as complete. They can accomplish this by adding the All sub-tasks must be resolved condition to the transition.
- Go to Administration > Issues > Workflows.
- Select Edit on the workflow you want to add a condition to.
- Select the transition to which you wish to add a condition. In this example, we select the transition that leads to Done.
- Under Options, select Conditions.
- On the Transition page, select Add condition.
- Select All sub-tasks must be resolved [ScriptRunner].
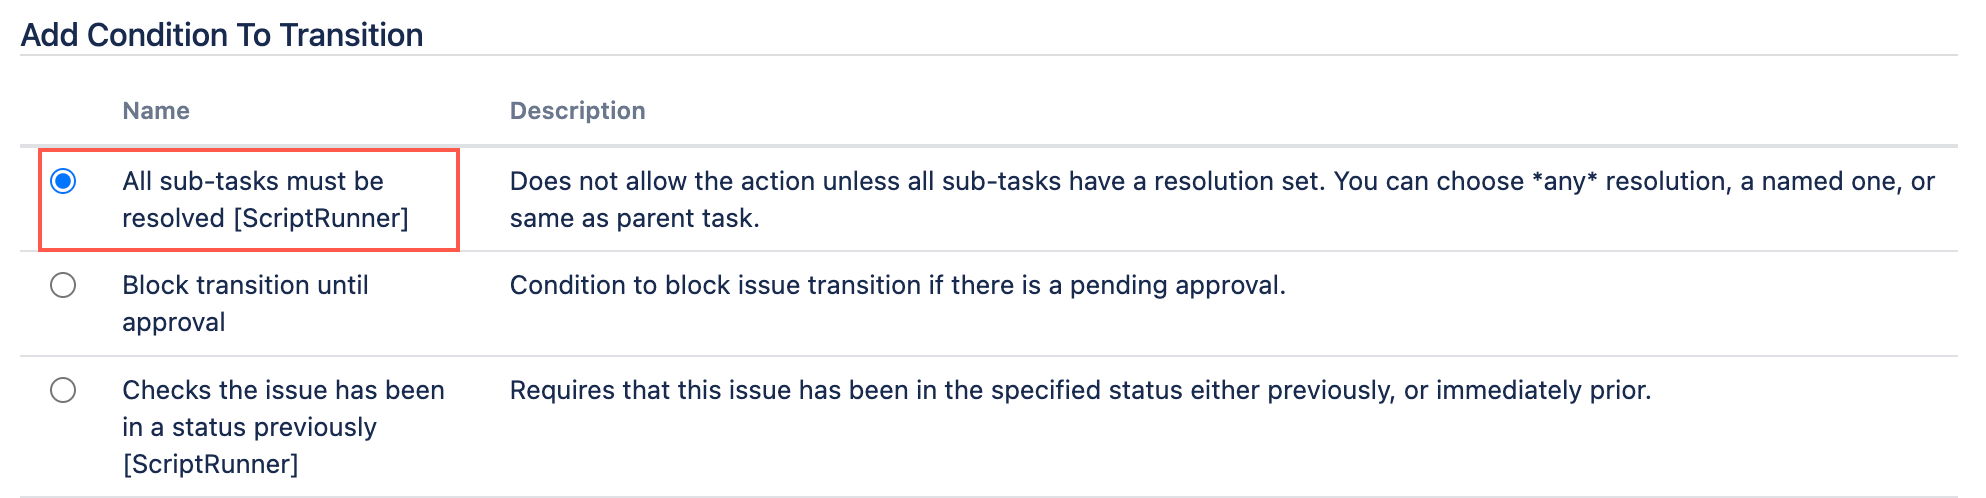
- Select Add.
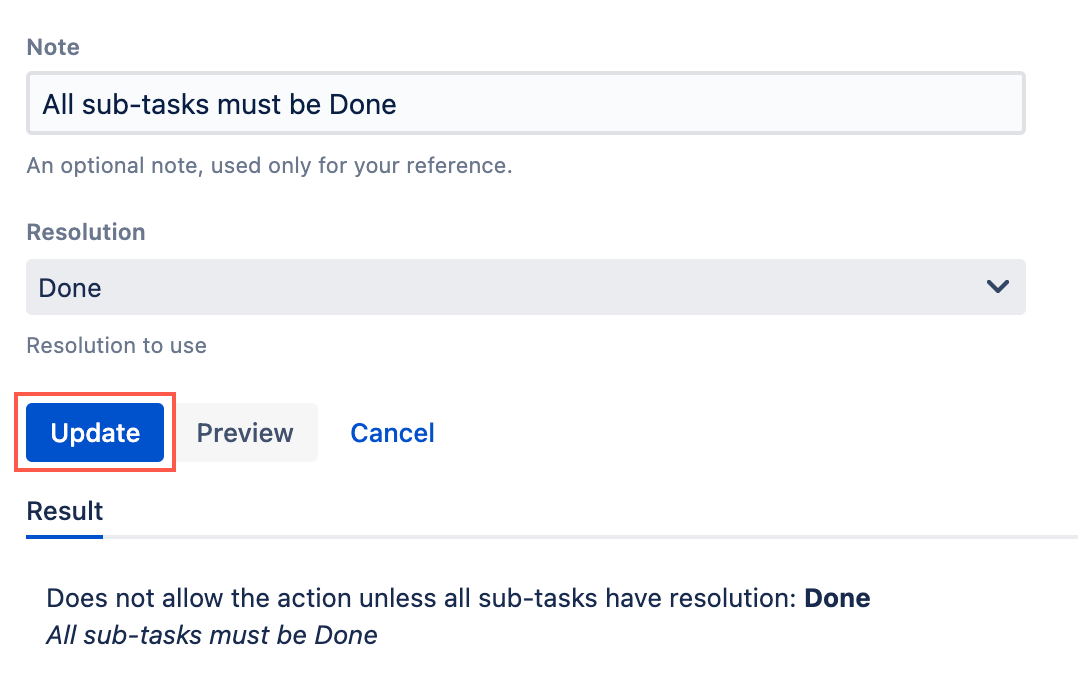
- Optional: Enter a note that describes the condition. In this example we enter
All sub-tasks must be resolved. - Select a resolution. In this example we select
Done. - Select Preview to see an overview of the change.
Select Update.
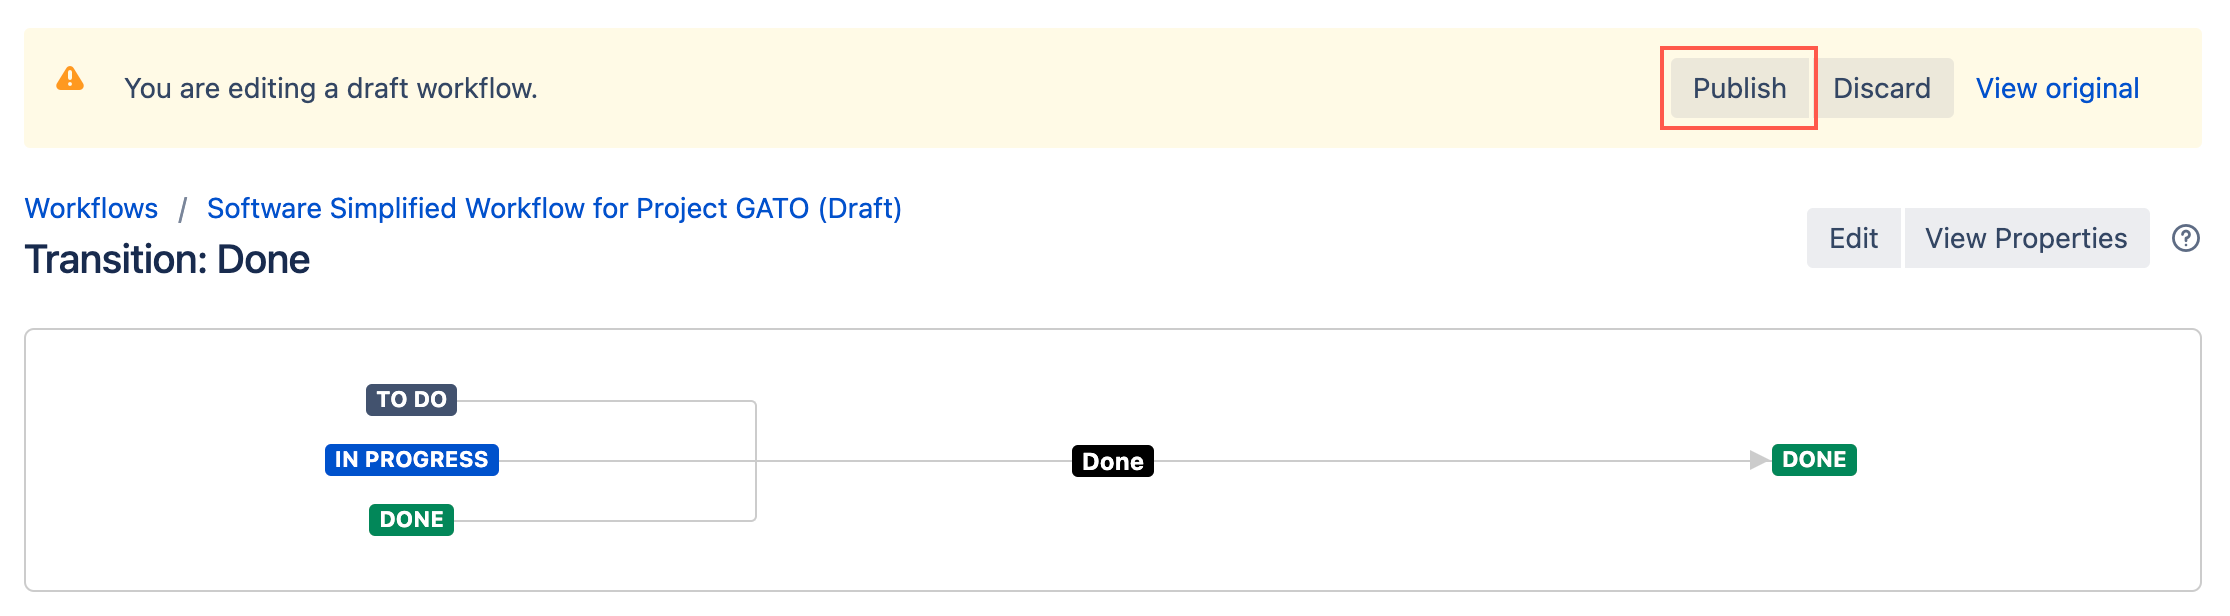
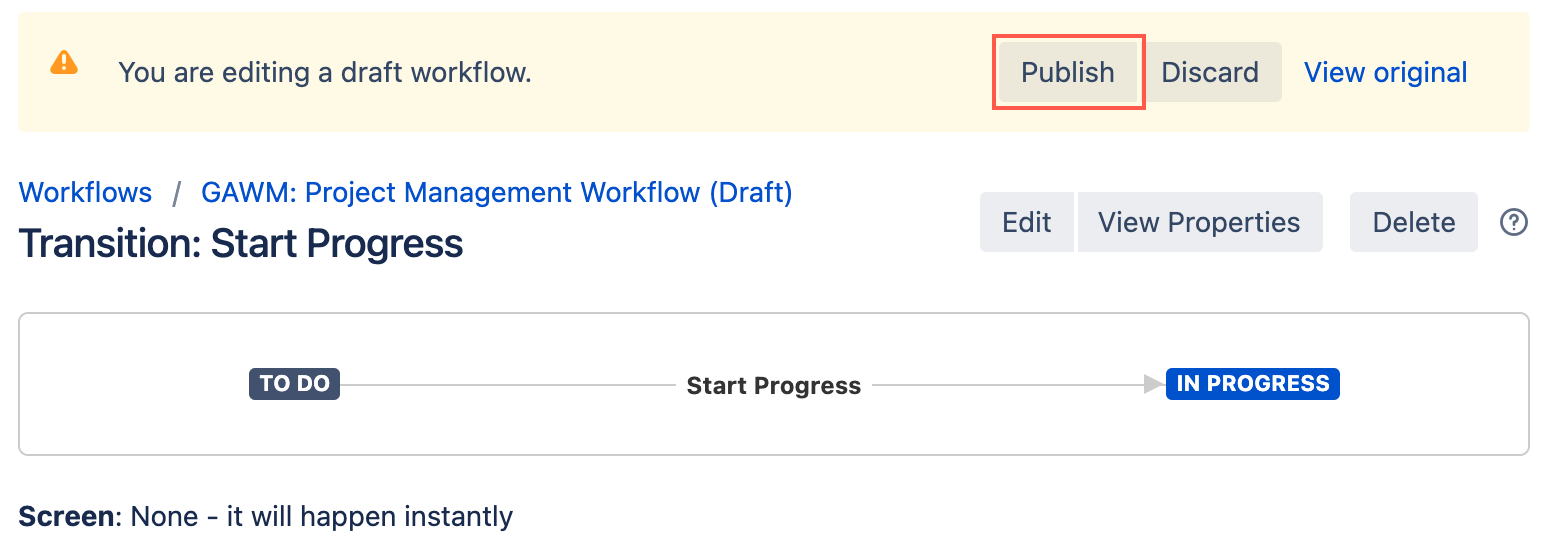
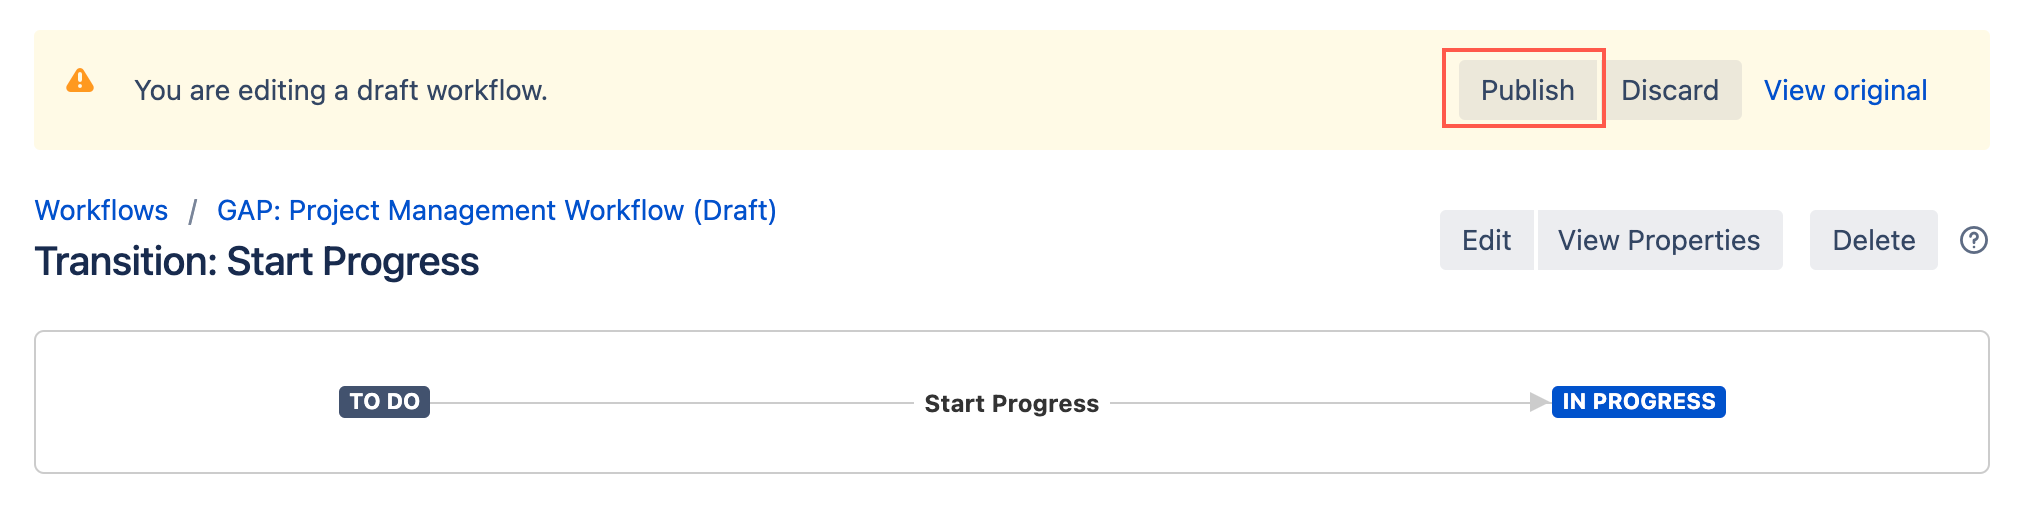
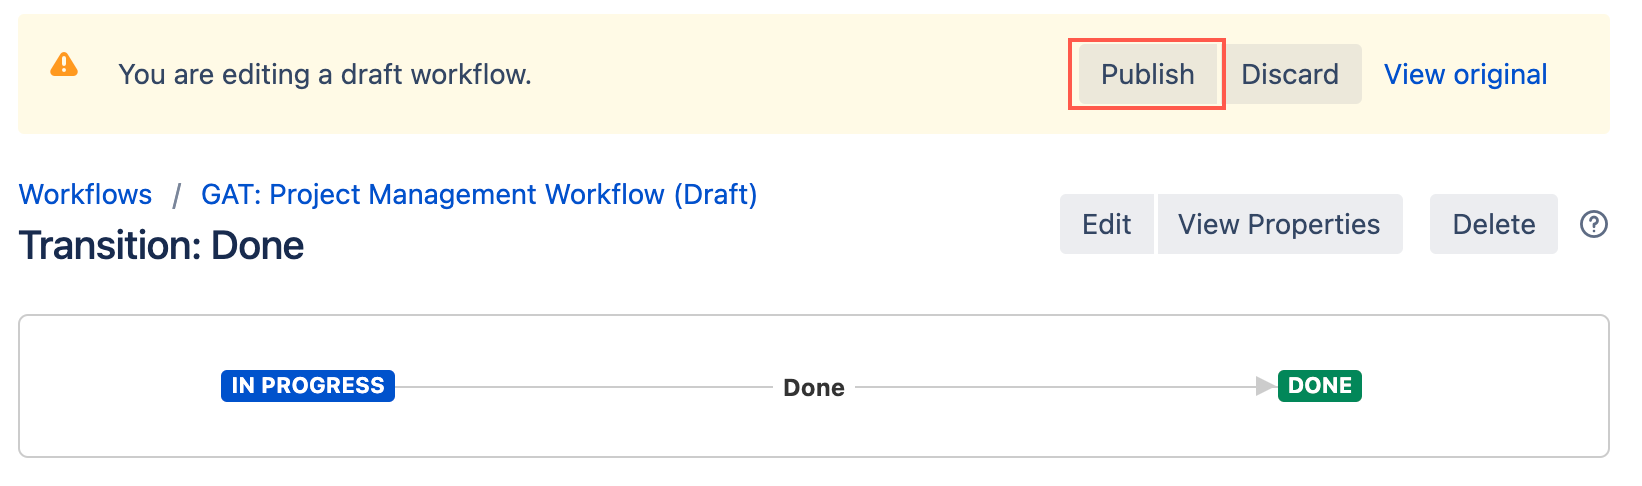
Select Publish and choose if you want to save a backup copy of the workflow.
You can now test to see if this workflow condition works.
User in field(s) condition
Before you start this example, make sure you have a suitable workflow that includes a transition from To Do to the In Progress status.
Great Adventure has been having issues with some team members who have started working on issues that are not assigned to them. Great Adventure want to make sure only the team member assigned to an issue can move it from To Do to In Progress. They can accomplish this by adding the User in field(s) condition to the transition that leads from To Do to the In Progress status.
- Go to Administration > Issues > Workflows.
- Select Edit on the workflow you want to add a condition to.
- Select the transition to which you wish to add a condition. In this example, we select the transition that leads to In Progress.
- Under Options, select Conditions.
- On the Transition page, select Add condition.
- Select User in field(s) condition [ScriptRunner].
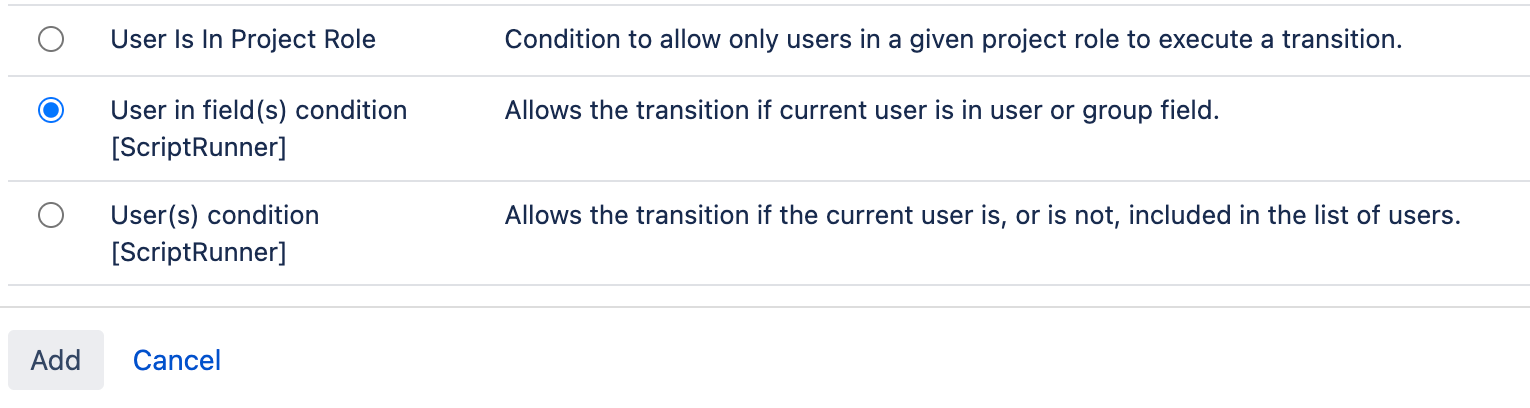
- Select Add.
- Optional: Enter a note that describes the condition. In this example we enter
Only the assignee can move the issue to In Progress. For the user field, select Assignee.
If you select multiple fields, the user only has to appear in one of those fields, not all of them.
- Select Preview to see an overview of the change.
Select Update.

Select Publish and choose if you want to save a backup copy of the workflow.
You can now test to see if this workflow condition works.
You could expand on this example and make sure a user can't move the issue directly to Done by adding the Checks if this issue has been in a status previously condition.
Scripted ScriptRunner workflow condition examples
All QA sub-tasks must be resolved - Simple scripted condition
Before you start this example, make sure you have a suitable workflow that includes a transition from To Do to In Progress or similar.
In addition, when issues in this project are transitioned to Done, make sure the Resolution automatically sets to the required state (in this case Done) using a post-function. This post-function is normally already set in most sample project workflows; see the Jira Knowledge Base article on Resolutions for more information.
Great Adventure want to make sure all QA tasks, for validating an issue, have been resolved before the issue can be moved to In Progress. As this is a more specific requirement Great Adventure need to use a Simple scripted condition instead of the All sub-tasks must be resolved condition.
- Go to Administration > Issues > Workflows.
- Select Edit on the workflow you want to add a condition to.
- Select the transition to which you wish to add a condition. In this example, we select the transition that leads to In Progress.
- Under Options, select Conditions.

- On the Transition page, select Add condition.
- Select Simple scripted condition [ScriptRunner].
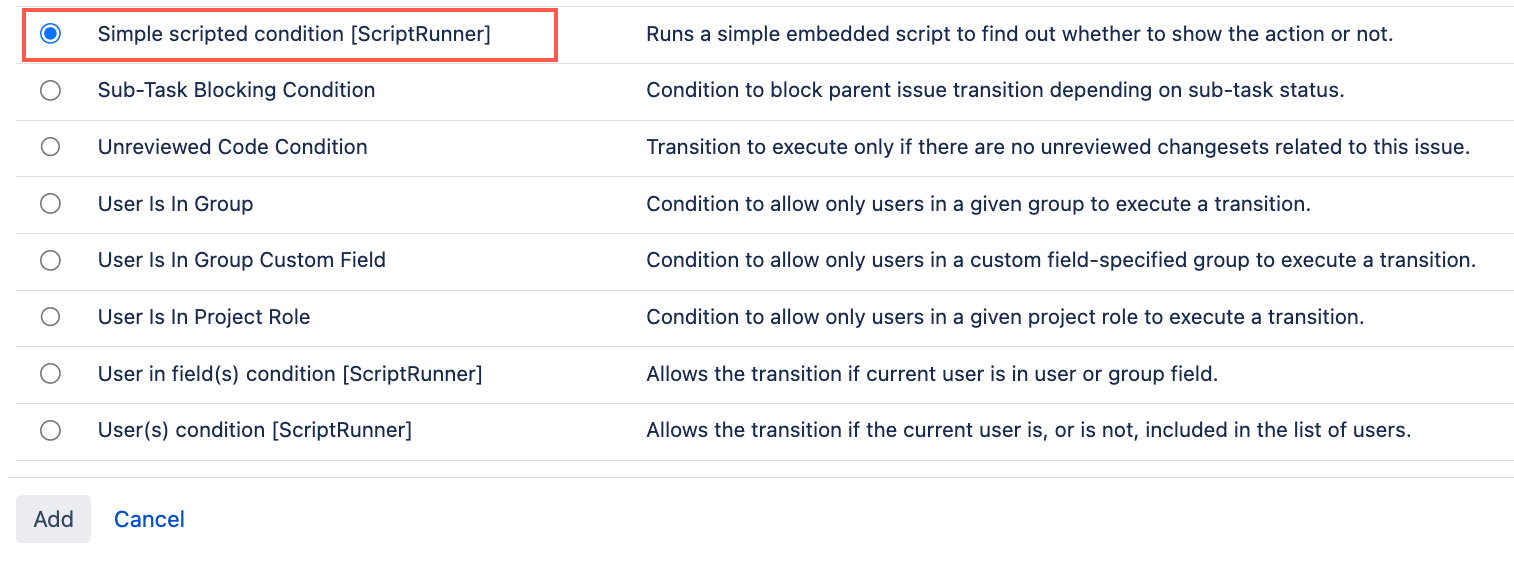
- Select Add.
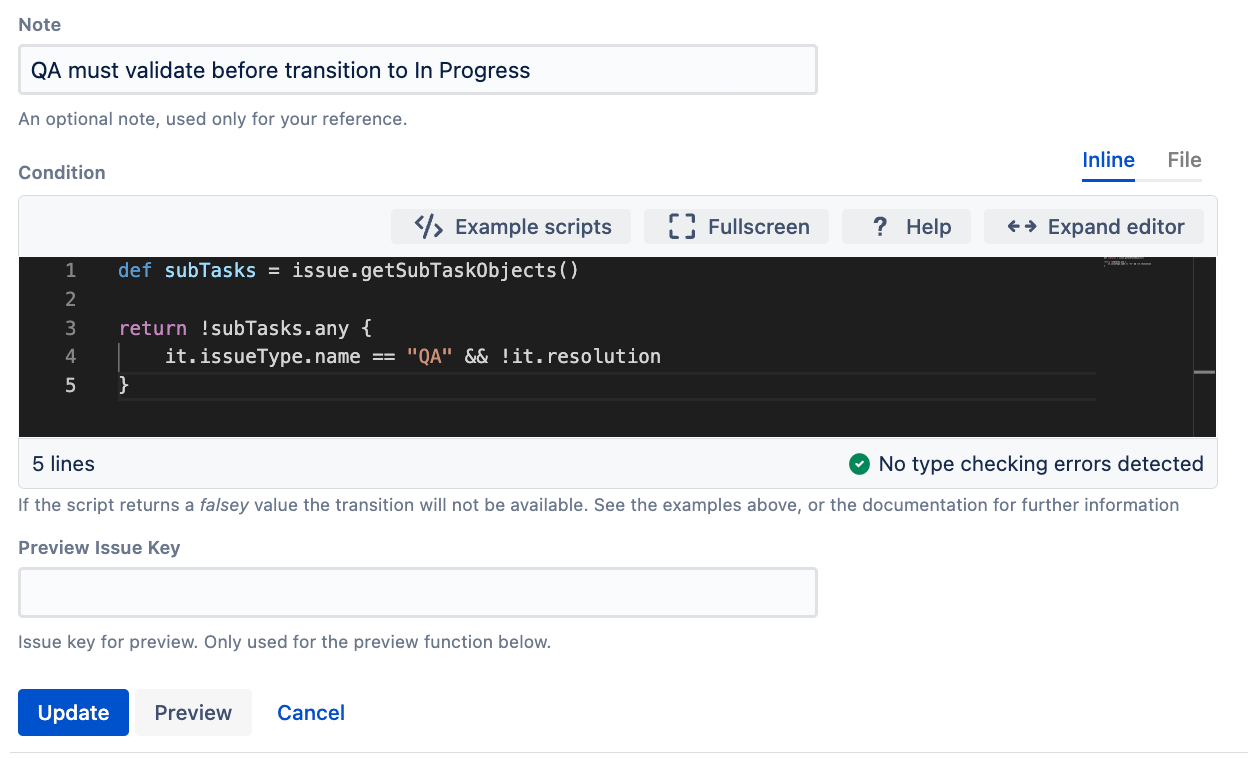
- Optional: Enter a note that describes the condition. In this example we enter
QA must validate before transition to In Progress. Enter the following condition:
groovydef subTasks = issue.getSubTaskObjects() return !subTasks.any { it.issueType.name == "QA" && !it.resolution }- Optional: Enter an issue key to preview if the result evaluates
trueorfalse. Select Update.
Select Publish and choose if you want to save a backup copy of the workflow.
You can now test to see if this workflow condition works.
You could expand on this example and make sure a user can't move the issue directly to Done by adding the Checks if this issue has been in a status previously condition.
All linked issues must be resolved - Simple scripted condition
Before you start this example, make sure you have a suitable workflow that includes a transition from In Progress to Done or similar.
In addition, when issues in this project are transitioned to Done, make sure the Resolution automatically sets to the required state (in this case Done) using a post-function. This post-function is normally already set in most sample project workflows; see the Jira Knowledge Base article on Resolutions for more information.
Great Adventure is having problems with issues being marked as Done when they still have other issues, linked as blockers, that are still In Progress. If an issue is blocked by any other issue, Great Adventure want to make sure that the issue with blockers cannot be transitioned to Done until all blockers are resolved. As this is a more specific requirement Great Adventure need to use a Simple scripted condition instead of the All sub-tasks must be resolved condition.
- Go to Administration > Issues > Workflows.
- Select Edit on the workflow you want to add a condition to.
- Select the transition to which you wish to add a condition. In this example, we select the transition that leads to Done.
- Under Options, select Conditions.
- On the Transition page, select Add condition.
- Select Simple scripted condition [ScriptRunner].
- Select Add.
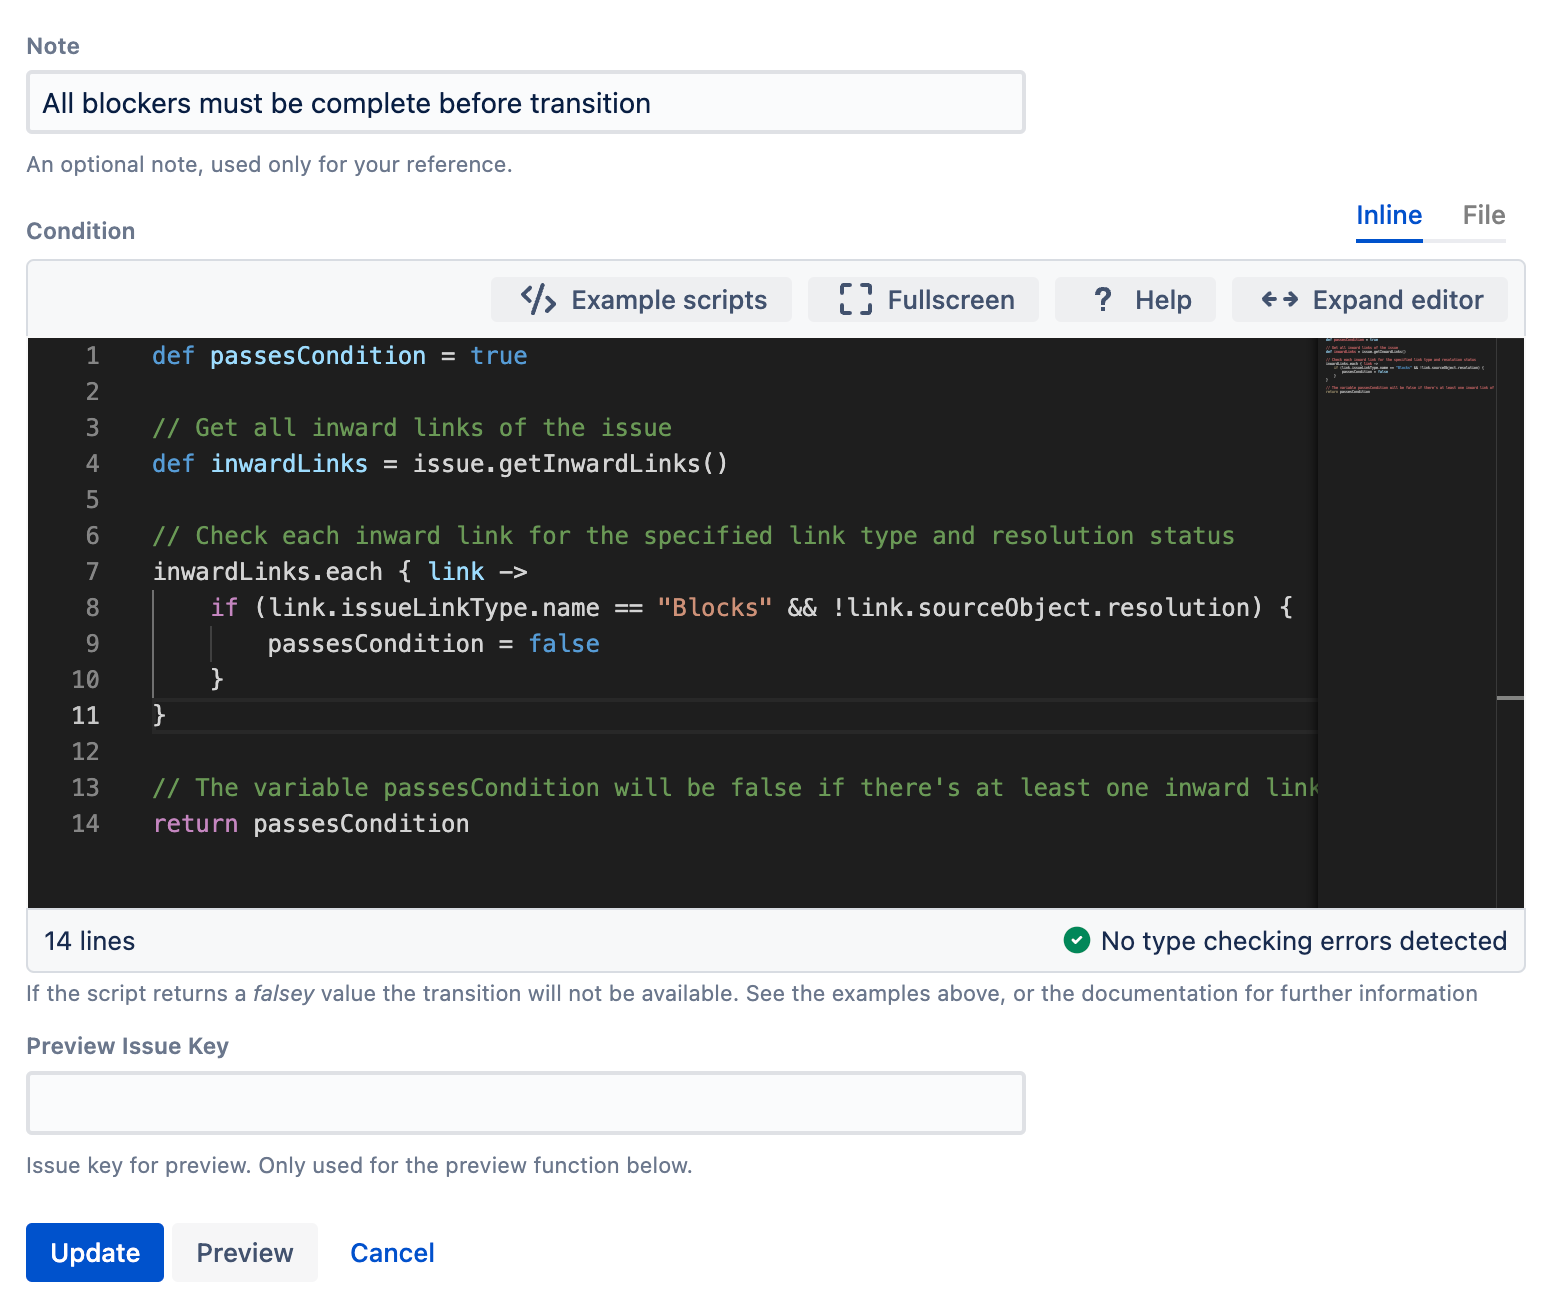
- Optional: Enter a note that describes the condition. In this example we enter
All blockers must be complete before transition. Enter the following condition:
groovydef passesCondition = true

// Get all inward links of the issue
def inwardLinks = issue.getInwardLinks()

// Check each inward link for the specified link type and resolution status
inwardLinks.each { link ->
    if (link.issueLinkType.name == "Blocks" && !link.sourceObject.resolution) {
        passesCondition = false
    }
}

// The variable passesCondition will be false if there's at least one inward link of type "Blocks" with an unresolved source issue
return passesCondition
Because this is a custom script, you can change items. For example, you could change the linkType to
DuplicatesorCausesto define a different relationship.- Optional: Enter an issue key to preview if the result evaluates
trueorfalse. Select Update.
Select Publish and choose if you want to save a backup copy of the workflow.
You can now test to see if this workflow condition works.