
Create a Sub-task
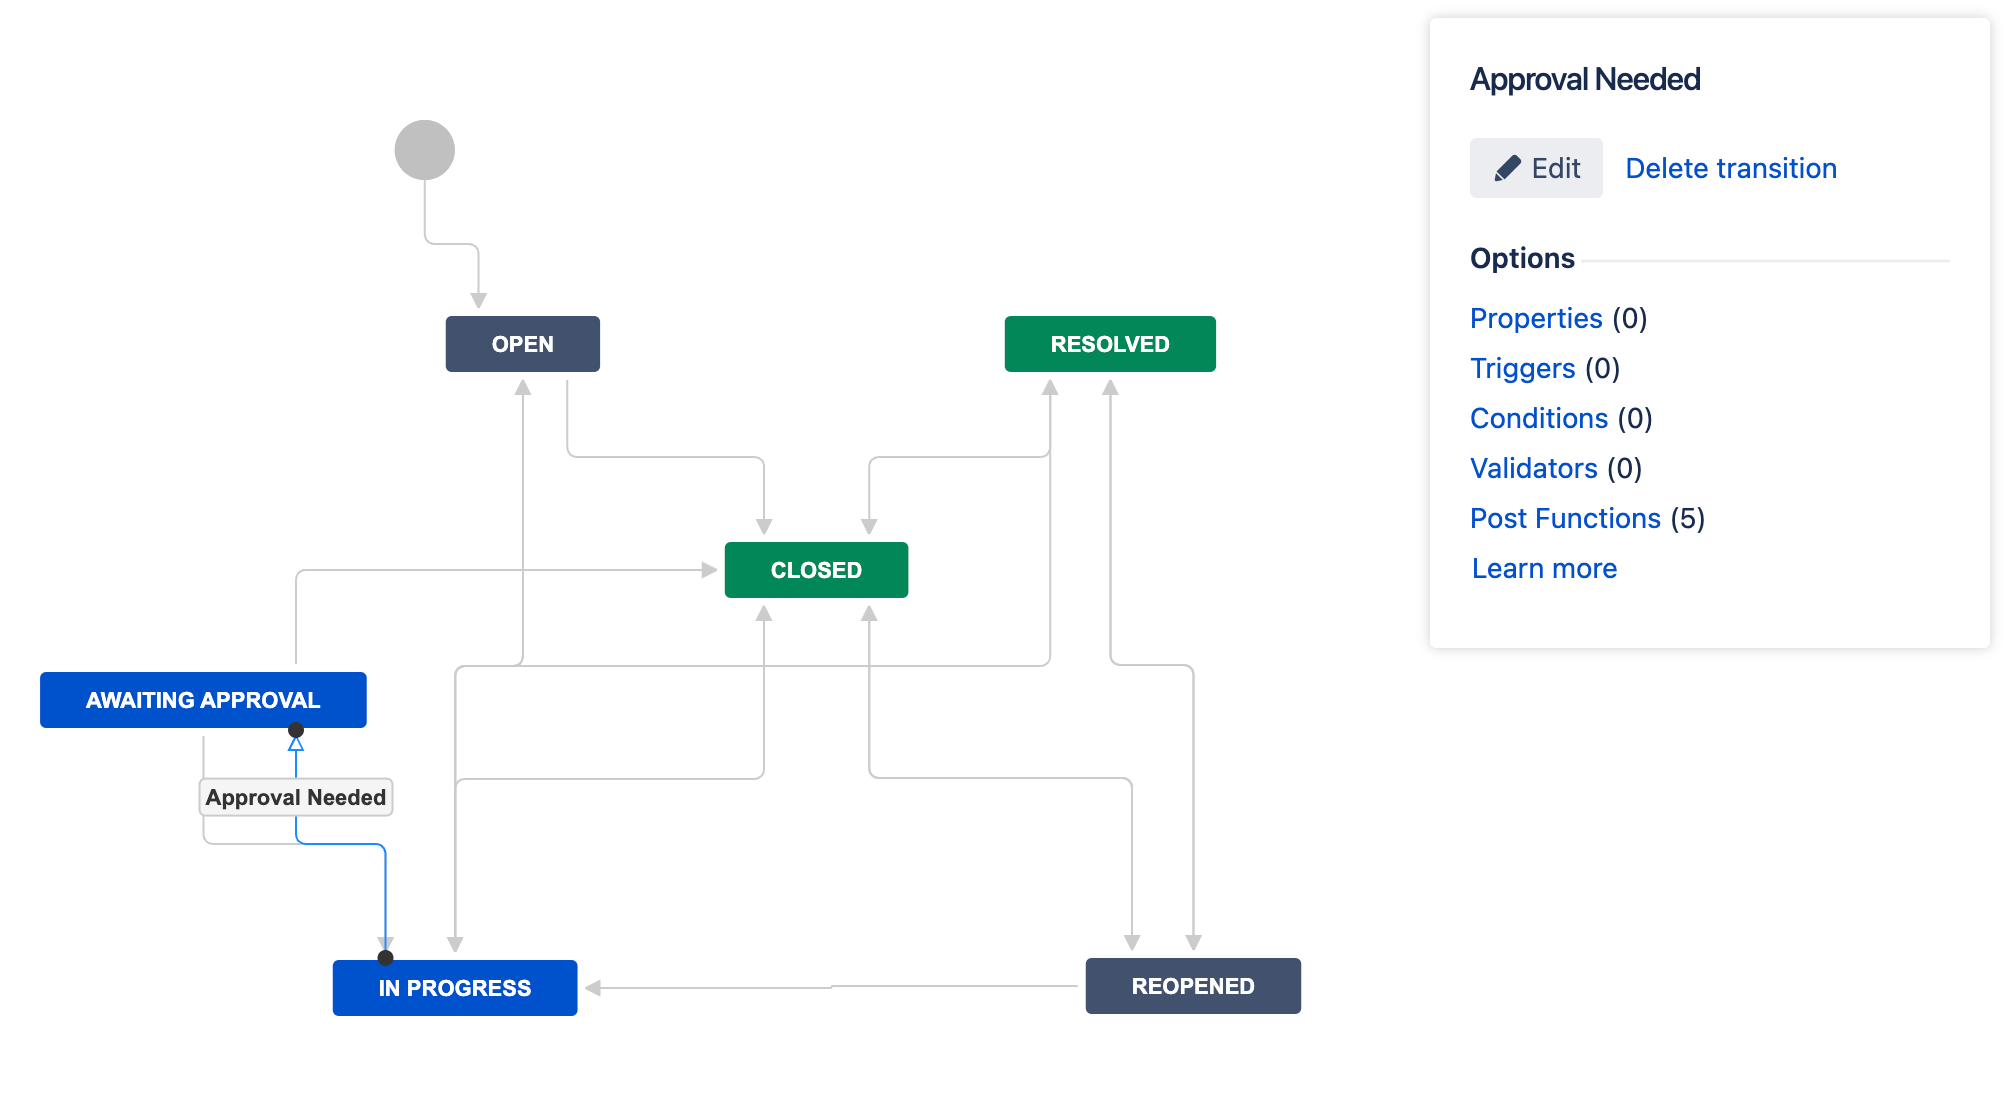
The Create a sub-task post function creates a sub-task after an issue has been transitioned. For example, you have an issue type that requires approval from three different departments. You could use this post function multiple times to automatically create three sub-tasks, one for each approval, whenever an issue is moved through an Approval Required transition (or equivalent). If you want to further automate your workflow, you could also use the Transition Parent when all Sub-tasks are Resolved post function.
Subtask action
If a parent issue already has a matching sub-task, you can use the Subtask Action option to update the action of the matching sub-task rather than creating a new sub-task. For example, a department must approve the parent issue and the sub-task represents their approval. The department rejects the approval. They move the parent issue back a step in the workflow so more work can be done, and move the sub-task to Done. When the parent issue is ready for approval again and moved through the approval transition, instead of making a new sub-task for this department to complete, the sub-task previously marked as Done (or equivalent) is reopened.
If the Subtask Action is left blank a new sub-task is created every time the parent issue is moved through the selected transition.
Use this post function
- Go to Administration > Issues > Workflows.
- Select Edit on the workflow you want to add this post function to.
- Select the transition you want to add this post function to.
- Under Options, select Post Functions.
- On the Transition page, select Add post function.
- Select Create a sub-task.
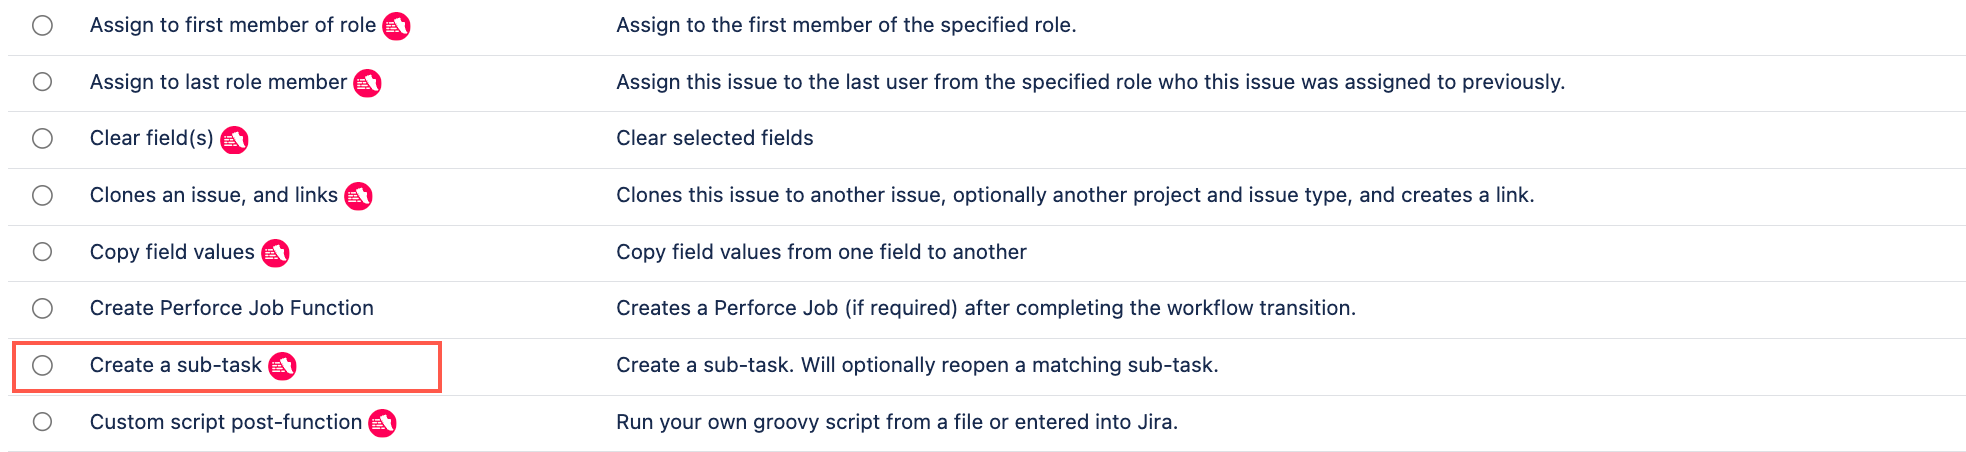
- Select Add.
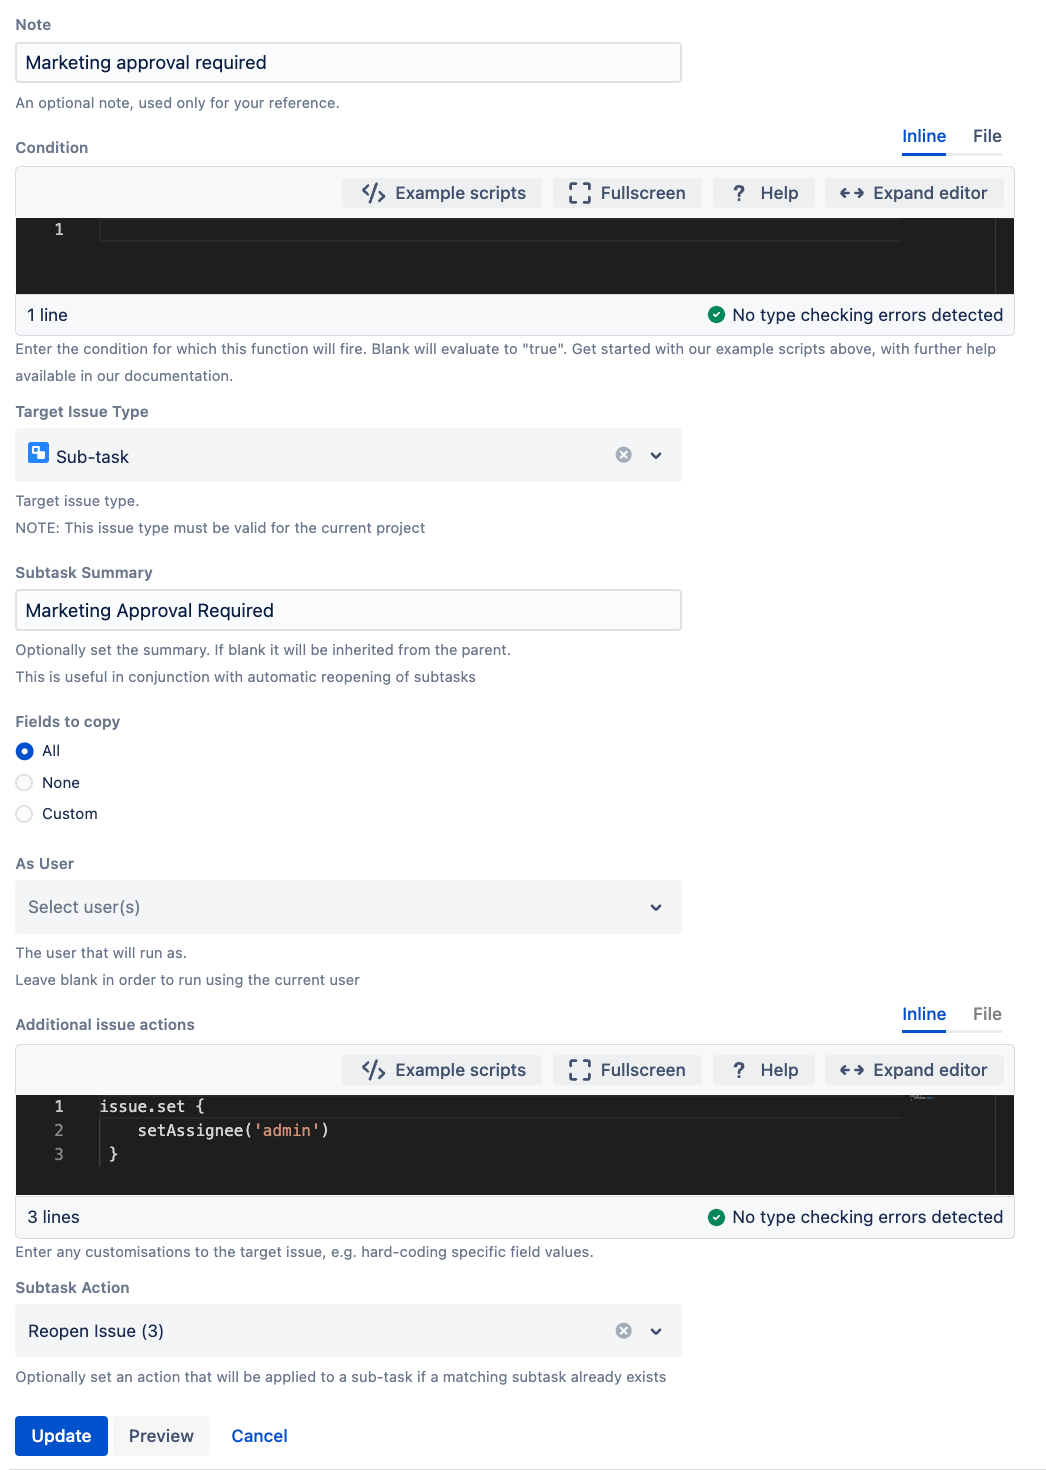
- Optional: Enter a note that describes the post function (this note is for your reference when viewing all post functions).
- Optional: Enter a condition.
- Select a target issue type.
- Optional: enter a sub-task summary. Leave this option blank if you want the sub-task to inherit the summary from the parent task.
- Choose which fields you want to copy to the sub-task—All, None, or Custom.
- Enter a user you want this post function to run as. Leave this option blank if you want this post function to run as the current logged in user performing the transition.
Optional: Enter any additional actions you want to occur.
To disable or selectively copy links, use the same method as described in the Clones an Issue and Links documentation.
- Optional: Set a sub-task action. If a matching sub-task already exists, this is the transition you want to move it through. Leave this option blank if you want to create a new sub-task every time the parent issue is moved through the selected transition.
- Select Preview to see an overview of the change.
- Select Add.
If applicable, reorder your new post functions using the arrow icons on the right of the function (they can only move one line at a time).
This post-function should be placed after the Re-index an issue to keep indexes in sync with the database post function. If you don’t do this, the parent issue will not be indexed correctly. Check out our documentation on Post function order for more information.
Select Publish and choose if you want to save a backup copy of the workflow.
Test your post function
You can now test to see if this post function works.