Create Constrained Issue
A special case of a web item creates a menu item that will open the Create Issue dialog with a predefined project, and optionally issue type.
This can be useful to workflow designers. Imagine a workflow where at one transition the user is required to create a new linked issue. Typically this is done by having a self or any to any transition which will create the linked issue with a post-function. Then the user is required to edit the linked issue further.This built-in script removes this action from the workflow, and allows the linked issue to be edited in the create step.
Let’s go through an example:
In this example we set up a web item that will open the Create Issue dialog to create a linked issue in another project
- Create the
tools-menu-additionalweb section inopsbar-operations, as described in steps 1-2 on the Web Section page. - From ScriptRunner go to Fragments > Create Fragment > Constrained create issue dialog.
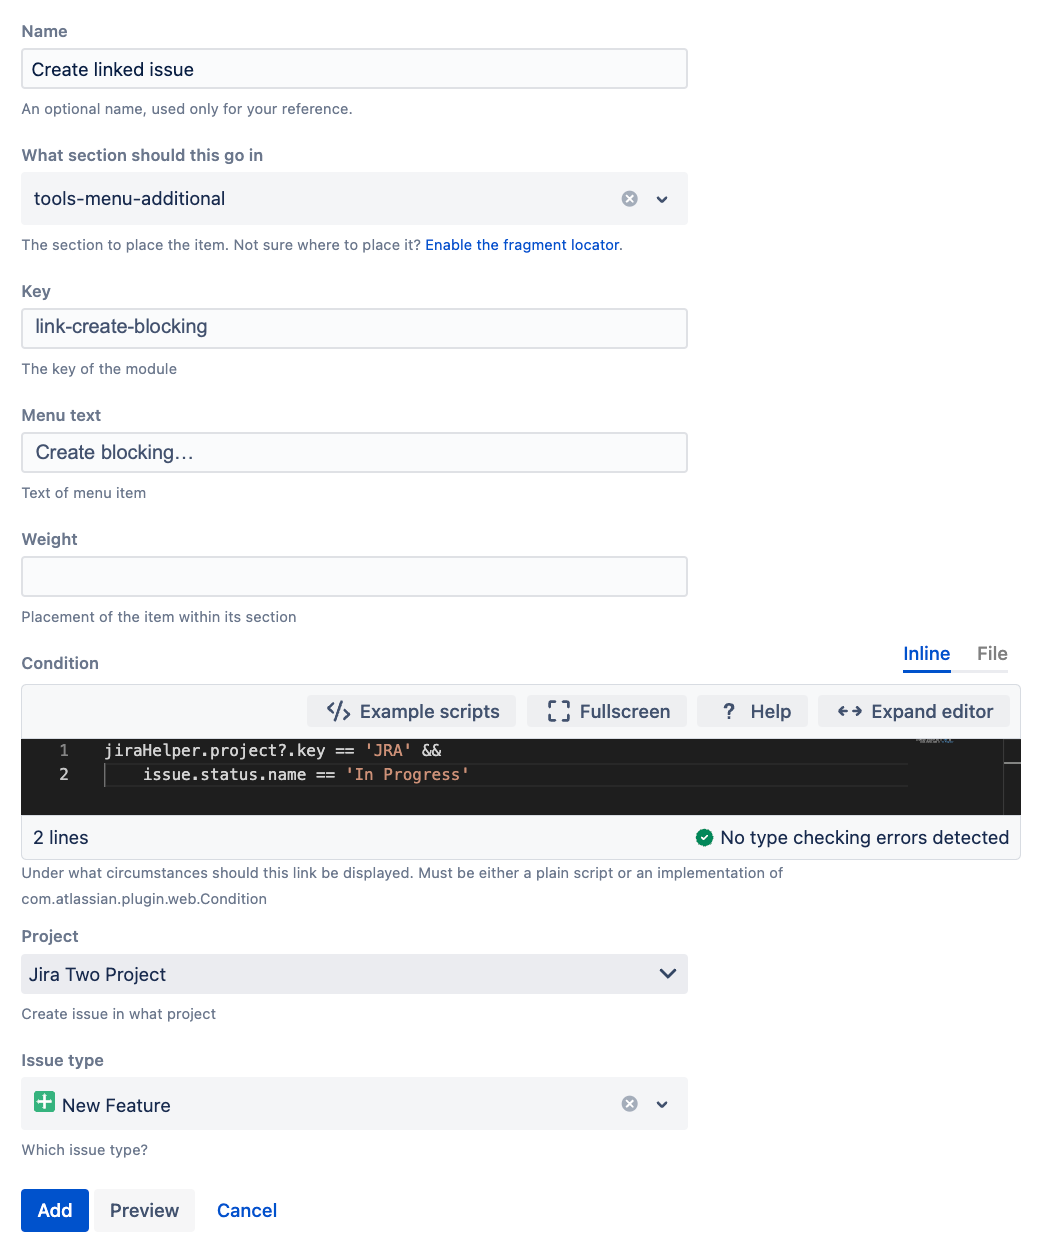
- Fill out the form as follows:
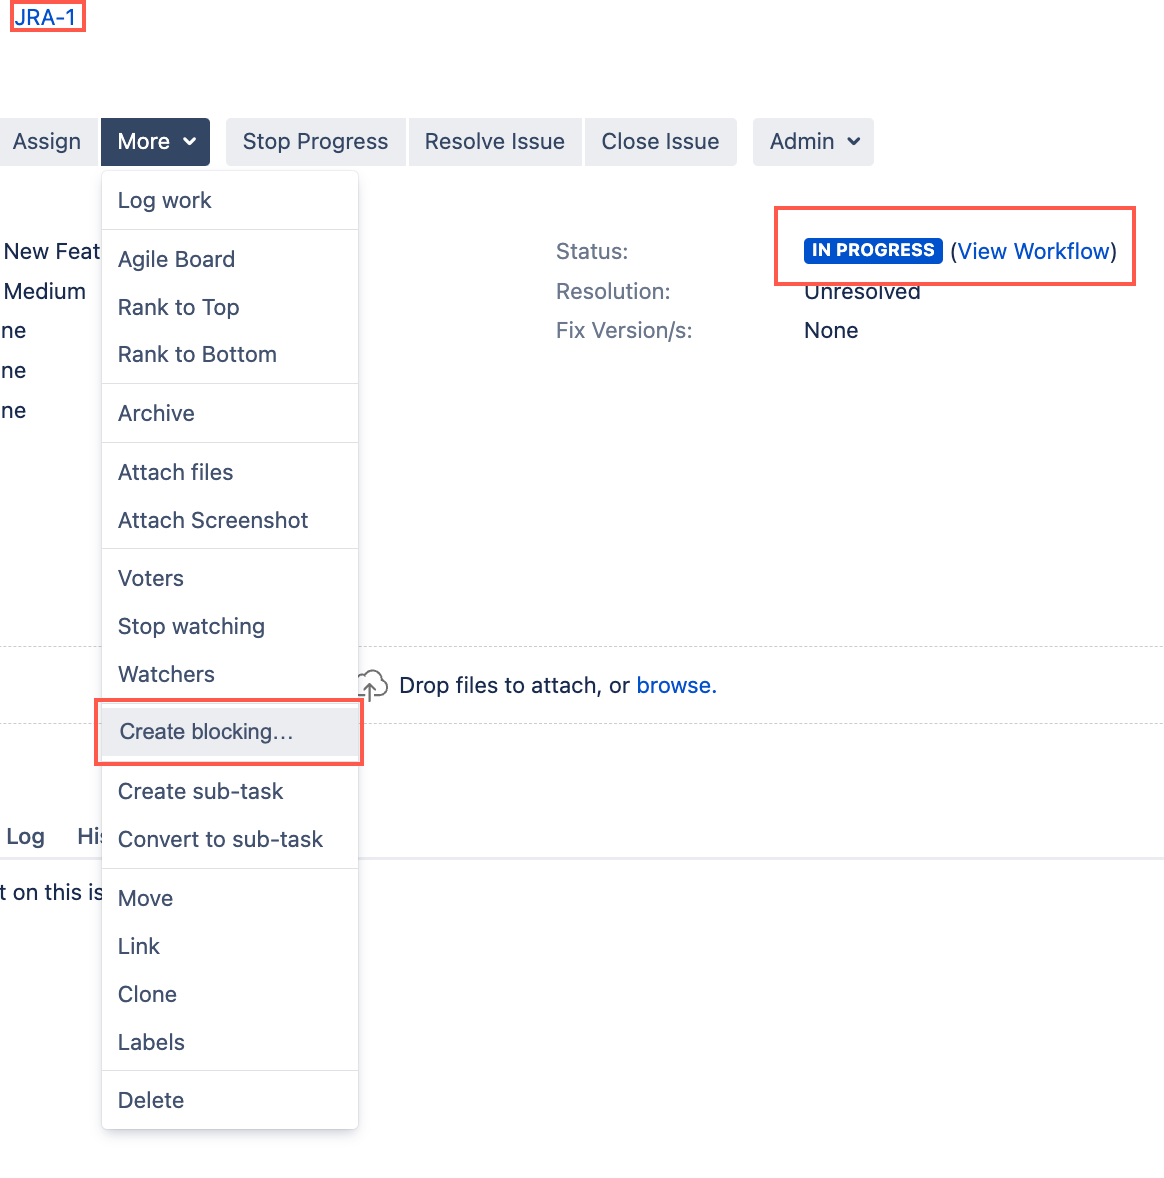
Make sure you add the condition, which says the link will be displayed only for one project, and a particular status. If the condition is fulfilled Create blocking... appears:
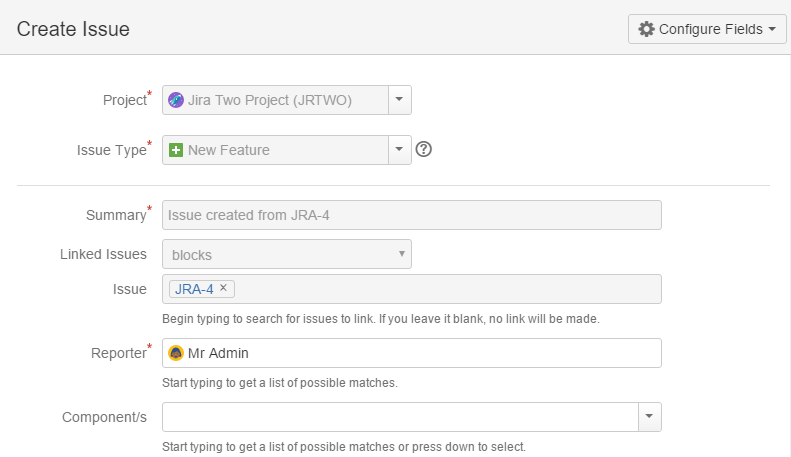
Selecting the link shows the Create Issue dialog with the selected project and issue type pre-filled:The problem here is that the issue won’t be linked automatically. The solution is integration with Behaviours, as described below.
Behaviours Integration
A Behaviour is required to pre-fill the Linked Issues field. We don’t want this behaviour to fire on every issue that it’s mapped to though. A behaviour script is able to get some information about how the create issue dialog was opened, which is the ID of the web item.
There are two API methods, that are available to all behaviours scripts, which facilitate this:
getBehaviourContextId() gets the ID of the web item that was clicked. In the example above it would be link-create-blocking.getContextIssueId() that gets the ID of the issue that was on the screen when the item was clicked.
getBehaviourContextId() and getContextIssueId() only work for constrained issue web items. These two APIs will return a null value if used with other web items
With these we can create a behaviour, with the following initializer function.
groovyimport com.atlassian.jira.component.ComponentAccessor

def issueManager = ComponentAccessor.getIssueManager()

if (getBehaviourContextId() == "link-create-blocking") {
    getFieldById("project-field").setReadOnly(true)
    getFieldById("issuetype-field").setReadOnly(true)

    def contextIssue = issueManager.getIssueObject(getContextIssueId())

    getFieldById("summary").setFormValue("Issue created from ${contextIssue.key}").setReadOnly(true)
    getFieldById("issuelinks-linktype").setFormValue("blocks").setReadOnly(true)
    getFieldById("issuelinks-issues").setFormValue(contextIssue.key).setReadOnly(true)
}
The behaviour must be mapped to the target project, but because you are checking the context ID, it won’t be fired when an issue is created in this project from the normal Create button.
This behaviour sets the link direction, and the linked issue. It also sets the summary and makes several fields read-only as you can see:
Creating a Sub-task
You may wish to create a sub-task of the current issue (or any other issue) at a particular stage.
We currently don’t have support via the UI for this (SRJIRA-2162). But you can do it with a raw XML fragment, with the caveat that the form will open in full-screen mode.
Reminder, pressing the Preview button generates the XML for any web fragment, which you can modify and submit via the raw xml module built-in script.
The XML to use is for example:
xml<web-item key='link-create-subtask' name='ScriptRunner generated web item - create-subtask' section='operations-operations' weight='1'>
    <label>Create Linked Subbie</label>
    <link linkId='link-create-constrained-subtask'>/jira/secure/CreateSubTaskIssue.jspa?parentIssueId=${issue.id}&pid=${issue.projectObject.id}&issuetype=10004</link>
</web-item>
Set the issue type ID of the sub-task, and set the context path correctly. In the case of the example above it is /jira.
Further Community Examples:
Using a context provider ( Atlassian Answers)


