HAPI Examples
To help you get started using HAPI effectively in your Jira instance, we have provided several use cases/examples below that incorporate HAPI in the scripts. You can use these examples to explore and customize your Jira instance:
Update Parent With Subtask Count
As an engineer working on larger tasks, it is better for tracking and delegation purposes to have these broken down into multiple subtasks. To have an accurate overview, it's crucial to know how many subtasks a parent issue has. Whenever a new subtask is created, updated, or deleted, the parent issue should reflect the current count of its subtasks.
HAPI Solution
Create a custom listener and use HAPI.
This script automates the task of updating the parent issue with the number count of its subtasks, removing the need to manually check and update it every time.
With HAPI, we've made it easy for you to update Issues. This means the script for the following use case has fewer imports, is much shorter, and is easier to adapt to your own instance if desired.
- Navigate to Apps > ScriptRunner.
- Open Script Listeners > Create Listener.
- Enter a name for the listener in Script Listener Called.
- Enable the Script Listener.
- Select any of the Issue Events (Issue Updated, Issue Deleted, Issue Created) under On these events.
- Select the projects you want the listener to be active for; you can select All Projects for this example.
- Enter a condition on which the code will run.
- Choose from either ScriptRunner Add-On User or Current User as the user you wish to run the listener from the Run code as: drop-down options.
- Write the following script in the Code to run: field. This code is executed when the Evaluate Condition is true.groovy
def eventIssue = Issues.getByKey(issue.key as String) def subTasks= eventIssue.getSubTaskObjects() def subTaskCount = subTasks.size() println("Total subtasks for ${eventIssue.getKey()}: ${subTaskCount}") eventIssue.update { setCustomFieldValue('Subtask Count', subTaskCount) } Click Save. You can test your script using the Save button, which will execute the script and return the results.
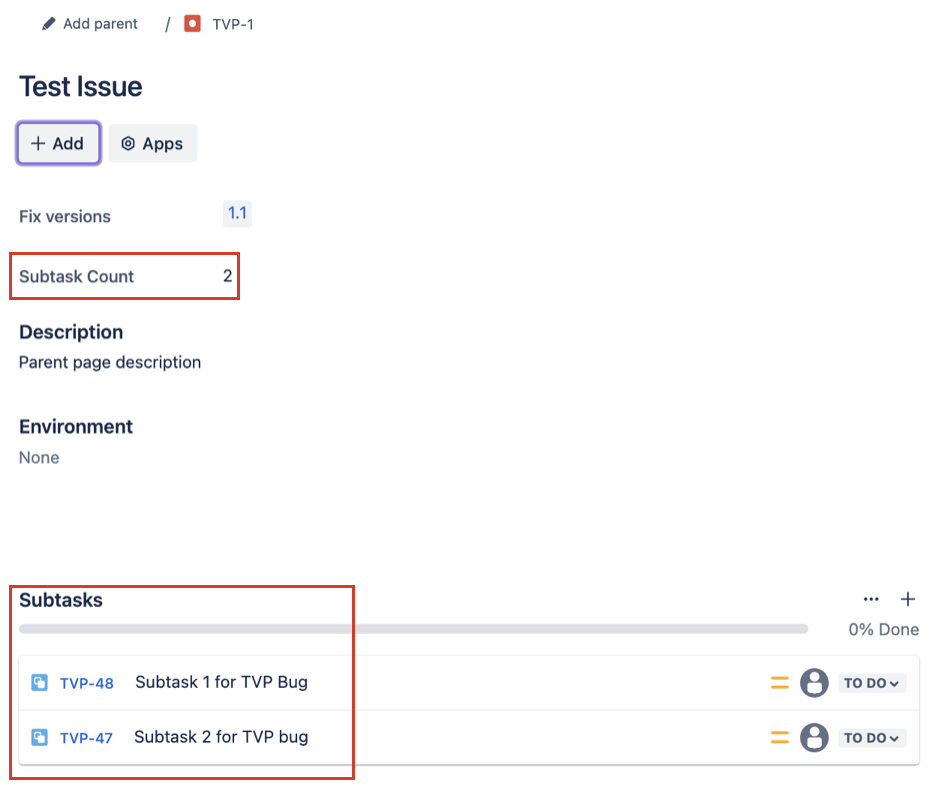
Test
To verify this script:
- Create a Subtask: Add a new subtask to any of your issues in Jira.
- Ensure Field Exists: Confirm that you have a numerical custom field named Subtask Count in your Jira instance. If the field has a different name, update the script accordingly before testing.
Your parent ticket will be updated with the subtask Count.
Add Comment On Issue Created
When a support ticket is raised, we often want to automatically add a comment to the issue, thanking the reporter and providing helpful information such as response timelines, documentation links, and work timings. This ensures better communication and sets clear expectations for the reporter.
HAPI Solution
Create a custom listener and use HAPI.
This script demonstrates how to automatically add a comment to a newly created issue in Jira, improving communication by providing relevant information right away. Using HAPI, Update Issues has been made simple and efficient.
- Navigate to Apps > ScriptRunner.
- Open Script Listeners > Create Listener.
- Enter a name for the listener in Script Listener Called.
- Enable the Script Listener.
- Select the Issue Created under On these events.
- Select the projects you want the listener to be active for; you can select All Projects for this example.
- Enter a condition on which the code will run.
- Choose from either ScriptRunner Add-On User or Current User as the user you wish to run the listener from the Run code as: drop-down options.
- Write the following script in the Code to run: field. This code is executed when the Evaluate Condition is true.groovy
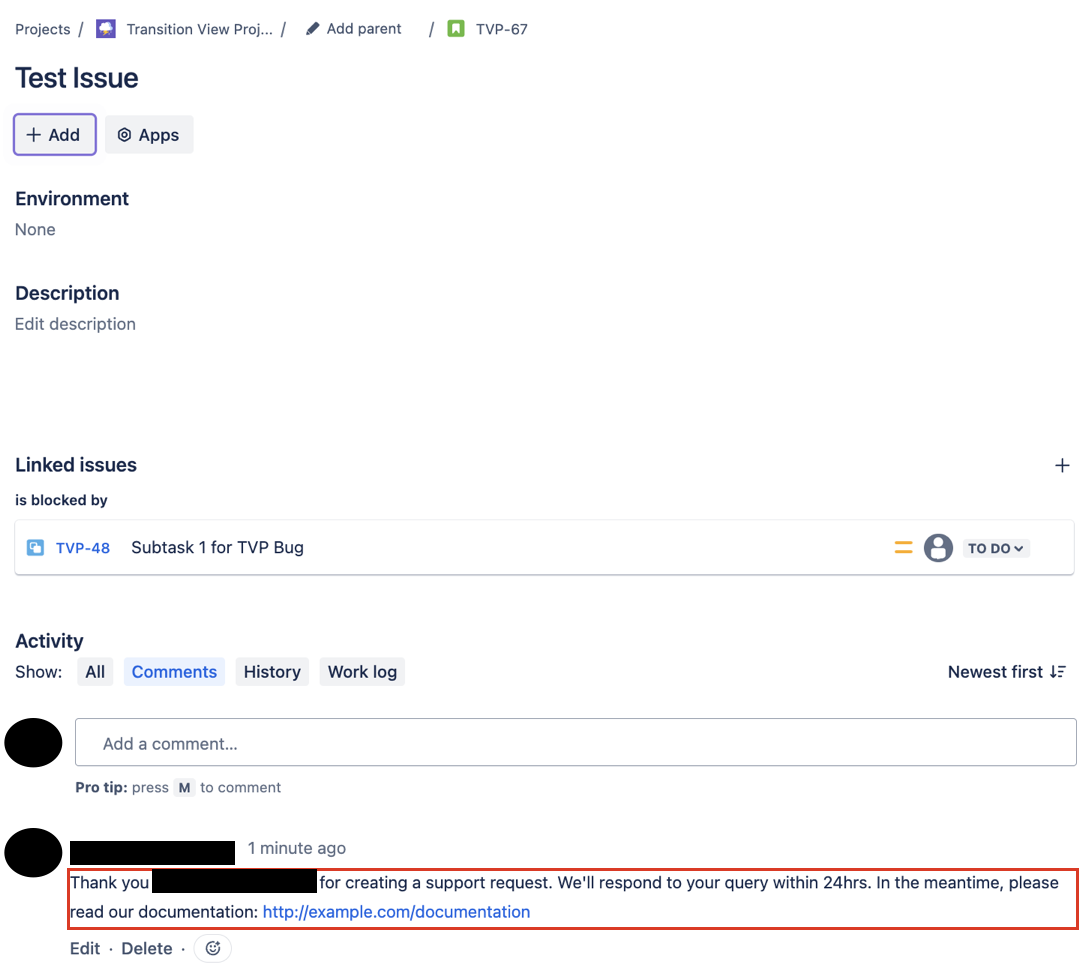
def eventIssue = Issues.getByKey(issue.key as String) def author = eventIssue.getCreator().displayName eventIssue.addComment("""Thank you ${author} for creating a support request. We'll respond to your query within 24hrs. In the meantime, please read our documentation: http://example.com/documentation""") Click Save. You can test your script using the Save button, which will execute the script and return the results.
Test
To test this script you need to create a new ticket, and it will automatically be updated with the added comment.
Bulk Update Multiple Issue Resolutions
As a Jira admin, I want to change the resolution of a large number of issues that were mislabelled. I can use this script to update the resolution of all these issues to their corresponding one ("Duplicate").
HAPI Solution
Run this HAPI script using the script console.
This script automates the process of bulk updating the resolution of all issues returned from the JQL search which meet the specified conditions.
- Navigate to Apps > ScriptRunner.
- Open Script Console.
- Write the following script in the code editor:groovy
// The Name of the resolution to be set def resolutionName = 'Cannot Reproduce' // Get all issues matching the specified JQL Query Issues.search("project = TEST AND issueType = Bug").each { issue -> issue.transition('Done') { setResolution(resolutionName) } logger.info("Resolution set to ${resolutionName} for the ${issue.key} issue") } - Click Run.
Test
The script updates the resolution of the issue.
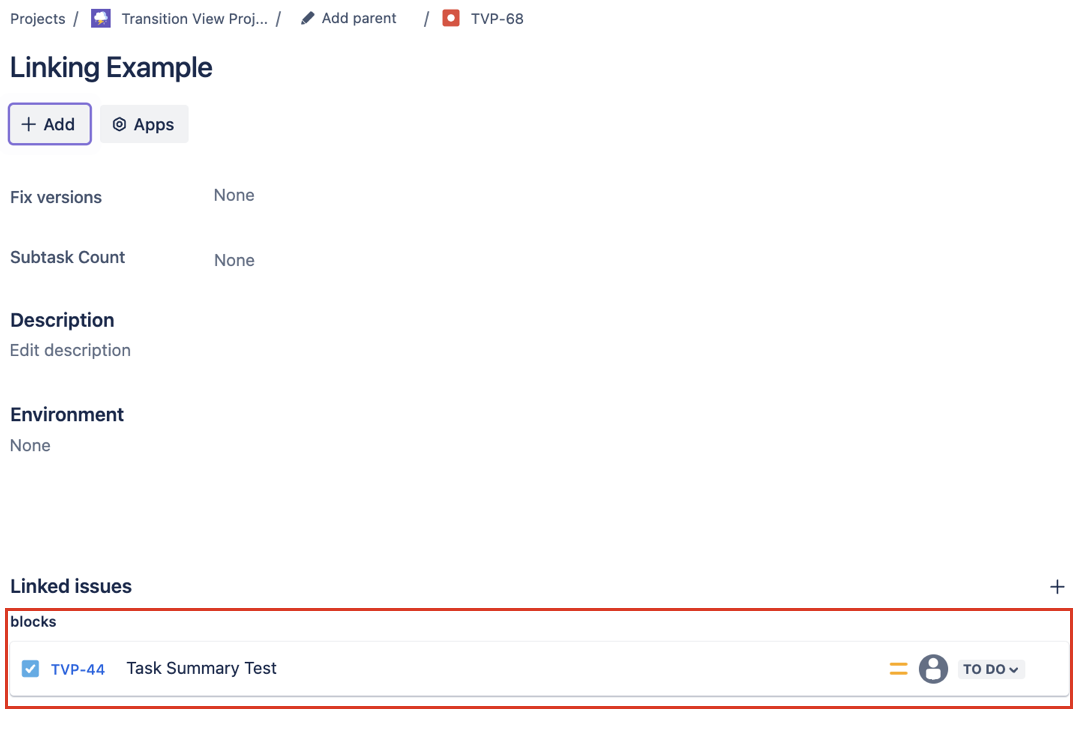
Add or Update the Issue Link for an Issue in Jira Cloud
As a Jira admin, I want to bulk link issues to keep track of my related work for one of my projects. I can do this quickly and efficiently with this script.
HAPI Solution
Run this HAPI script using the script console.
Linking issues means you can create an association between two existing issues. With this script, you can bulk link a set of issues.
- Navigate to Apps > ScriptRunner.
- Open Script Console.
- Write the following script in the code editor:groovy
// Specify the source issue final sourceIssueKey = "TVP-68" // Specify the target issue final targetIssueKey = "TVP-44" // Specify the link direction name to use final linkType = "blocks" // Create the issue link between both issues Issues.getByKey(sourceIssueKey).link(linkType, targetIssueKey) - Click Run.
Test