
Manage Labels Job
Use the Manage Labels job to schedule routine label management. You can manage labels on new pages and spaces, which helps your users find relevant content.
Follow these steps to set up a Manage Labels job.
- Navigate to General Configuration > ScriptRunner > Jobs.
- Select Create Job.
- Select Manage Labels Job.
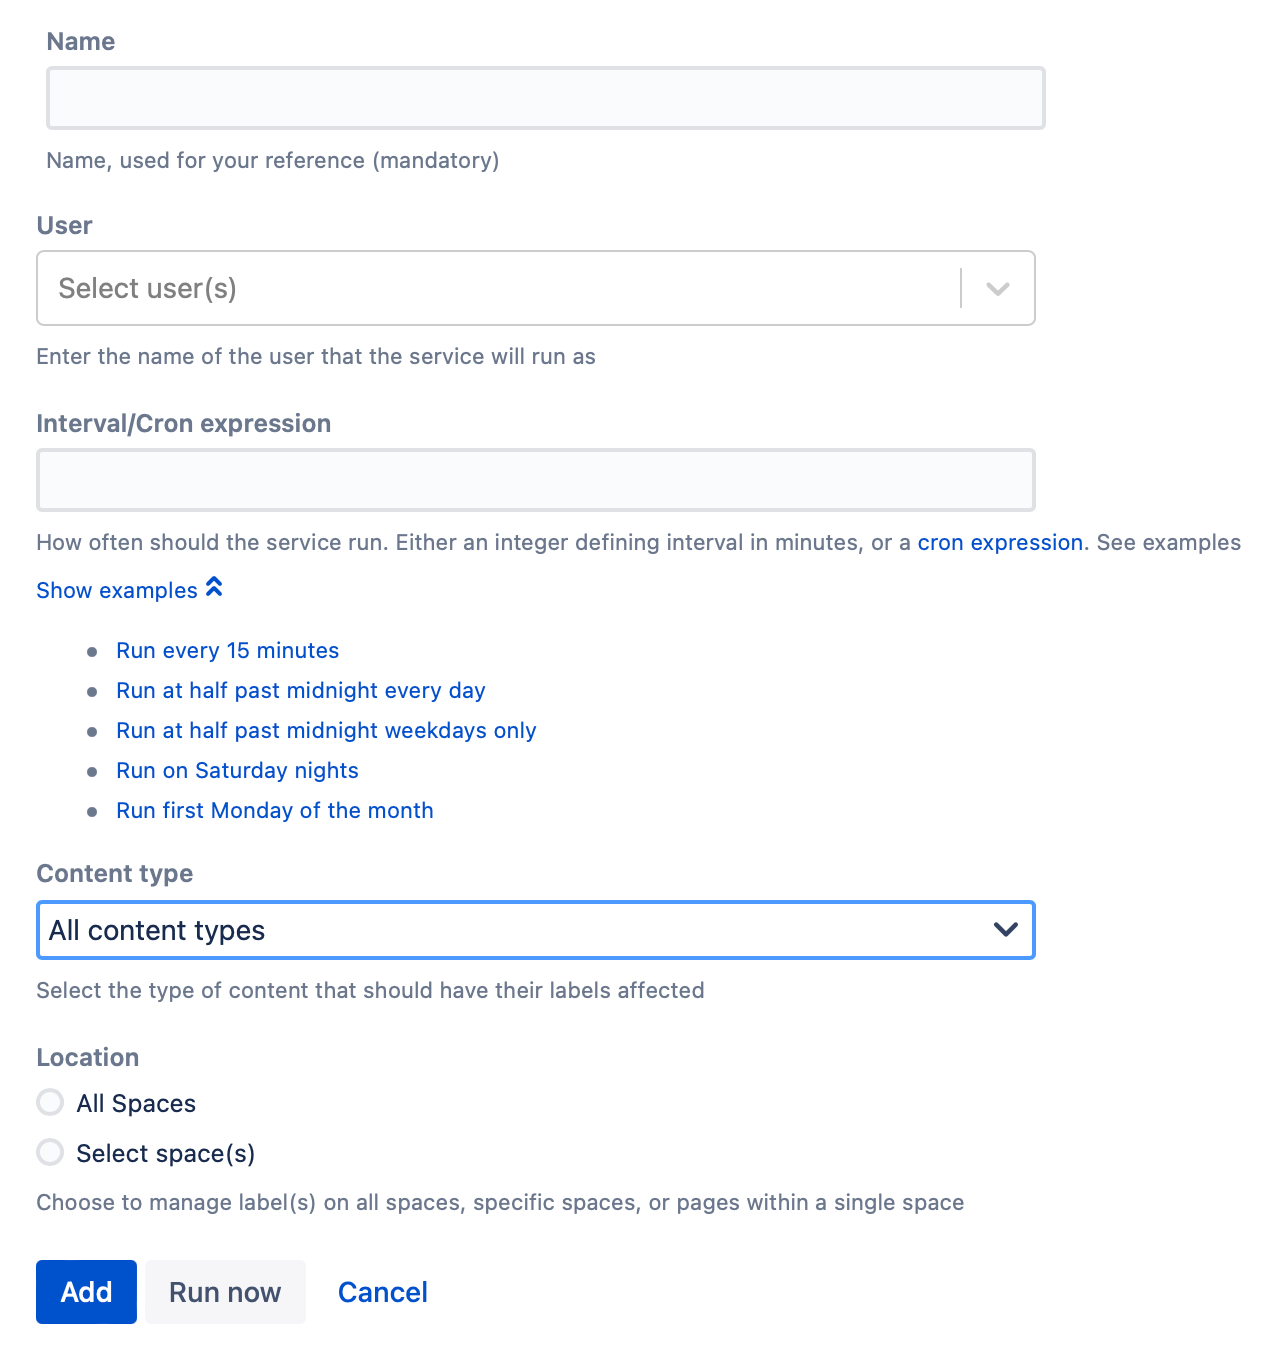
- Enter a Name for your reference.
Select the User.
When this job runs, this user is entered as who made the change.You can create a user to assign for jobs like this. For example, ScriptRunner Bot User.
Enter an Interval/Cron Expression.
Determine how often you want this job to run. You can select Show Examples to use an included expression or enter your own. You have two options for this field:- If you want it to run on a schedule, enter the minutes. For example, 30 for every thirty minutes or 120 for every two hours.
- If you want it to run at a certain time or day, enter a cron expression.
- If you want it to run on a schedule, enter the minutes. For example, 30 for every thirty minutes or 120 for every two hours.
- Choose the type of content that should have labels affected. Your choices are:
- All Content Types
- Page
- Blog
- Attachment
- Choose the Location where you want this job to work.
Your options are:- All Spaces
- Select Space(s)
If you choose Select Space(s), the Target Space(s) fields appear, where you can select what space and pages you want to work with. Select Page(s) Within a Specific Space
If you choose Selected Space, the Space and Page(s) fields appear, where you can select what space and pages you want to work with.Not available for All Content Types.
- Once you make your selections, you can choose an Action:
- Add Label(s)
- Label(s) appears, where you can enter the labels that you want added to the page.
- Remove Label(s)
- Label(s) appears, where you can enter the labels that you want removed from the page.
- Rename Labels
- Original Name appears, where you enter the old label name that you want to change.
- New Name appears, where you enter the new label name.
- Add Label(s)
- Select Add.
Example
Add a label
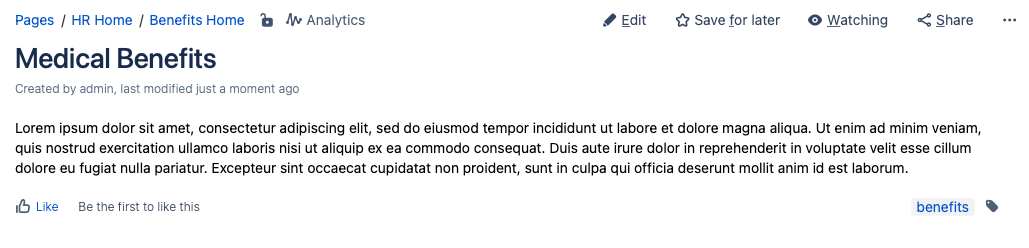
Using this job, you can review and correct labels based on a parent page on a schedule. For example, you could run a weekly review to ensure that a benefits label was added to all pages under the main Benefits page in an HR space.
- The Name Benefits label for HR space describes the job.
- Enter admin for the User.
- Enter 0 0 17 ? * FRI for the Interval/Cron Expression.
- Select Page for Content Type.
- For Location, choose Selected Spaces Within a Specifc Page to be able to pick a specific space.
- For Space, enter HR.
- For Page(s), select Benefits Home to work with all pages updated or created in this section.
- For Action, choose Add Label(s).
- For Label(s), enter benefits to name the label.
- Click Add.

Now, at 5:00 PM on Fridays, the job runs, and pages in the Benefits section of the HR space are checked to make sure the benefits label is there. If it's not, it will be added.
Related Content
- Manage Labels Event Listener
- Manage Labels Confluence Administration
- Manage Labels Space Administration