Manage Labels
Use this script to rename, add, and remove page labels in bulk.
Labels can't contain spaces or uppercase letters. If you want a label to contain more than one word, use an underscore or a hyphen, which are the only two special characters allowed. They can contain a maximum of 255 characters.
Run the script
There are three different ways to run the script, outlined in the following tasks:
Adding Labels
- Navigate to General Configuration > ScriptRunner > Built-In Scripts.
- Select Manage Labels.
- Choose the Content Type from:
- All Content Types
- Page
- Blog
- Attachment
Choose the Location.
- To work with the entire instance, choose All Spaces.
- To work with an entire space, choose Select Spaces, and then choose the Target Space(s).
To work with certain pages in a space, choose Select page(s) within a specific space, and then choose the Space and Page(s).
This is unavailable if you're working with All Content Types in Content Type.
- For Label Action, choose Add Label(s).
Enter the Label Name(s) you would like to add to the selected space and pages.
If All Content Types is selected for Content Type, the action type also applies to attachments on pages.
- Select Run.
You can select Preview instead of Run to view changes before implementing them.
Once you select Run, the Results of the script appear.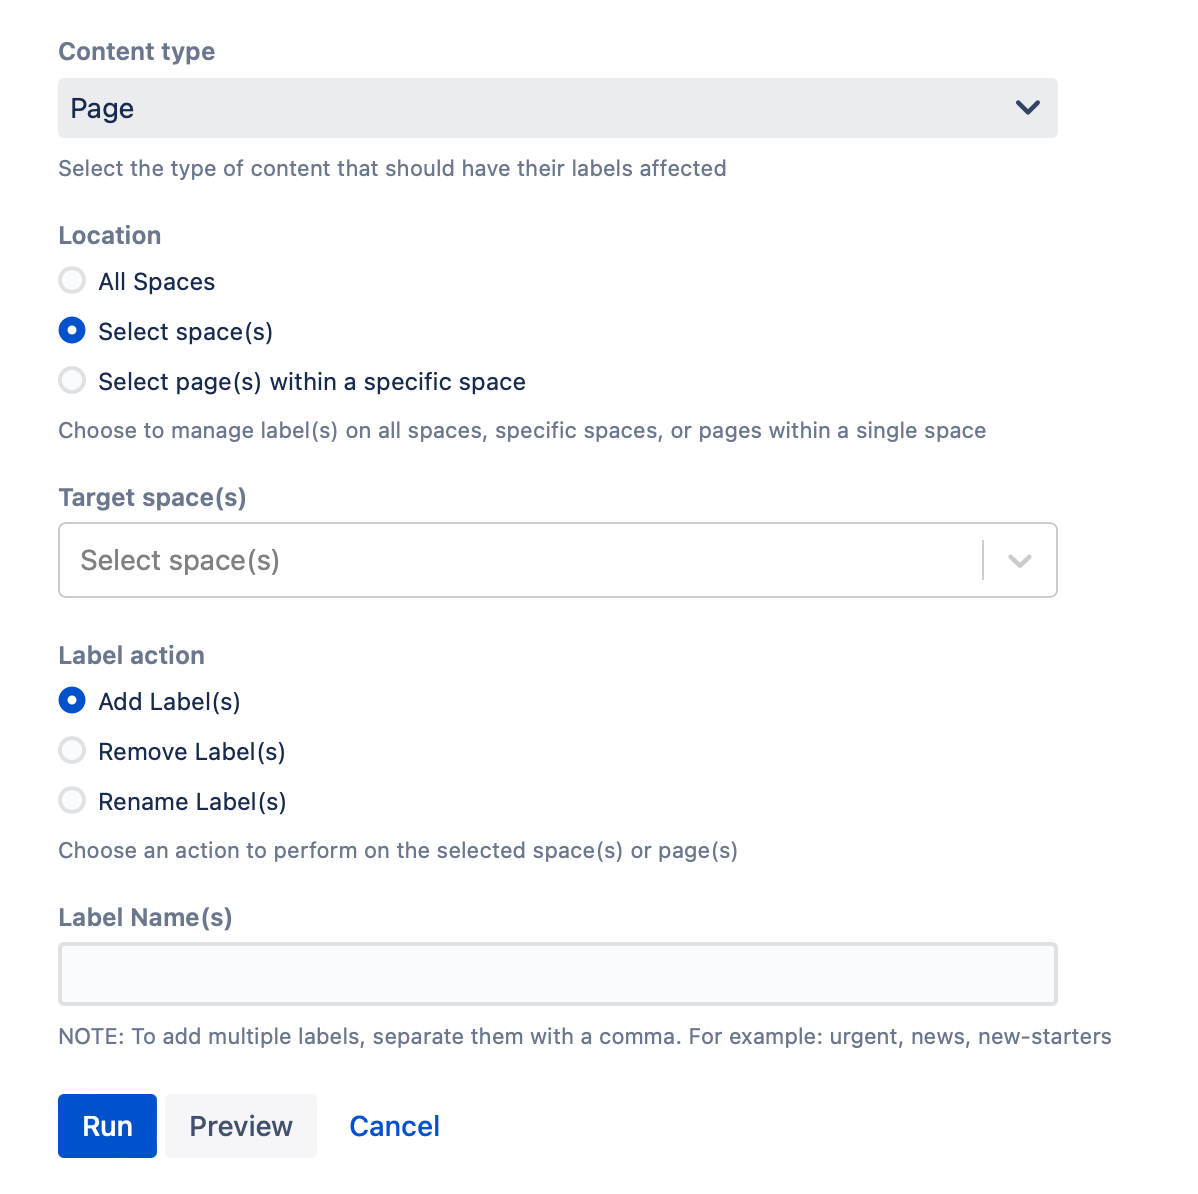
Results
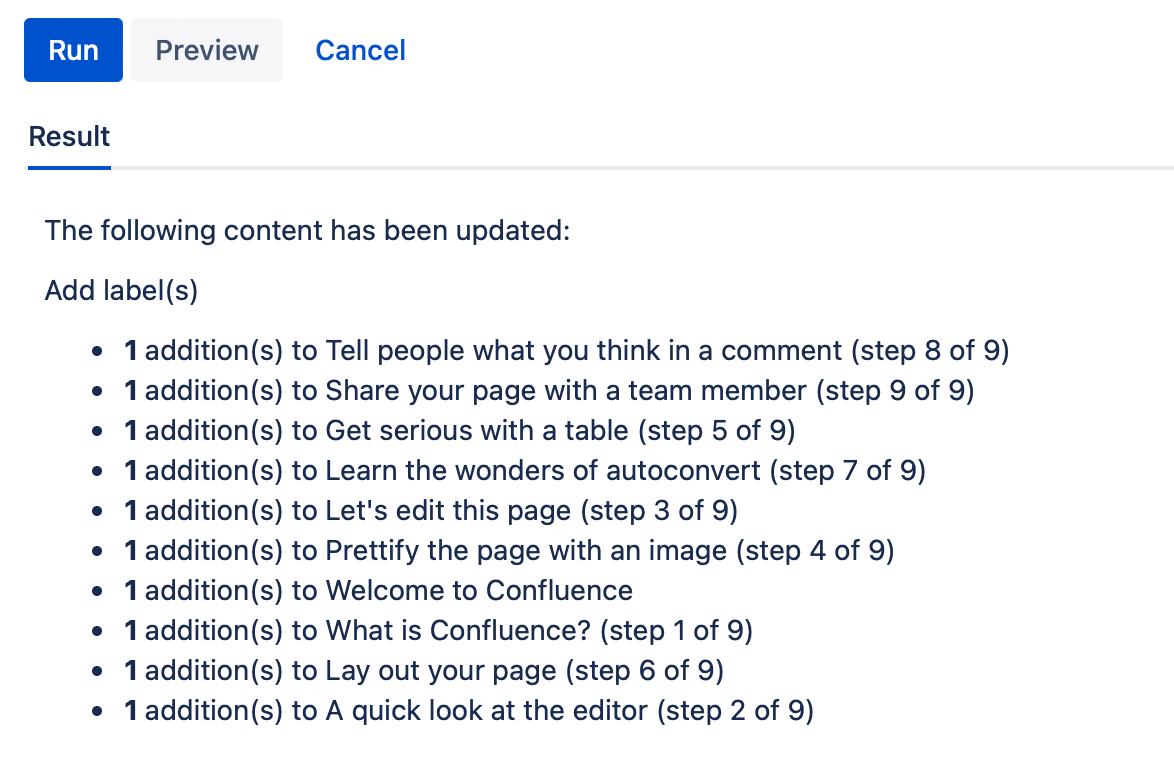
The labels that were added appear on the Results list:
Removing Labels
- Navigate to General Configuration > ScriptRunner > Built-In Scripts.
- Select Manage Labels.
- Choose the Content Type from:
- All Content Types
- Page
- Blog
- Attachment
Select the Location where you want to run the script:
To work with all spaces, choose All Spaces.
To work with certain spaces, choose Select Space(s), and then select the Target Space(s).
To work with certain spaces and pages, choose Select page(s) within a specific space, and then choose the Space and Page(s).
This is unavailable if you're working with All Content Types in Content Type.
- Select Remove Label(s).
Enter the Label Name(s) you would like to be removed from selected or all spaces.
- Select Run.
You can select Preview instead of Run to view changes before implementing them.
Once you select Run, the Results of the script appear.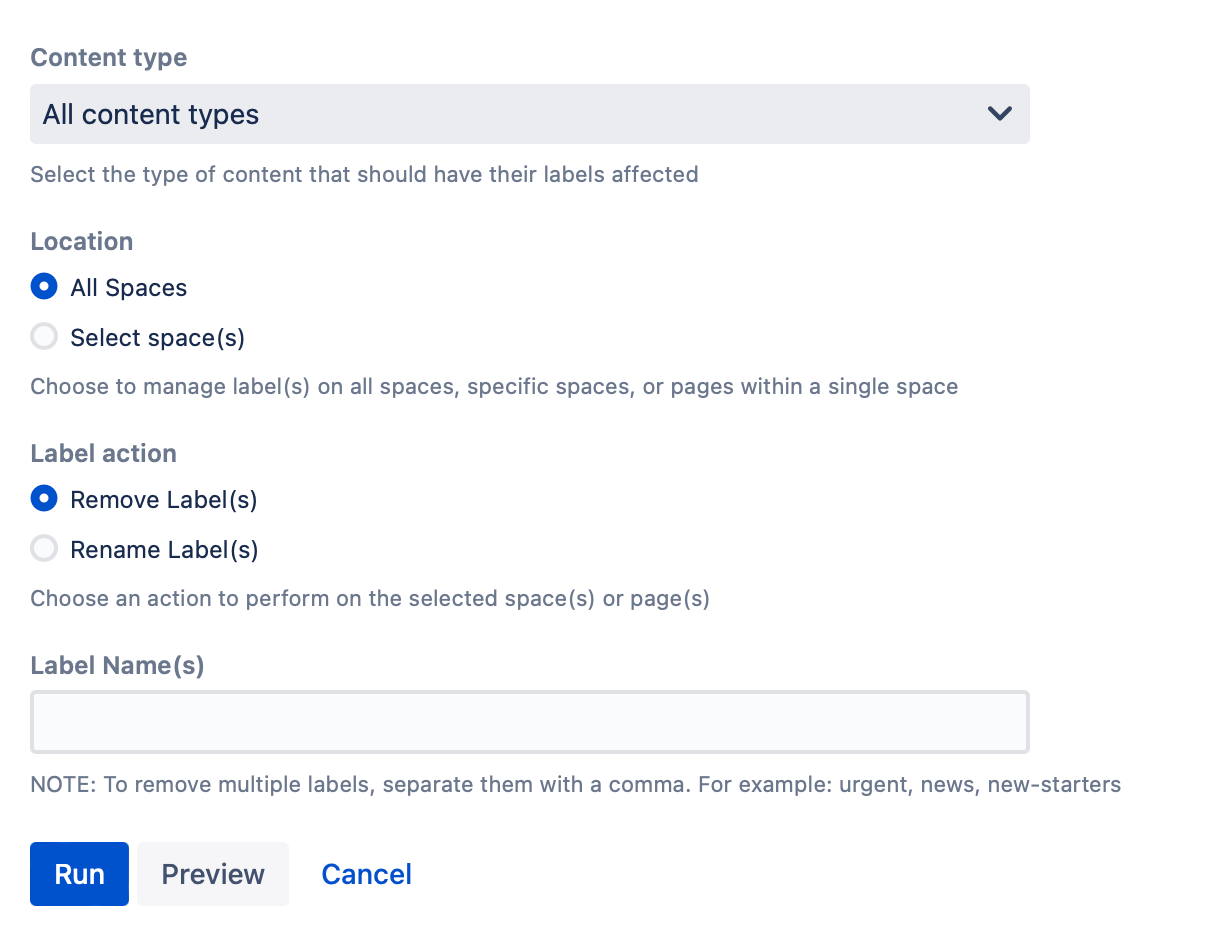
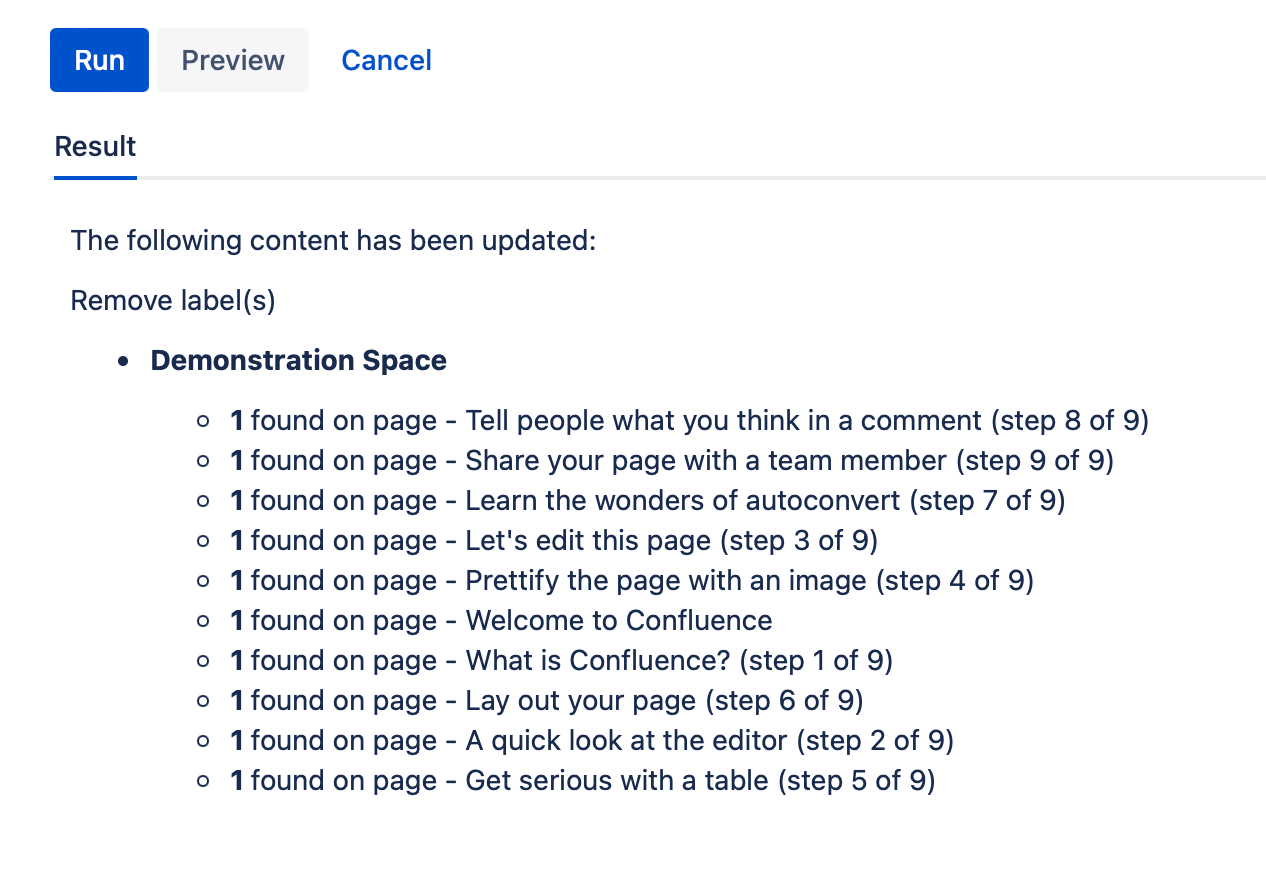
Results
The labels that were removed appear in the Results list:
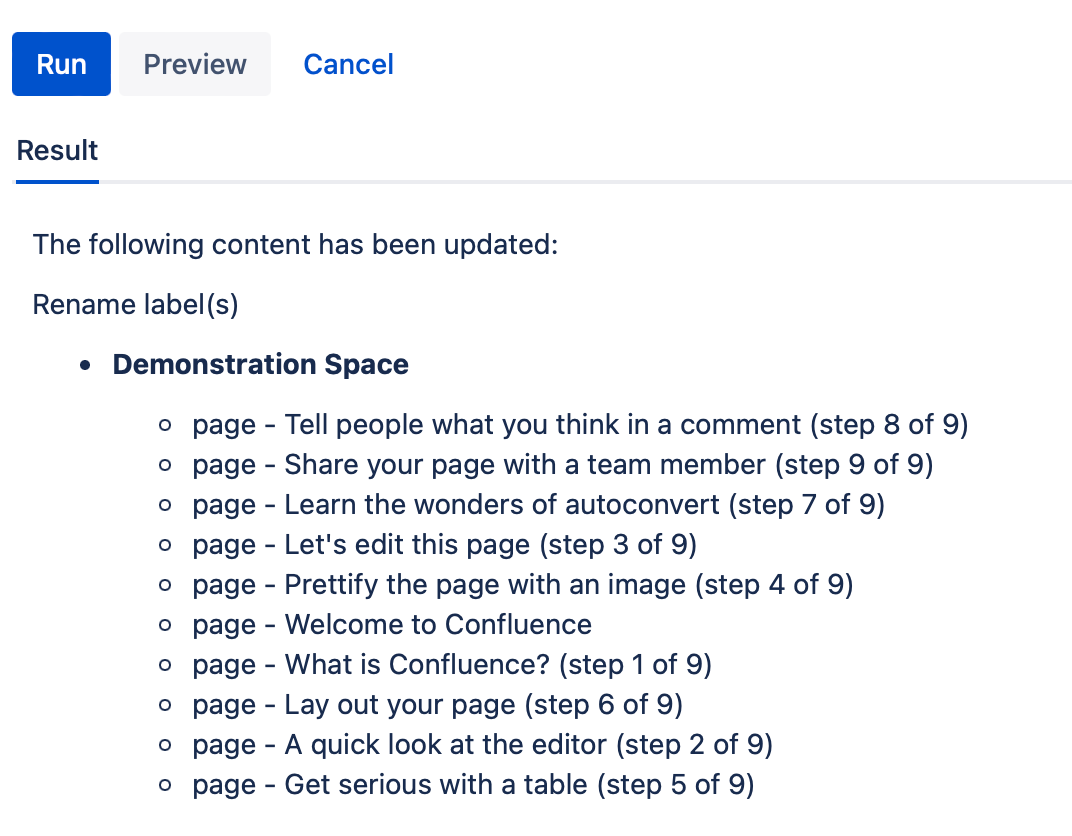
Renaming Labels
- Navigate to General Configuration > ScriptRunner > Built-In Scripts.
- Select Manage Labels.
- Choose the Content Type from:
- All Content Types
- Page
- Blog
- Attachment
Select the Location where you want to run the script:
To work with all spaces, choose All Spaces.
To work with certain spaces, choose Select Space(s), and then select the Target Space(s).
To work with certain spaces and pages, choose Select page(s) within a specific space, and then choose the Space and Page(s).
This is unavailable if you're working with All Content Types in Content Type.
- Select Rename Label(s).
Enter the Original Label Name(s) of the new label and the New Label Name you want the label to be called.
- Select Run.
You can select Preview instead of Run to view changes before implementing them.
Once you select Run, the Results of the script appear.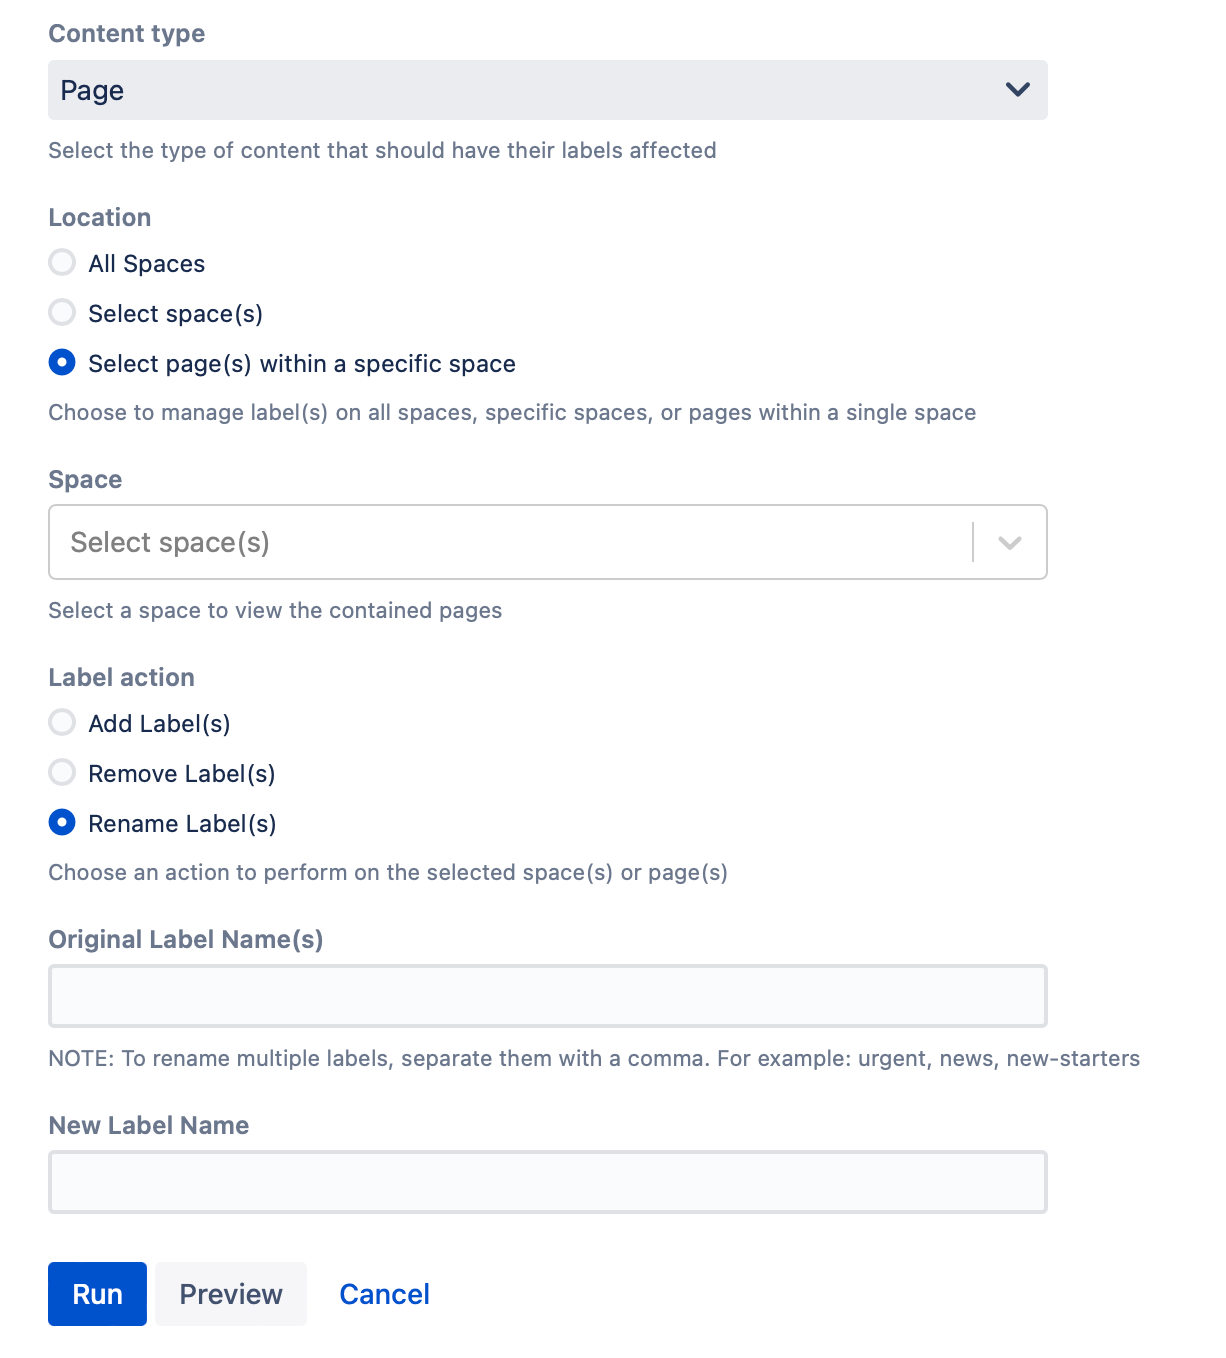
Results
The pages that have labels that were renamed appear in the Results list: