[All Adaptavist Apps]
Page History
| Table of Contents | ||||
|---|---|---|---|---|
|
Introduction
The Layout Editor Resources screen is a file upload and management tool.

Managing resources
Creating new text resources

Editing

Resource Notation
Any image or text file can be uploaded to the Theme Builder Resources, and is then available to a layout using the resource notation.
LAYOUT::ResourceName
Resource Actions

Once a resource has been uploaded you can perform actions on it to manage that resource. The actions will differ depending on the type of resource.
Note: Text includes CSS, JS etc. You must use the 'Save' button in the Layout Editor after changing any text file in the Resources screen.
Resource Type | Icon | Action |
|---|---|---|
| Image |  | Hover to View in popup |
| Image, Text |  | Click to Open browser (or right click to copy image url) |
| Image, Text |  | Click to Delete |
| Text |  | Hover to Preview contents |
| Text |  | Click to Open in simple text editor |
Upload and Reference an Image File
Resource Screen
- Use the 'Browse' button to upload any image from a local folder.
- The image will start uploading automatically.
- Once uploaded the image will appear in the Resources list.

To use a resource with the image macro:
Wiki Markup
| Code Block |
|---|
{image:resource=layout::image.ext} |
CSS Usage
Image resources can be used in the ThemeBuilder 5 CSS screen for background images. The code is added with the url in resource notation.
Examples
Add a background image to a HTML div in a panel or page.
| Code Block |
|---|
.my-background {
    background-image: url("layout::ResourceName.ext");
} |
Image in Resource screen

CSS screen

| Code Block |
|---|
.my-background {
    background: url("MYLAYOUT::flying-pig.png") repeat left bottom #CC3300;
    color: #FFFFFF;
    height: 340px;
} |
Div Added to Page
You will need the Content Formatting plugin installed to add HTML div's to a page. Use the macro browser to add a 'div' with the class 'my-background'.
| Code Block |
|---|
{div:class=my-background} |
Result
The image is added as a background to the div.

Example Usage- CSS/JS
Text files can be used as additional resources for CSS and JavaScript code, or as a way to hold code separate from your layout that then gets imported into a panel e,g, a place to hold chunks of text that are re-used throughout your layout.
CSS/JS Resource
See Skin Editor - HTML for an example of how to reference a CSS or JS resource file.
New Text Resource - Panel Import
- Use the 'New text resource' button top open the text editor.
- Add the name of your file in the 'Name' text field and press 'Enter'

- A popup will display with the file name in the tab, and a simple text editor. The example shows HTML added in a file called company-address.txt.
The text file extension can be used as this will be imported into a panel that outputs XML/HTML.
In the Theme Builder layout use the Import macro to include the contents of the resource in your panel. Use resource notation to reference the file.
Code Block {import:layout::company-address.txt}
Result

Output HTML
| Code Block |
|---|
<p>My Company</p> <p>The Building</p> <p>The Street</p> <p>The Town</p> <p>The District</p> <p>The Code</p> |
Notes
You will need to click the 'Save' button to apply any changes made in the 'Resource' screen.

Default resources
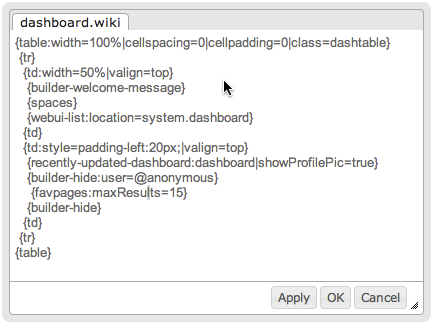
dashboard.wiki
dashboard.wiki contains the wiki markup that creates the dashboard. You can edit this markup to customise your dashboard when using a Theme Builder layout globally.
flaglogic.wiki
flaglogic.wiki contains the conditional logic used to control the display of confluence content when using a Theme Builder layout.
Overview
Community Forums
Content Tools
Apps