Run a Search
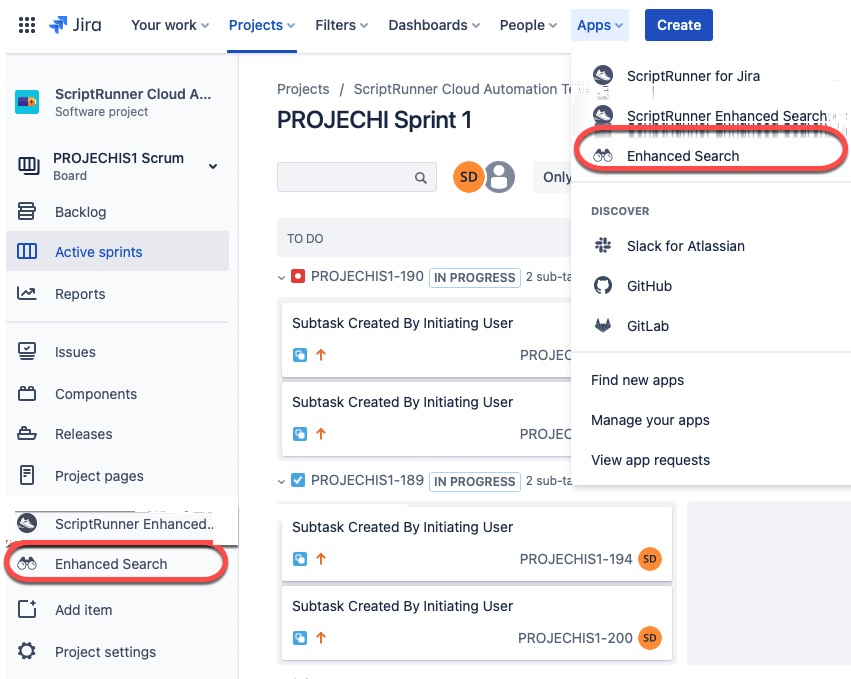
After installation and syncing, navigate to your Jira Cloud instance:
- Select Apps→Enhanced Search from the Jira Administration menu. Alternatively, you can select Enhanced Search from the left navigation when viewing a project.
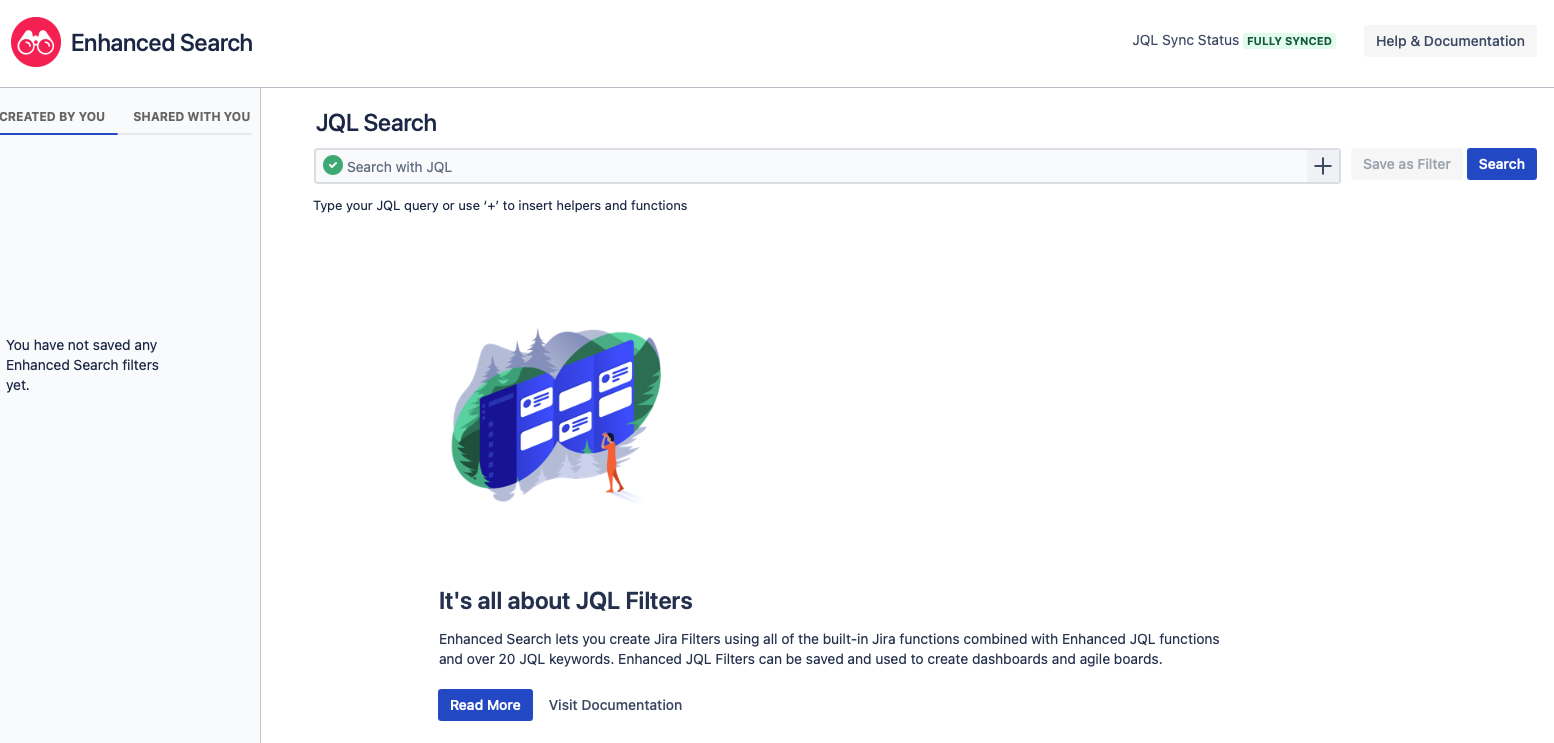
You will see the Enhanced Search for Jira Cloud JQL Search screen appear:
Once you have navigated to the Enhanced Search screen, you can run a search in your Jira instance and customize the results. - Enter your Enhanced Search JQL query into the JQL Search bar if you are familiar with writing such queries and click the Search button.
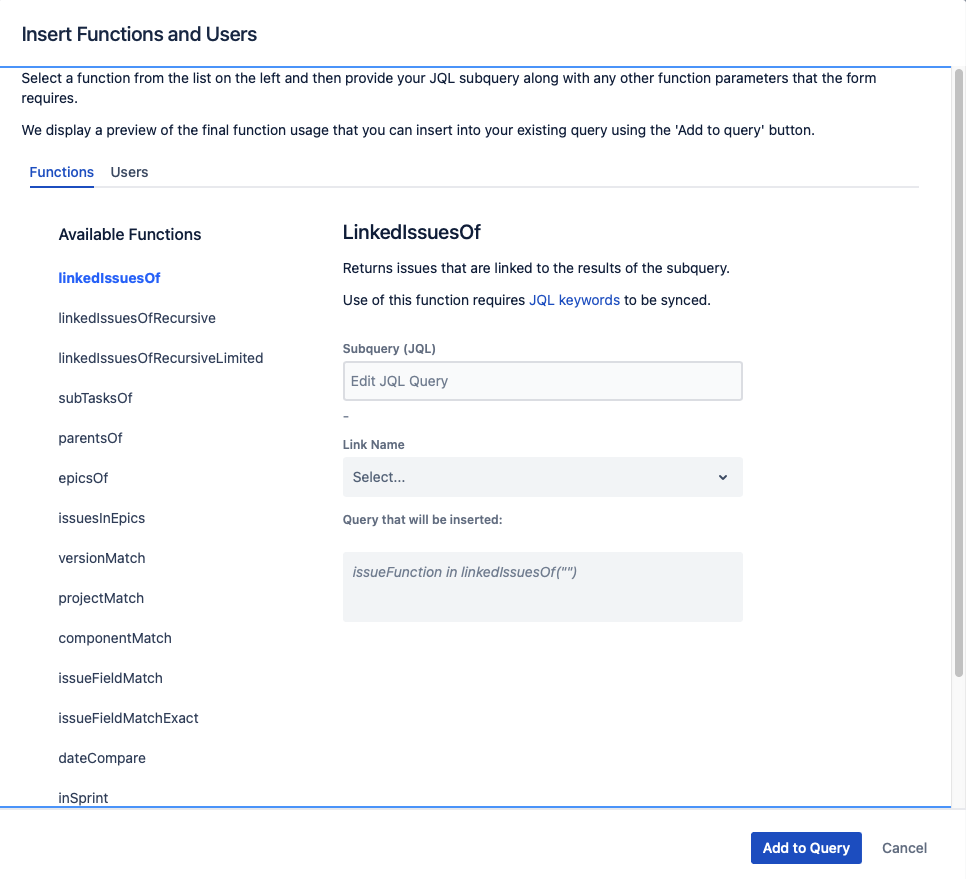
If you are unfamiliar with writing JQL queries, click the Insert Function button '+' to open the Insert Functions and Users screen. This function provides access to pre-generated queries, as shown below: Select the function from the Available Functions list within the Functions tab. Depending on the function chosen, you may be required to enter or select subquery details to generate valid JQL for that function. For example, a subquery
"project = EXAMPLE"tells thelinkedIssuesOffunction that it should find issues linked to the results of that subquery.Space required after comma
If you see an error message informing you that "Function 'X' does not exist", then you should check that you have entered a space after the comma in the query you are running.- Click the Add to Query button.
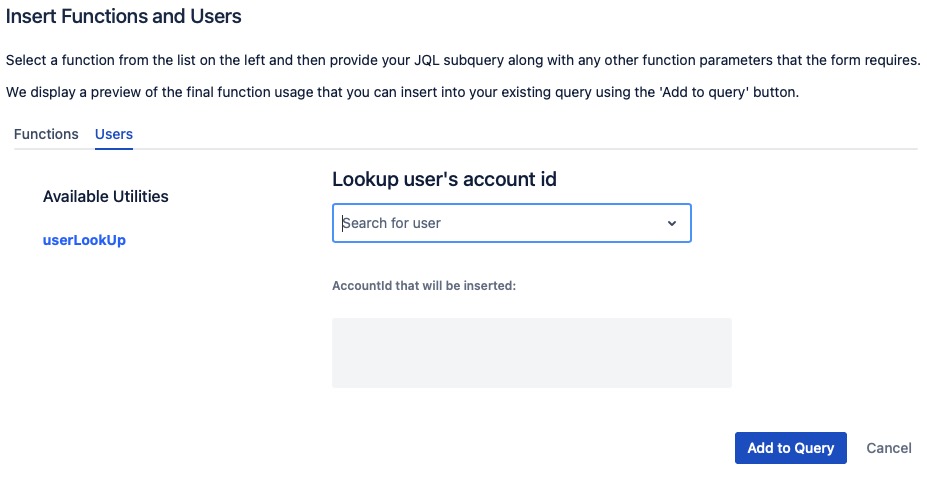
- (Optional) You can also view the account IDs of users in your Jira instance within the Insert Functions and Users screen. To do so, select the user from the Users tab, view their account ID and click the Add to Query button.
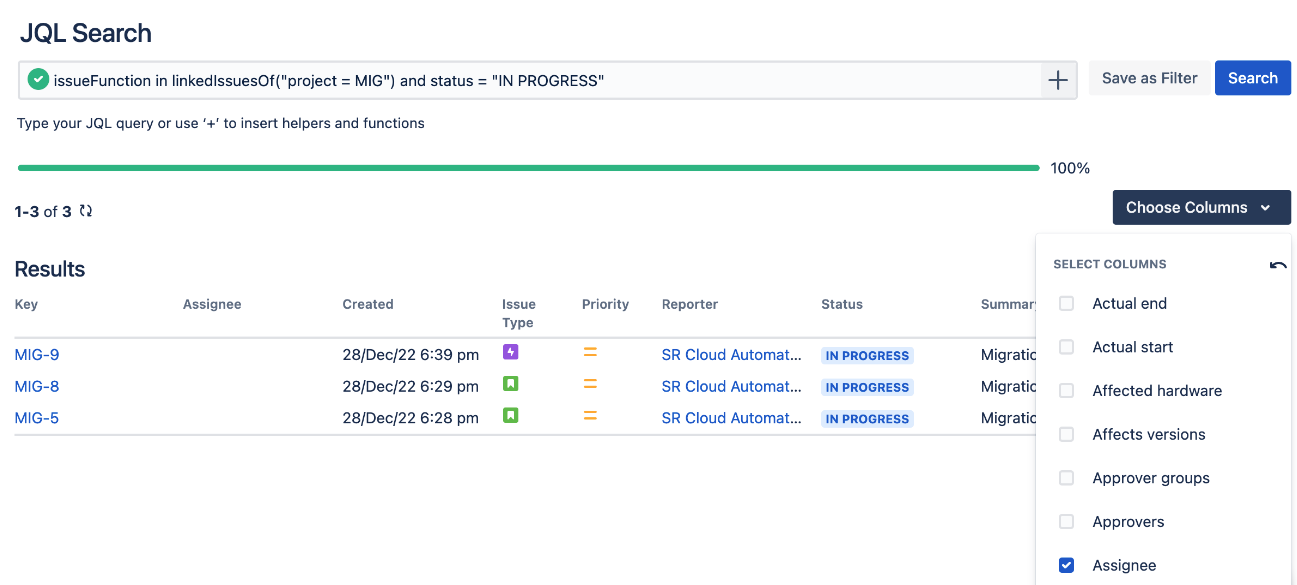
Click Search. You are returned to the JQL Search page with a list of results displayed for the function.
Search run-time
Searches can run for up to two minutes, with a progress bar indicating the status. We recommend simplifying your query as much as possible and using our Tips for Writing Queries to reduce the run time. You can also refer to our filter syncing tips and FAQs in Troubleshoot Enhanced Search for Jira Cloud.
Check your query has returned the desired results, and customize the display.
Customize Search Results
After running your enhanced JQL query, a table of results is displayed, showing customisable information about the issues returned. Enhanced Search for Jira Cloud allows you to choose what information is displayed in the Results table, helping you to find what you need efficiently.
To customize the Results table view, click Choose Columns, and check the columns you wish to display.
The number of columns is not capped, but we recommend you select no more than 10 columns depending on screen resolution.
Use Search Results in a Jira Filter
If you need to use the results of your Enhanced Search filter inside a standard Jira filter such as a dashboard, Scrum, or Kanban board, then you can do this as follows:
- Create the filter on the enhanced search page.
- Save the filter and share it (This creates a copy of the filter as a standard Jira filter where we synchronise the list of issue keys returned by the enhanced search filter.)
Use the JQL below to access the results of this filter in the feature where you need to reference it.
filter=‘NameOfHisSharedESFilter’


