
Status Report
Staying tuned in to team progress is important for any leader. This workflow template allows you to schedule status reports for any Slack channel (or user), and those reports are added to specified Jira issues as comments.
Download the Template
Click here to download the Status Report Tasks template file.
Importing a Template to Your Slack Workspace
The following steps describe how to import the template from your computer into Workflow Builder.
Prerequisite
Ensure you've downloaded a workspace template to your local machine. If you haven't, you can find the download link near the top of this page.
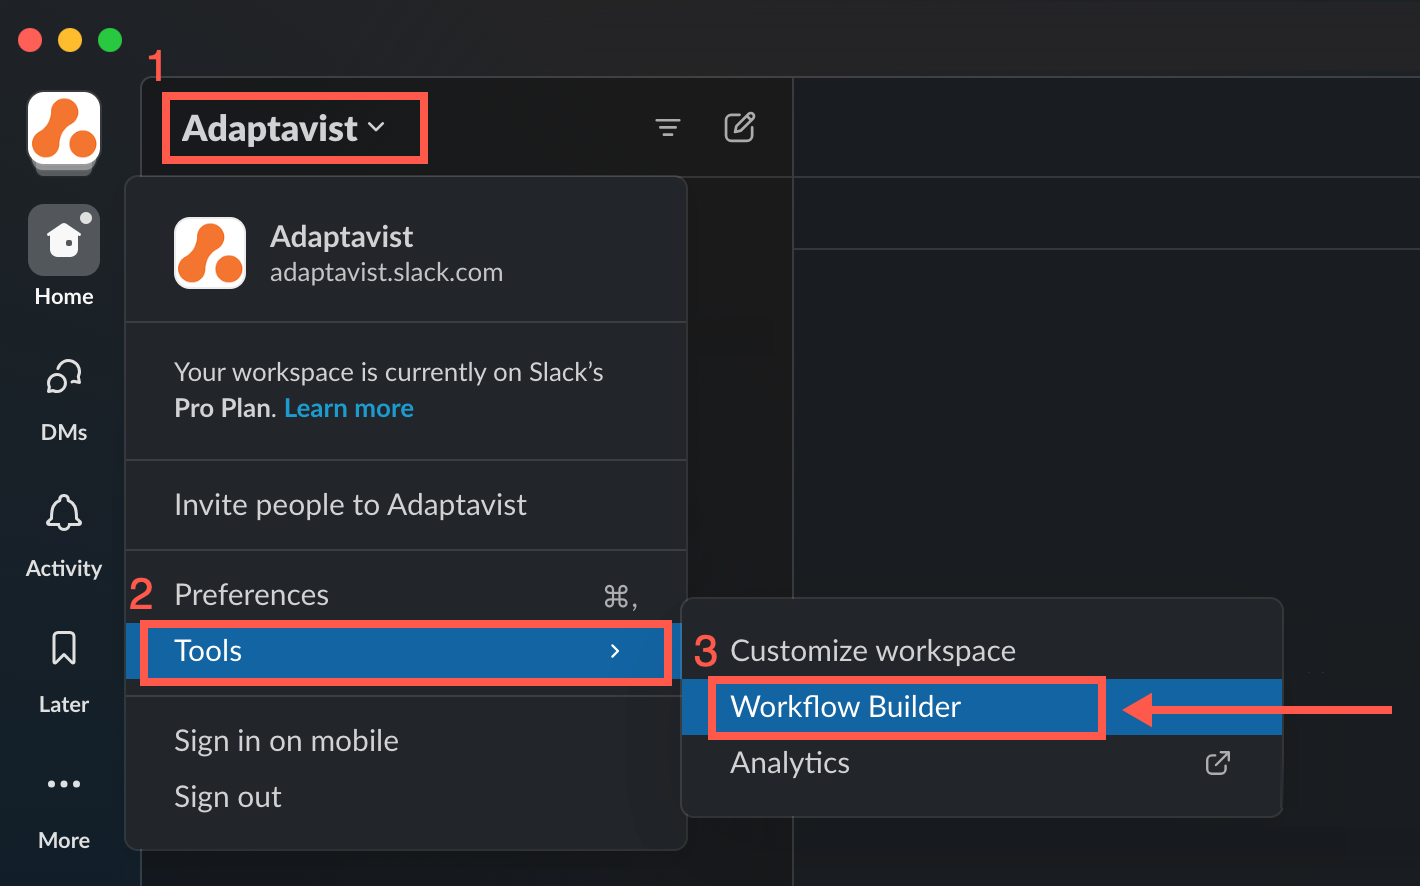
- In Slack, click the workspace drop-down menu in the upper-left corner, and select Tools > Workflow Builder.
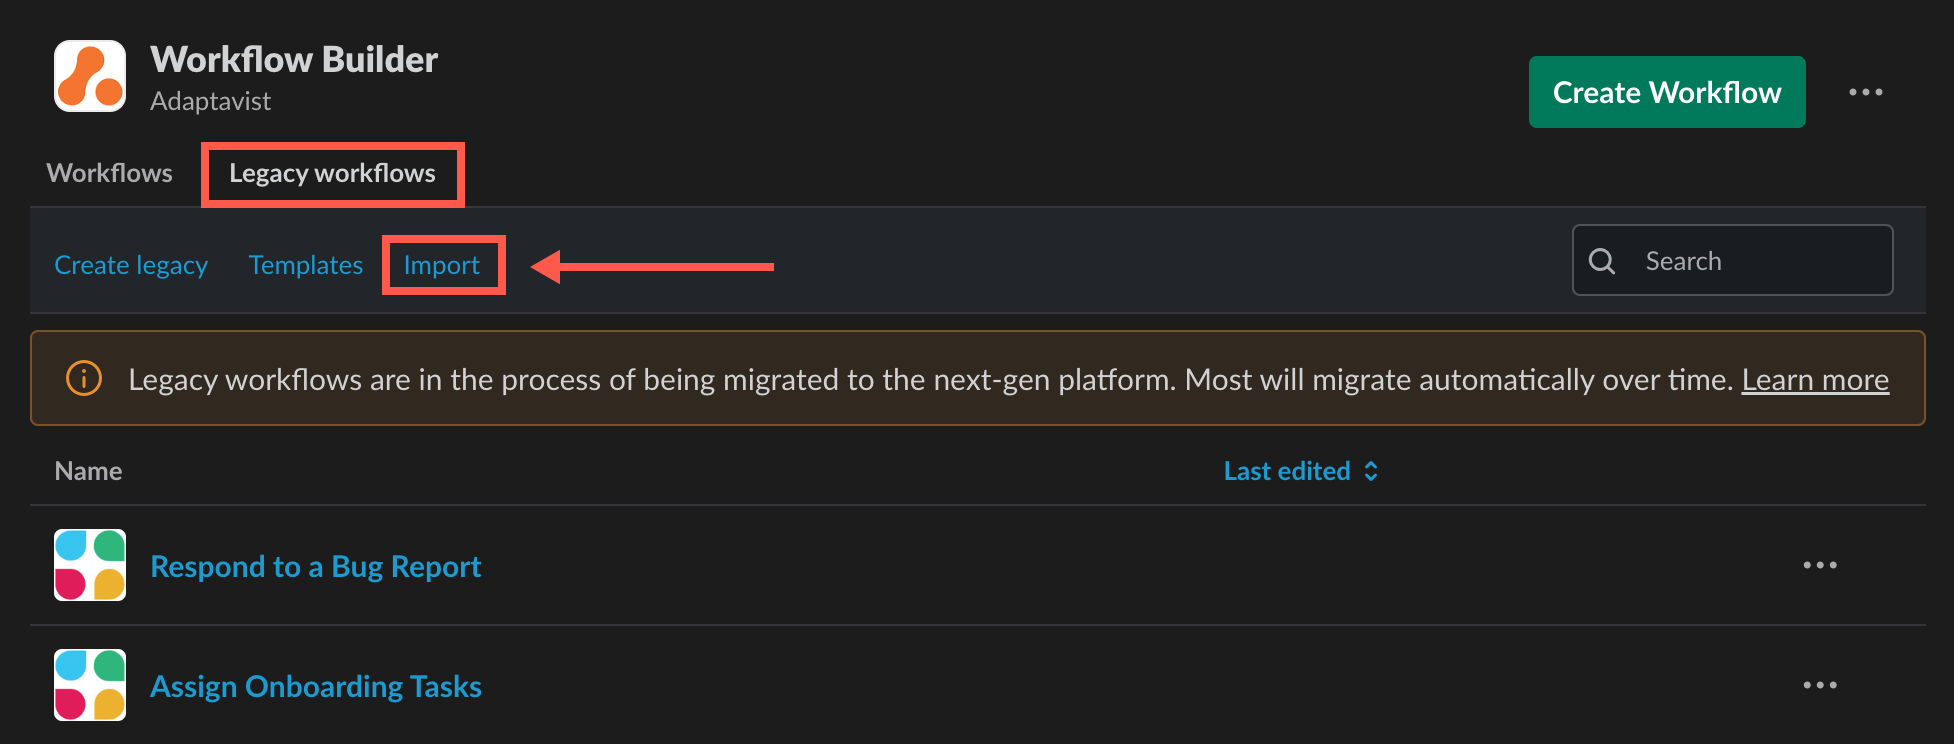
Workflow Builder opens in a new dialog. - Click the Legacy workflows tab, then click Import.
- Navigate to and select the workflow template on your local machine, then click Open.
You are prompted to edit the workflow's name. - Click Next.
A success message appears, and the template is imported to the Your Workflows tab. Click Got It to close the message.
The imported workflow and its steps appear, ready for you to review and customize the steps.
Customizing the 'Status Report' Template
After you download and import the template, fine-tune the workflow by evaluating and making adjustments to each step. You'll likely need to make some changes to perfect the workflow to meet your specific needs.
With the template imported, open the workflow so all the steps are visible.
- Click Edit next to each template step to review and update the contents.
Here's a summary of each step in the workflow and details you may want to customize:
Schedule Date and Time Workflow Trigger
This template uses the Schedule Date and Time workflow trigger. Select the date, time, and frequency for the update prompts.
Send a Form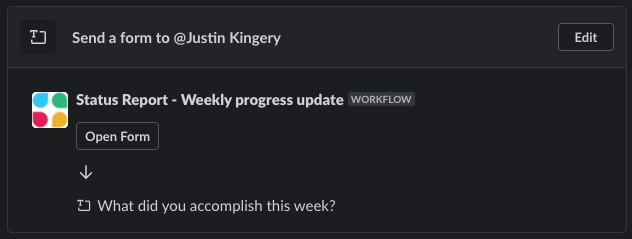
This step defines who will be prompted to fill out the form, the form's title, and the questions posed to the recipient(s).
Note that this step can be sent to an entire channel or just one person. Click Add Step if you'd like to send forms to only a few individuals (one person per step). This approach also gives you the flexibility to ask each recipient different questions in the form.
Update Jira Issue
This step declares the type of update you want to make to the Jira issue (in this case, a comment), defines the Jira issue to be updated, and uses the response variables to supply the comment text for the Jira issue.
Send a Message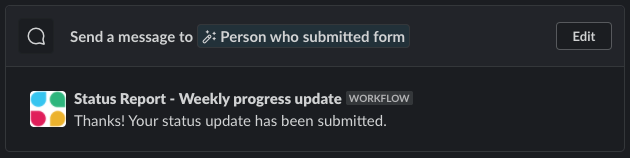
This step contains the message to be sent to the individual who filled out the form and submitted an update.
Review the default message, and customize it to best fit your workflow needs. - When you're finished fine-tuning the template, click Publish Changes at the top-right of the dialog.
- Test the workflow in Slack!
It's always best to test the workflow before introducing it to your coworkers. Ensure that the steps are pulling the right info from Jira and working as you'd expect them to.