
Submit a Request
At some point, we all need something—a new computer, a software license key, access to a blocked page, etc. This workflow template, which is triggered by a shortcut button in Slack, gathers request details that are conveniently recorded to a new Jira issue.
Download the Template
Click here to download the Submit a Request template file.
Importing a Template to Your Slack Workspace
The following steps describe how to import the template from your computer into Workflow Builder.
Prerequisite
Ensure you've downloaded a workspace template to your local machine. If you haven't, you can find the download link near the top of this page.
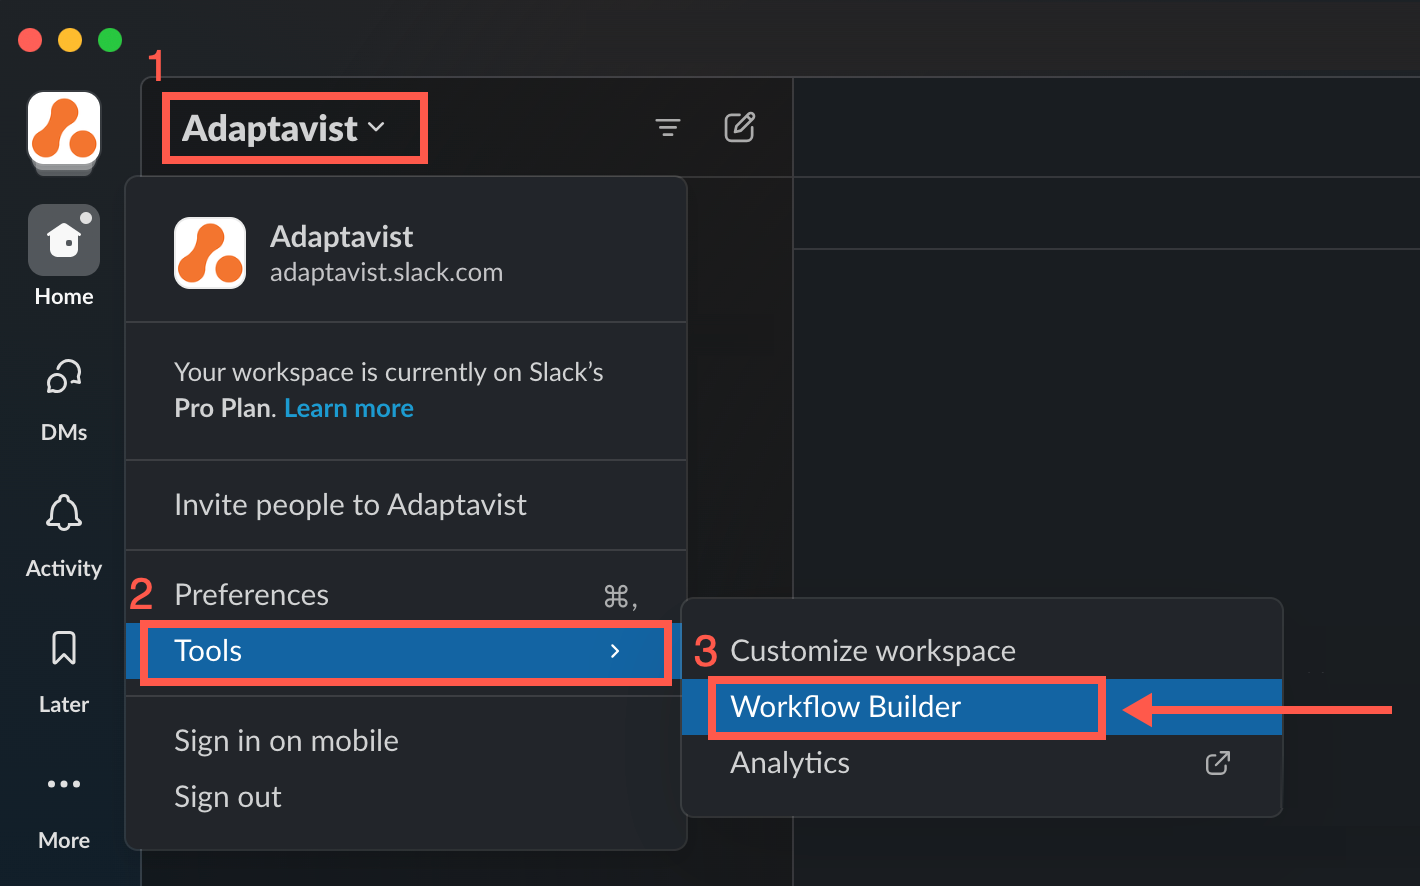
- In Slack, click the workspace drop-down menu in the upper-left corner, and select Tools > Workflow Builder.
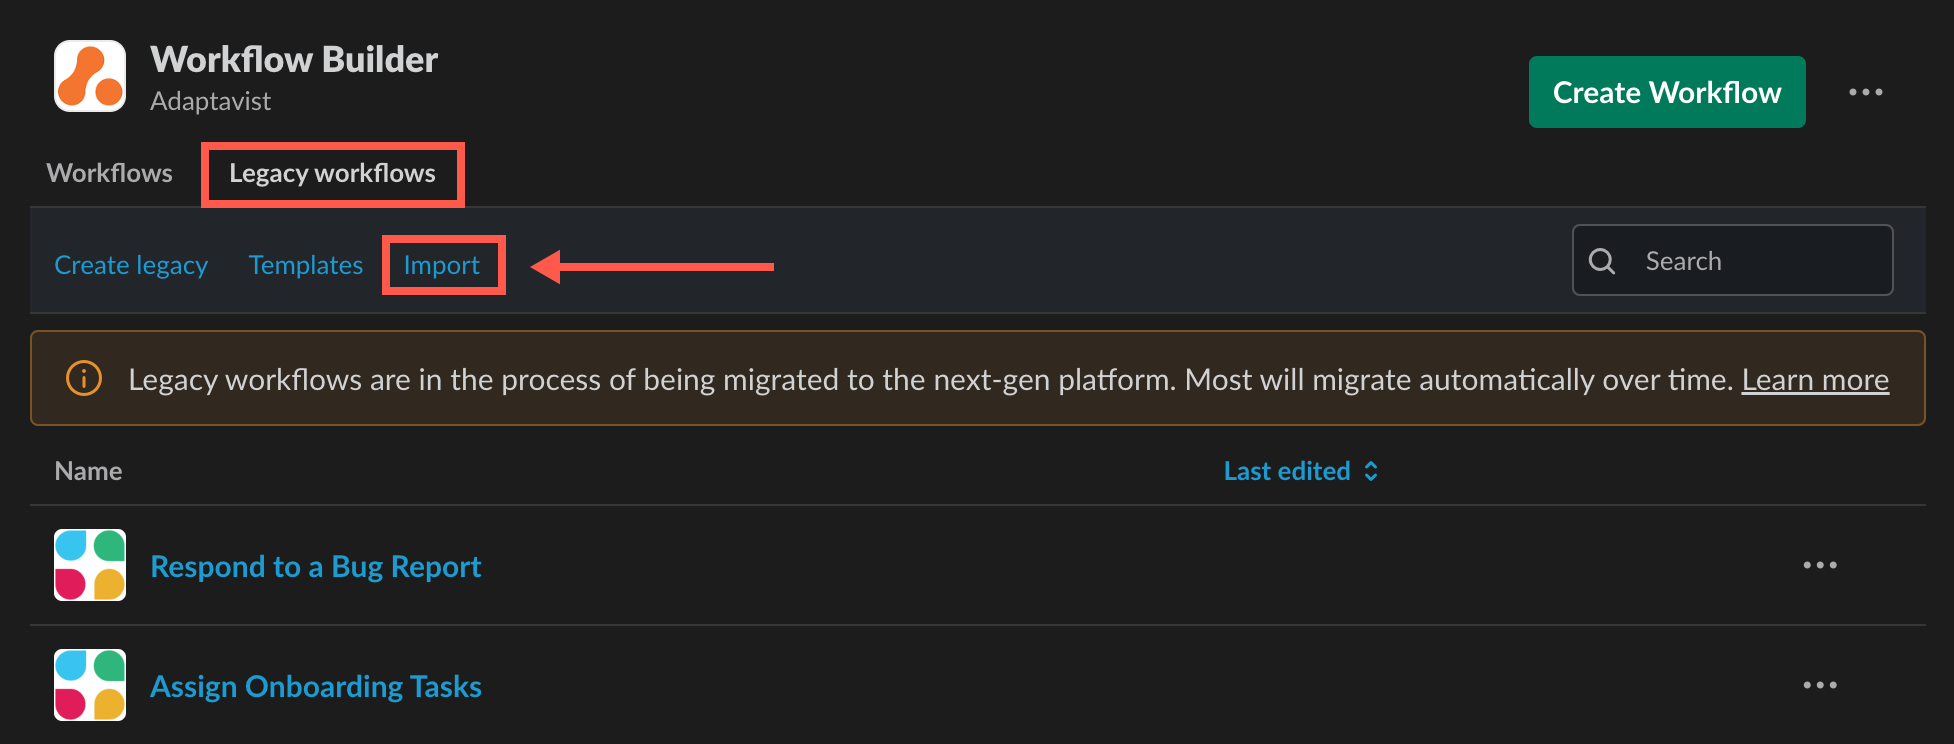
Workflow Builder opens in a new dialog. - Click the Legacy workflows tab, then click Import.
- Navigate to and select the workflow template on your local machine, then click Open.
You are prompted to edit the workflow's name. - Click Next.
A success message appears, and the template is imported to the Your Workflows tab. Click Got It to close the message.
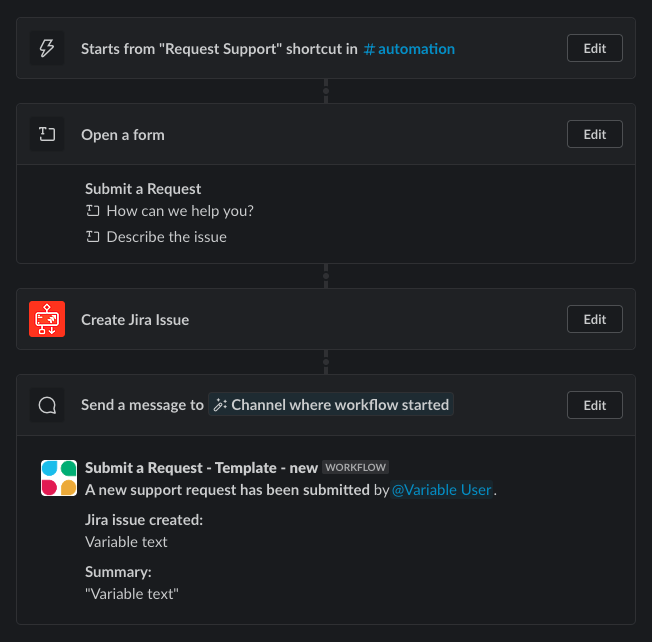
The imported workflow and its steps appear, ready for you to review and customize the steps.
Customizing the 'Submit a Request' Template
After you download and import the template, fine-tune the workflow by evaluating and making adjustments to each step. You'll likely need to make some changes to perfect the workflow to meet your specific needs.
With the template imported, open the workflow so all the steps are visible.
- Click Edit next to each template step to review and update the contents.
Here's a summary of each step in the workflow and details you may want to customize:
Shortcut Workflow Trigger
This template uses Slack's shortcut trigger to initiate the workflow.
Select the channel in which you want the workflow to exist, then give the workflow a name. This name is what workflow users will see when they trigger the workflow with a shortcut. You can return to this step at any time to revise the name.
Open a Form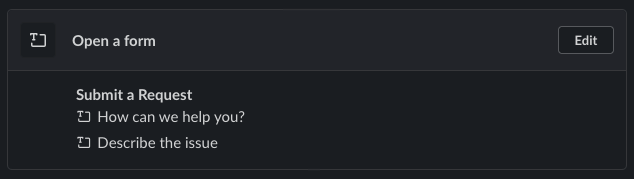
Edit this form step to customize the general questions that users need to submit with each workflow request.
Ask as many questions as you desire, then you can map the form fields to Jira fields or simply add the collected details to the Jira ticket description for context.
Create Jira Issue
Edit this step to select the desired Jira instance and project, plus the Jira issue type that's to be created in the Slack channel.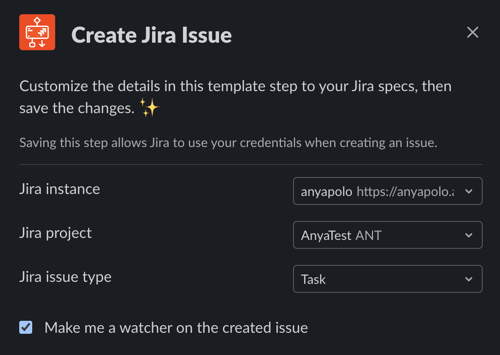
By default, the step is set to prompt the user who submits a request for the Summary field value, but explore the available variables and customize the prompt to suit your needs.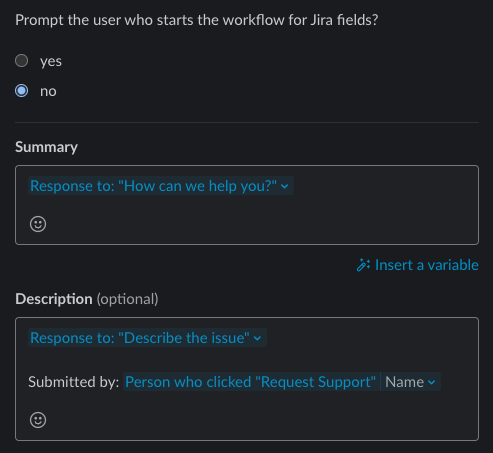
Send a Message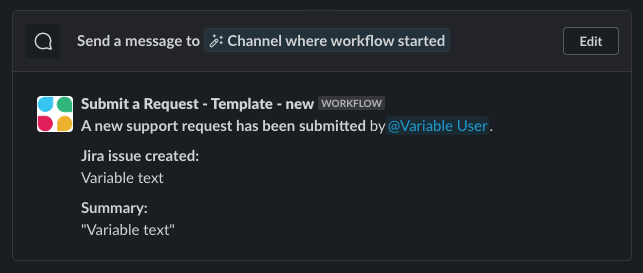
This step produces a summary of each new request submitted via the workflow. It's sort of like a receipt that appears in the channel where the workflow was triggered, and it gives instant feedback to the ticket creator, as well as the other channel members.
Review the default message, and customize it to best fit your workflow needs. - When you're finished fine-tuning the template, click Publish (or Publish Changes) at the top-right of the dialog.
- Test the workflow in Slack!
It's always best to test the workflow before introducing it to your coworkers. Ensure that the steps are pulling the right info from Jira and working as you'd expect them to.