Get Started
To translate custom field options with TFO, you first need to create a new custom field and then define the translations for the options you define.
TFO for Jira enables the translation of the custom field options only. If you want to translate the name of the new custom field, you can use Jira’s translate feature by selecting Cog > Translate in the Custom Fields page.
TFO for Jira only enables the translation of custom field options for internal screens. It is not available in the customer portal.
Create a New Custom Field
Once you have installed TFO, create a new custom field for one of the types supported by the app.
Select Issues from the Jira Administration menu.
In the left sidebar, select Custom Fields under Fields.
Click Add Custom Field.
In the Select a Field Type screen, select All, then type
translatein the search bar.Select the required field type, e.g. Translate Fields Checkbox, then click Next.
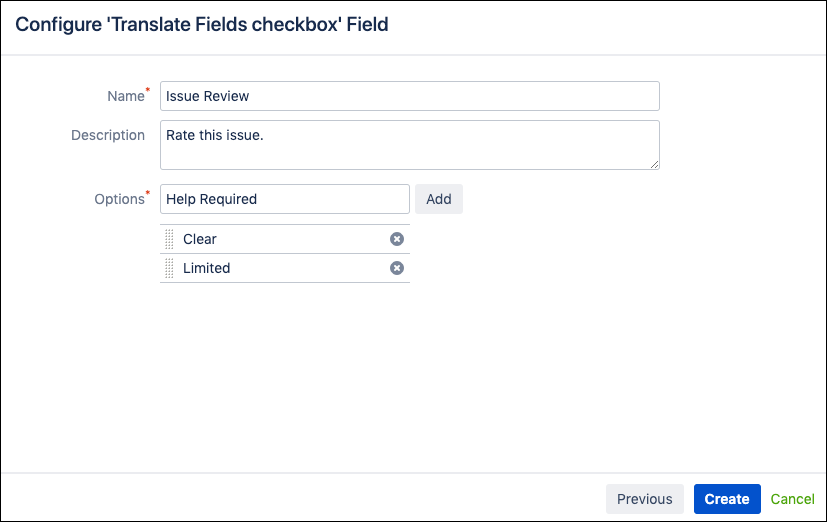
Define a name for the field, and then add your required options. In the example below, we add a field called Issue Review and then add the following options: Clear, Limited, Help Required.
Click Create.
Translate the Custom Field Options
Once you have created your custom field and defined the options, you can translate them using TFO for Jira.
Select Issues from the Jira Administration menu.
In the left sidebar, select Custom Fields under Fields.
Locate your new custom field, then select Configure from the Cog drop-down menu.
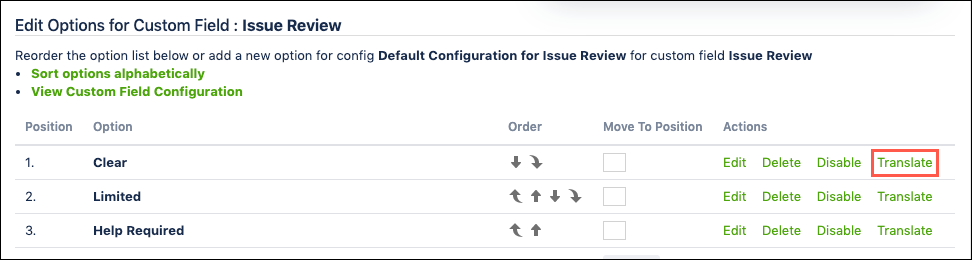
Click Edit Options.
Under Actions, click Translate for the option you want to translate.
All the available languages in Jira are listed. The text box next to each language is where your translations are added. Only enter a translation for the language(s) that you require.
Type the required translation for the selected option, then click Save.
Click Return, then repeat steps 5 and 6 for each option.
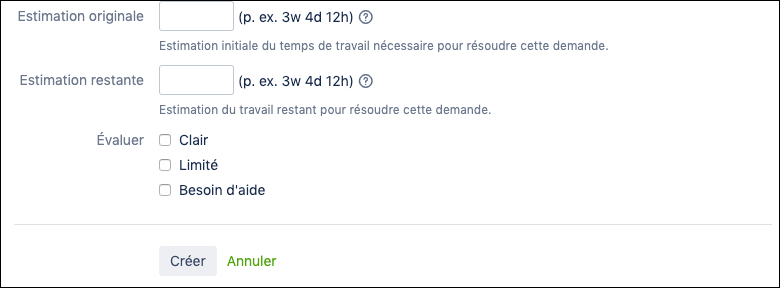
See it in Action
Now that the custom field options are translated, they can be viewed in an issue screen where the custom field is used. Ensure the default user language is set to the same language as your translations. Otherwise, the original values of the options will be displayed. In the example below, our custom field options have been translated into French, our default user language is French and therefore the options are displayed in French. Users with a different default language will see the original values of the options, in this case, English.