
Tutorial: Configure a Confluence Cloud Template
Follow the steps to configure and run the Create a Confluence Cloud Page When a Jira Issue is Created template.
Admins only!
You must have admin privileges to set up the webhook in your Jira Cloud instance (Step 8).
- Click Templates in the left-hand navigation options.
Shortcut for advanced users ⚡
Alternatively, you can open the template, click Setup Template > Advanced view, and skip to Step 5 in this task if you select the advanced view, setup guide instructions are not covered here.
- Click Confluence Cloud.

All templates for Confluence Cloud filter down and appear on the ScriptRunner Connect screen. - Click the Create a Confluence Cloud Page When a Jira Issue is Created template.
A read-only version of the template appears, which includes overview, setup, and usage details. - Click Use Template.

The New Workspace dialog appears. - Review and update the Workspace name, Description, and Select editor type, then click Create.
A success message appears, and the template workspace opens in the Resource Manager, where you can configure API connections before you run the script. - Create and authorize a new Confluence Cloud connector in the workspace.
- Click New API Connection for Confluence Cloud.
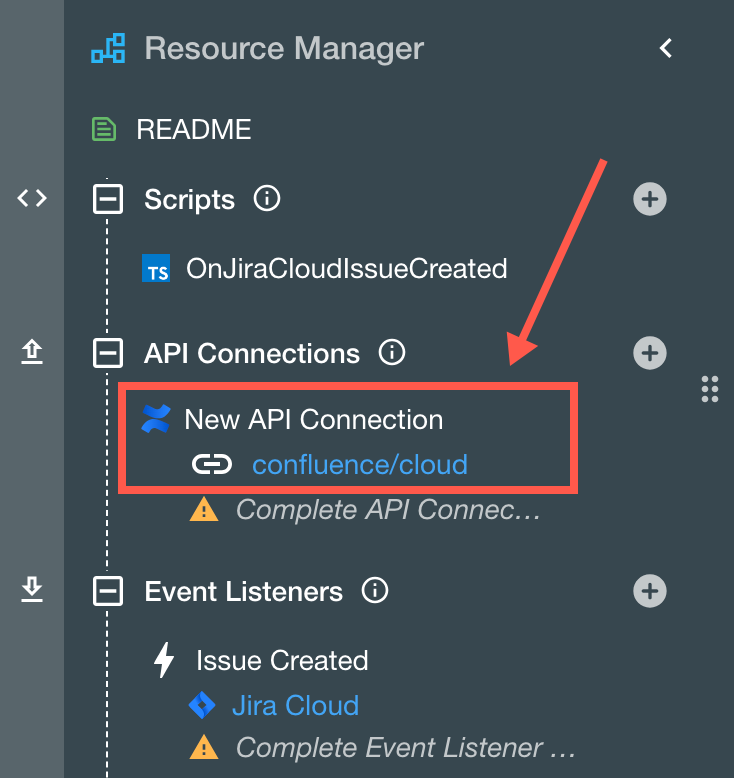
The Edit API Connection dialog appears. - In the Uses Connector field dropdown, click Create New.
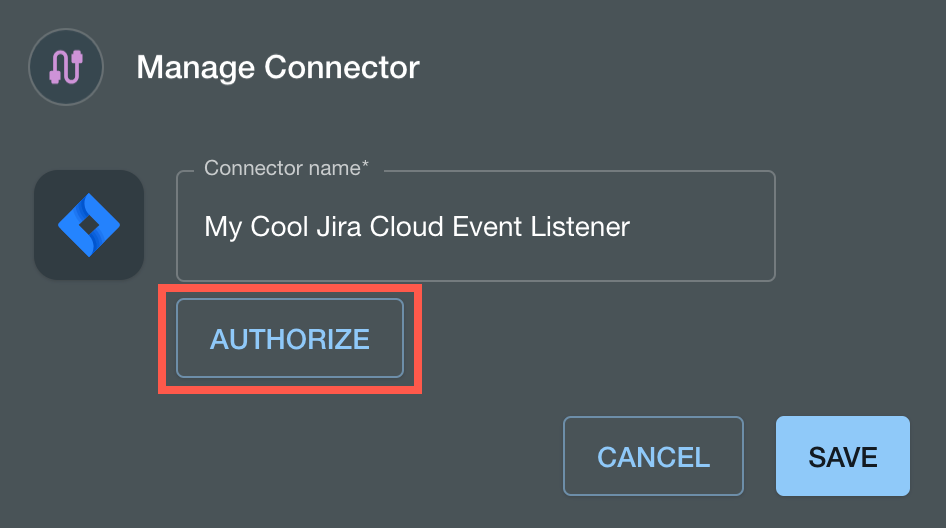
The Manage Connector dialog appears. - Enter a name for the connector, then click Authorize.
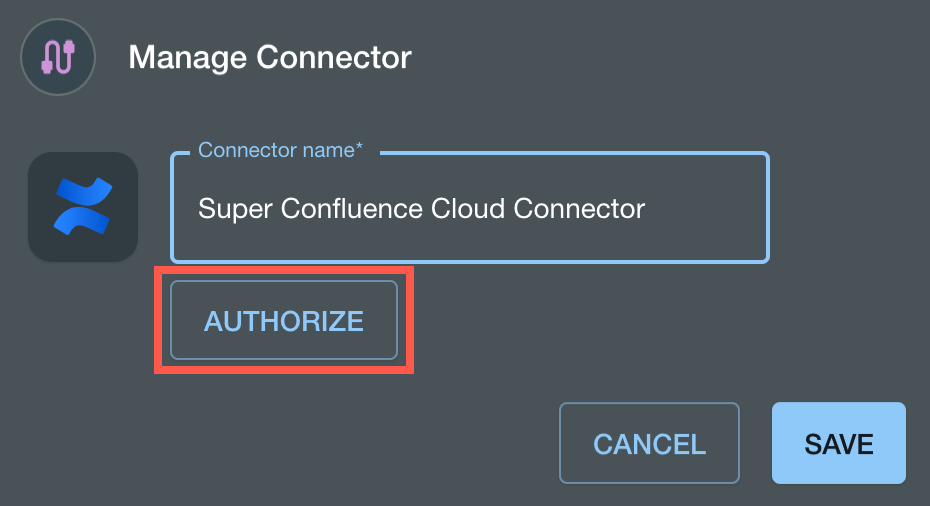
A new Atlassian tab opens and prompts you to choose a site (or instance) to authorize and give ScriptRunner Connect proper permissions. - Choose a Confluence site (or instance) to connect to ScriptRunner Connect, then click Accept.
The Atlassian tab closes, and the Authorize Confluence Cloud Site dialog appears. - In the Site field dropdown, reselect the intended Confluence Cloud site or instance, then click Confirm.
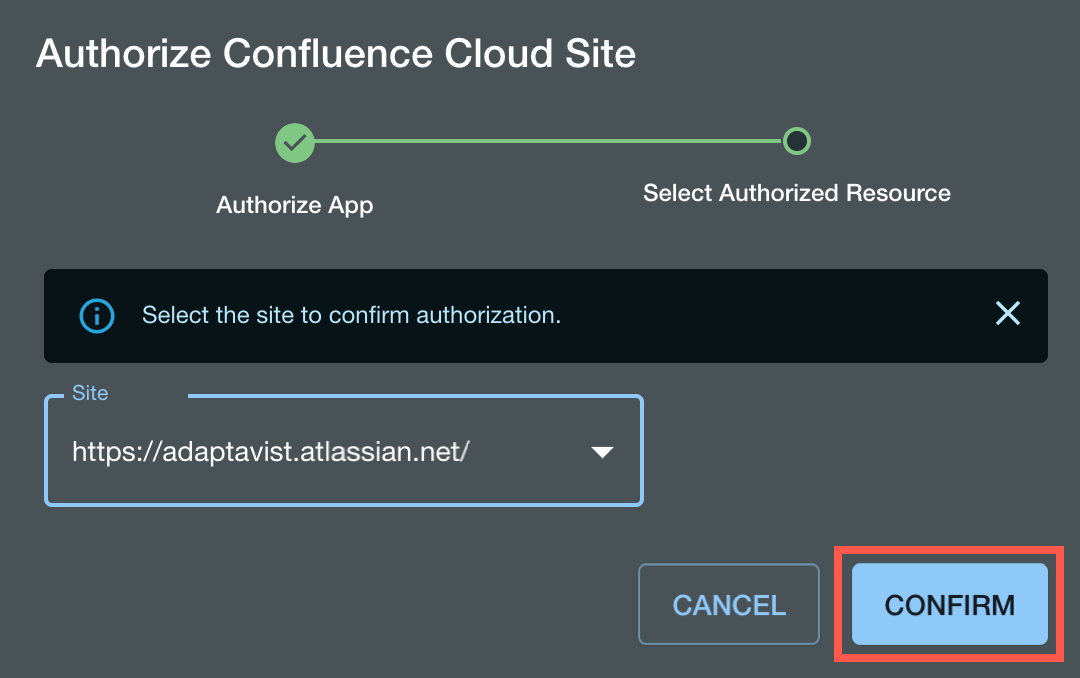
The Manage Connector screen reappears, and the save option is active. - Click Save to complete the API connector authorization process.
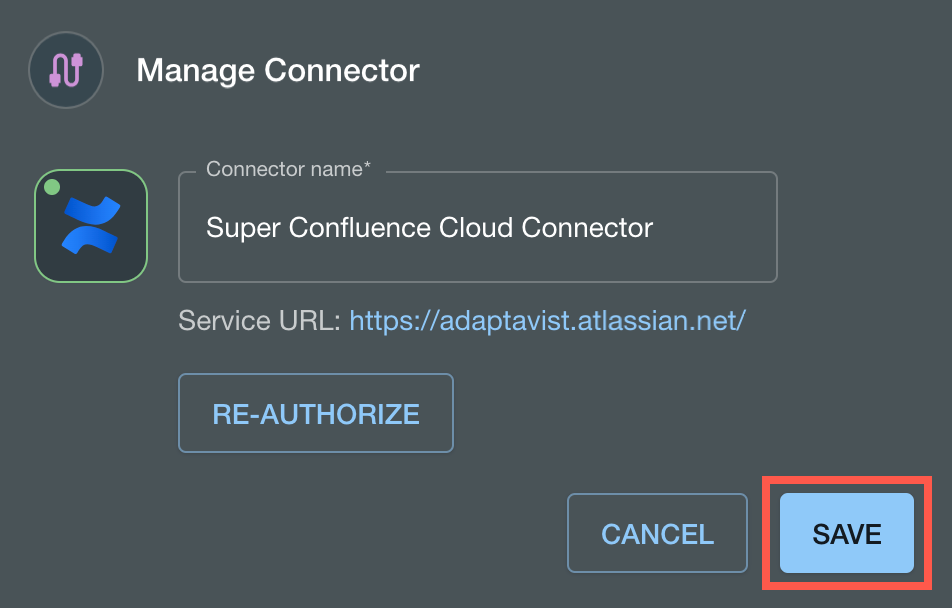
The Manage Connector dialog closes. - Click Save on the Edit API Connection dialog to add the newly authorized API connection to the workspace.
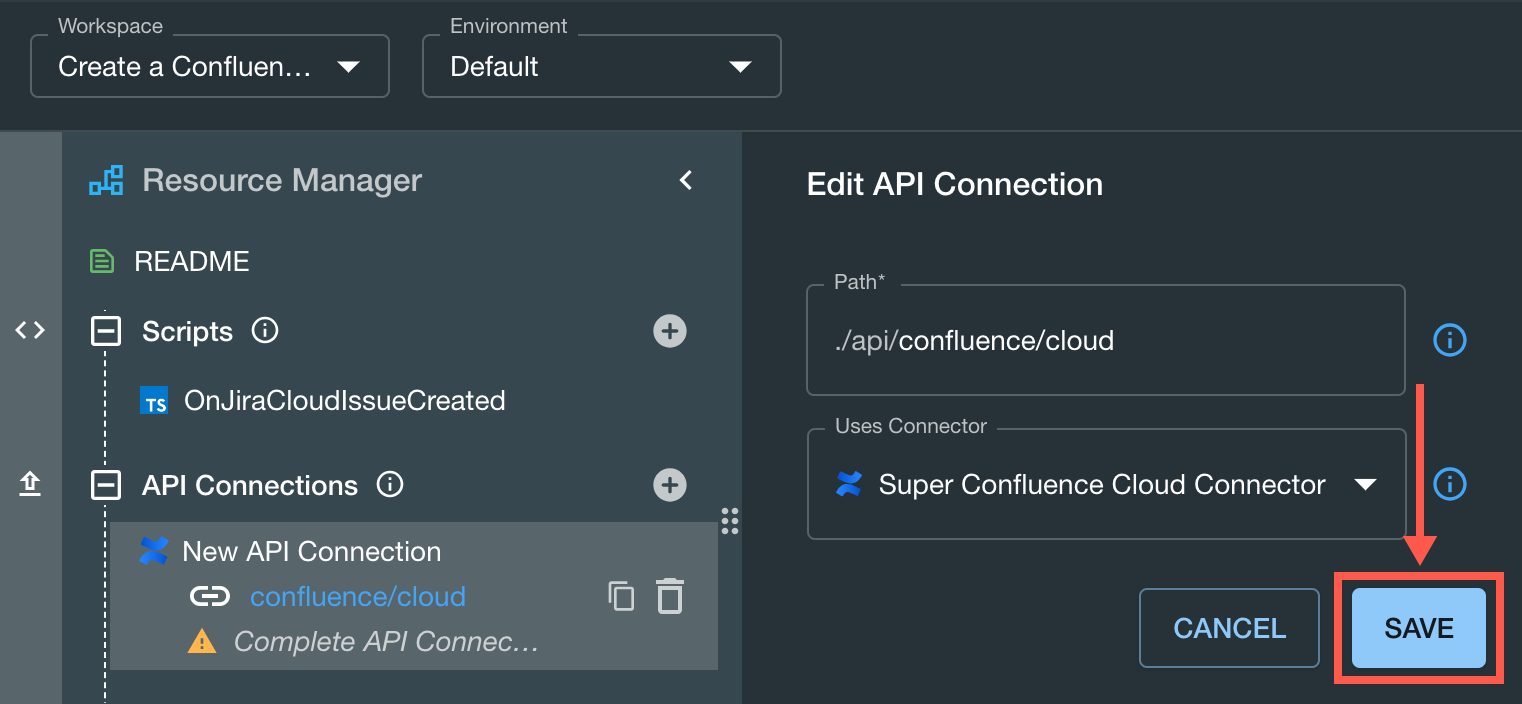
A success message appears.
- Click New API Connection for Confluence Cloud.
- Configure a Jira Cloud event listener in the workspace.
- Click the Event Listener for Jira Cloud.

The Edit Event Listener dialog appears. - Ensure the first two fields are as follows:
- Listener Event Type is set to Issue Created
- UsesExistingScript is set to OnJiraCloudIssueCreated
In the Uses Connector field dropdown, click Create New.
The Manage Connector dialog appears.Does your Jira Cloud event listener already exist?
If the event listener you want to use already exists, select it and skip to Step 7h.
- Enter a name for the connector, then click Authorize.
A new Atlassian tab opens and prompts you to choose a site (or instance) to authorize and give ScriptRunner Connect proper permissions. - Choose a Confluence site (or instance) to connect to ScriptRunner Connect, then click Accept.
The Atlassian tab closes, and the Authorize Confluence Cloud Site dialog appears. - In the Site field dropdown, reselect the intended Confluence Cloud site or instance (if necessary), then click Confirm.
A success message appears. The Manage Connector screen reappears with a service URL, and the save option is active. - Click Save to complete the event listener authorization process.
A success message appears. - Click Save to save the event listener to the workspace.

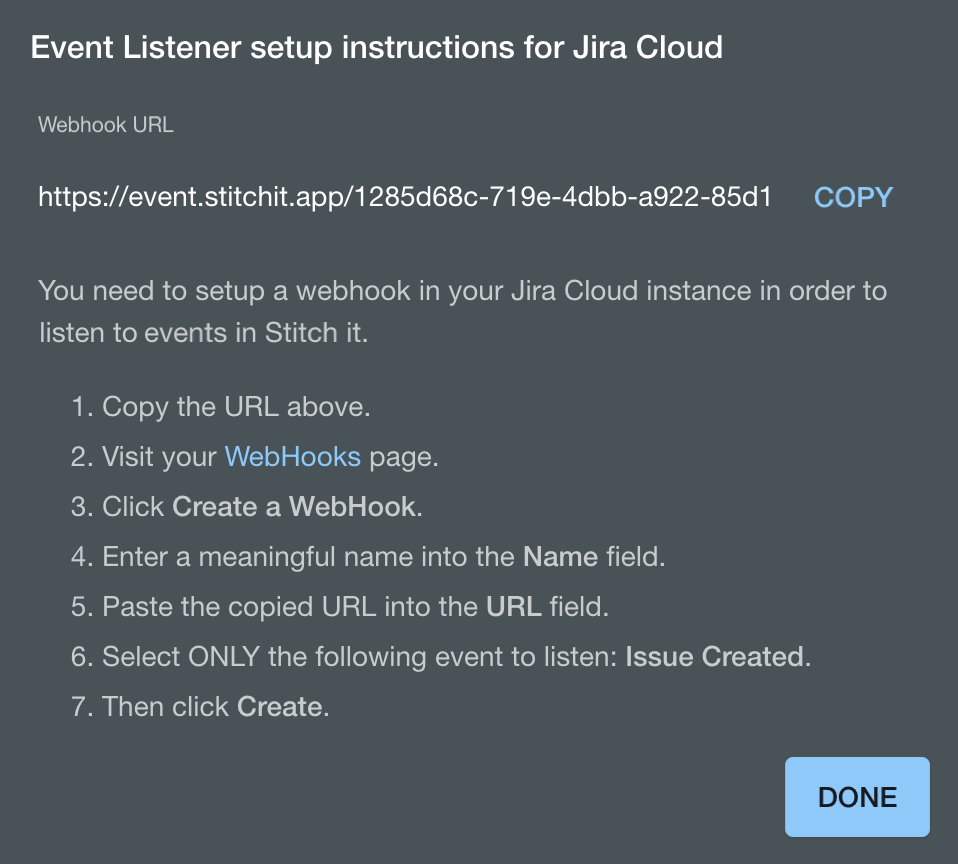
Instructions to set up the webhook in Jira Cloud appear on the screen.
- Click the Event Listener for Jira Cloud.
Set up the Jira Cloud webhook by following the instructions in ScriptRunner Connect, then return to ScriptRunner Connect and click Done.
The webhook is complete.ReadMe! 👀
If you ever find yourself lost in a template-setup process, review the ReadMe information for high-level details on how to succeed.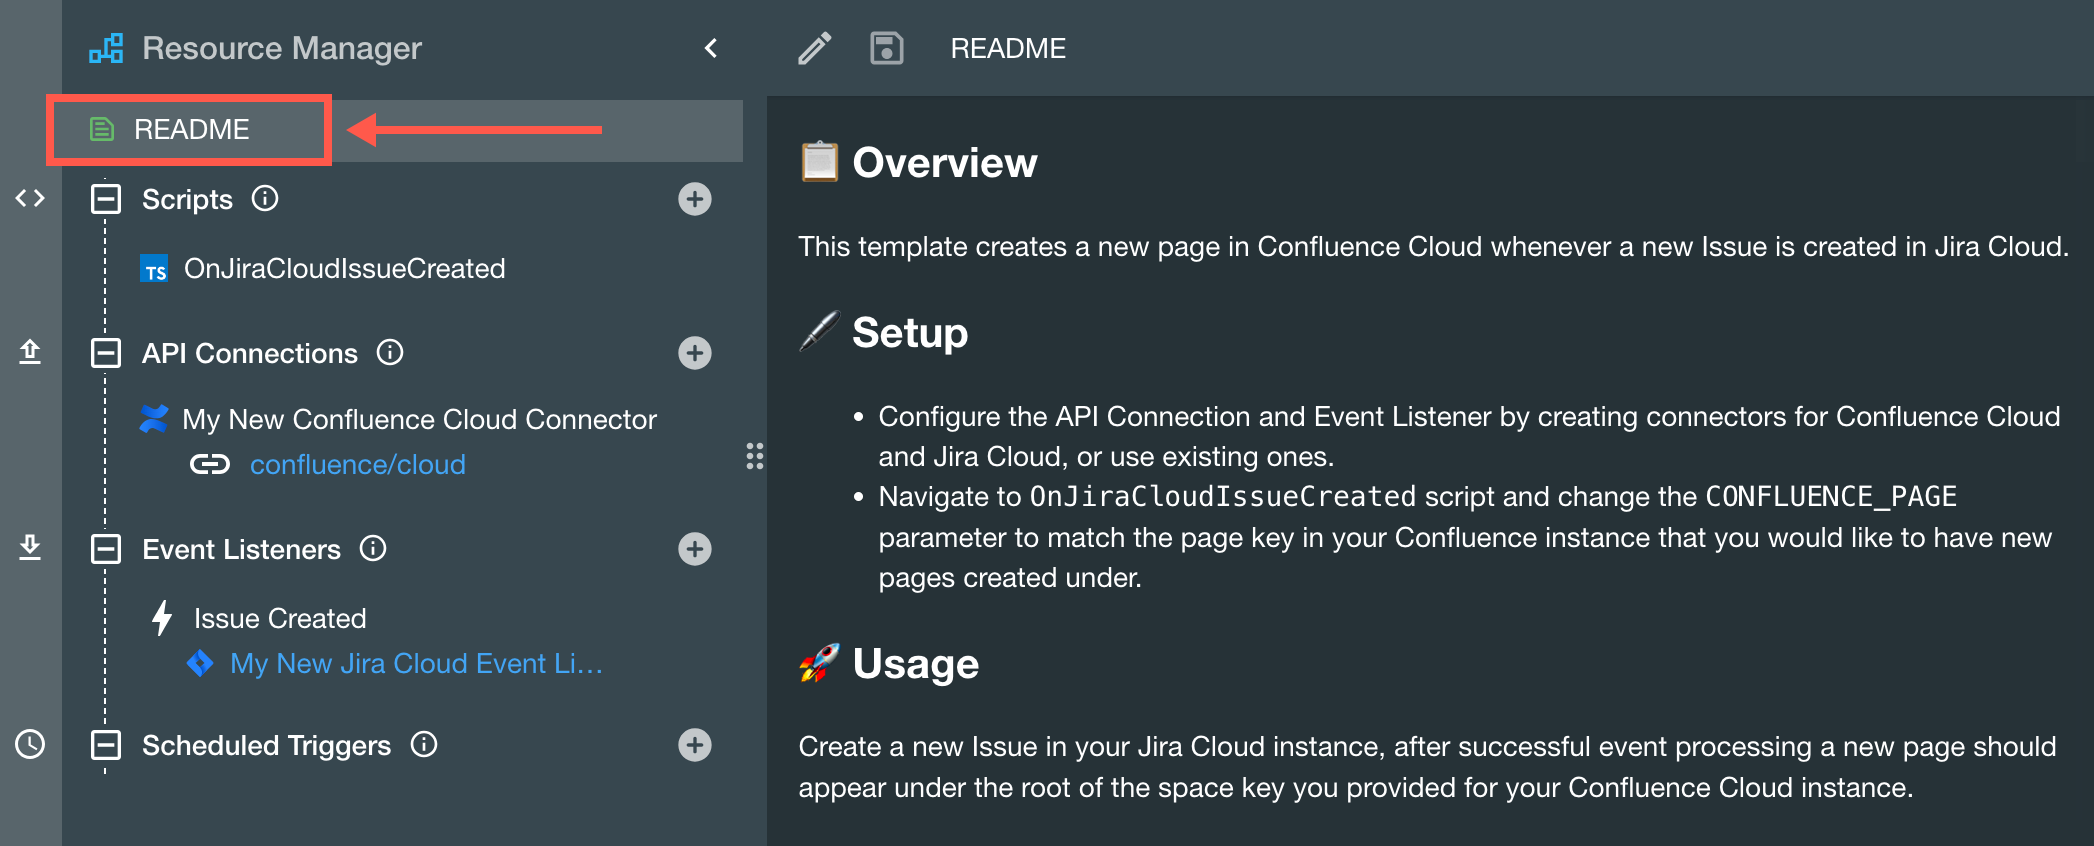
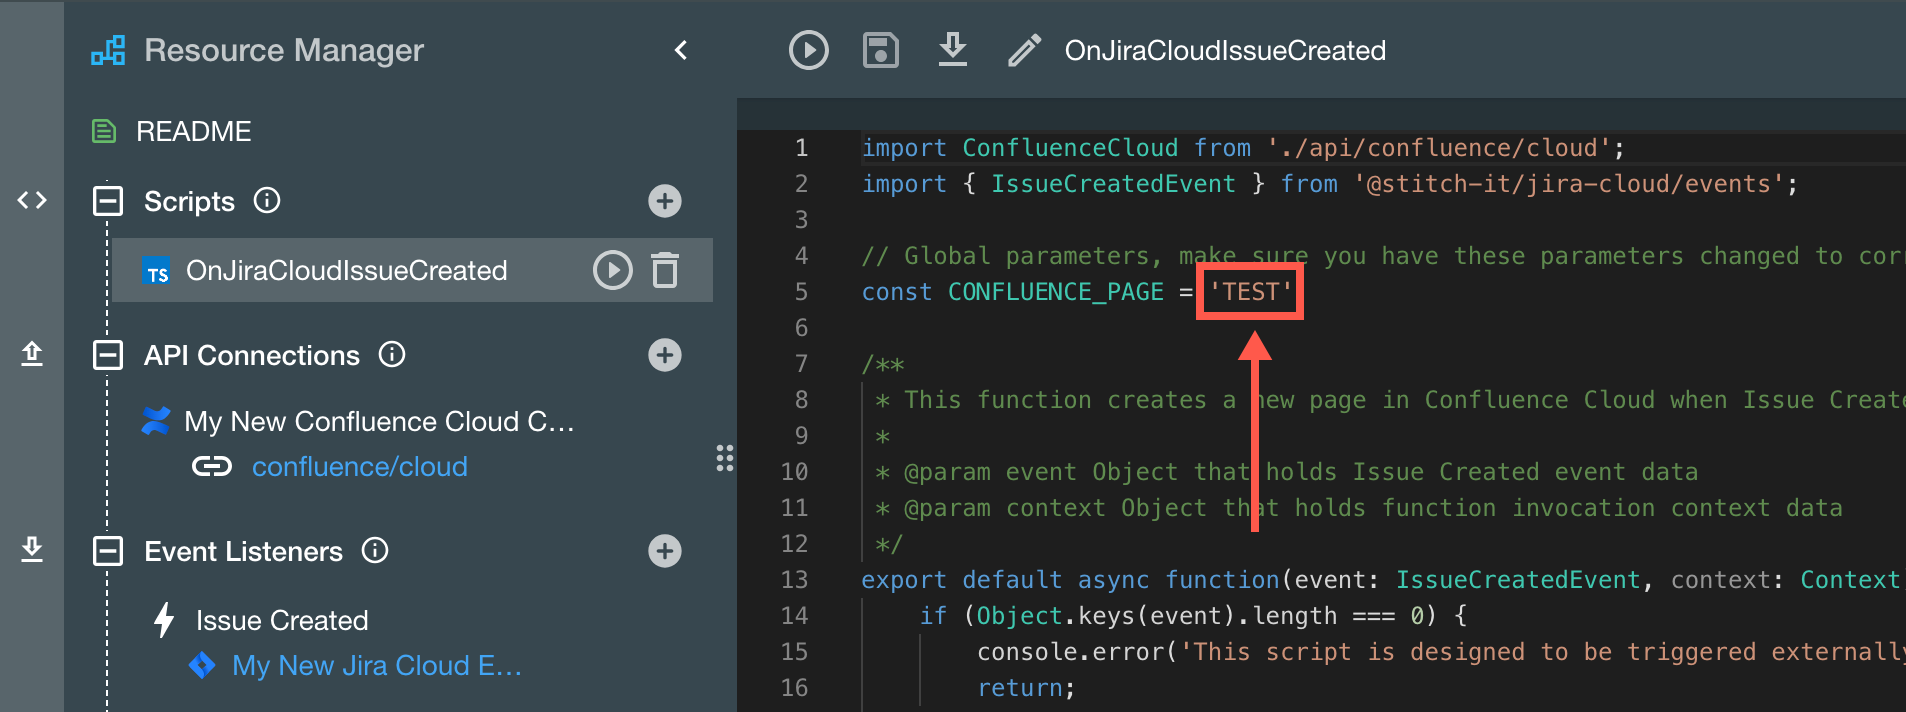
- Click the OnJiraCloudIssueCreated script.
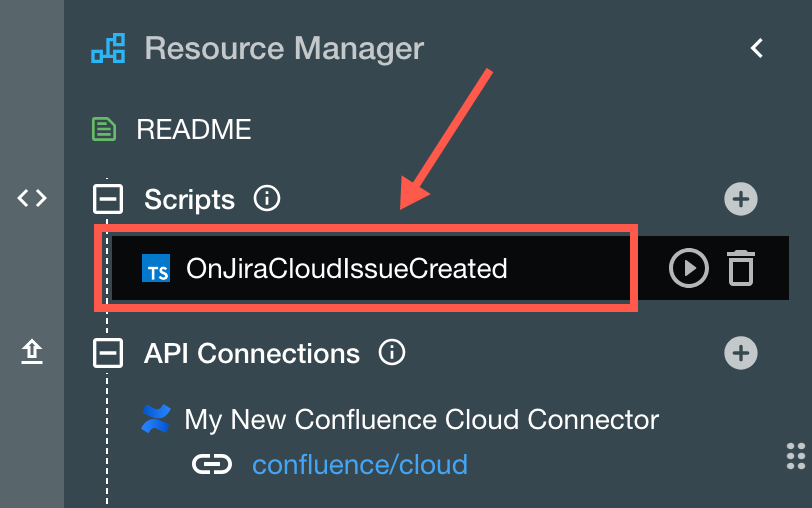
Highlight TEST in the CONFLUENCE_PAGE parameter, and replace it with the Confluence page key of the parent page you want the new pages to be created under.
Copying the Confluence Cloud page key 🔑
In Confluence Cloud, the page key is a string of numbers (and sometimes other characters) in the URL before the page title. Only copy the numbers and characters between the slashes.

Click Save in the Resource Manager to save the script changes.
Now a new Confluence child page will be created in your desired Confluence space each time a Jira ticket is created in the connected Jira instance.Make it your own! 🪄
You can edit the script to further define and customize which details from the Jira ticket are collected onto the Confluence page.