
Fires an Event when Condition is True
The Fires an event when condition is true post function enables you to trigger a specific Jira event based on a custom condition. Once fired, the event can be picked up by a notification scheme, determining who gets alerted.
Jira events, such as the Issue created or Issue updated event, are predefined occurrences in an issue's lifecycle. This post function allows you to fire these events even if that event wouldn't normally be triggered at that point in the workflow. This post function only fires the event when your specified condition is met, providing precise control over when notifications are sent.
By combining custom conditions with Jira's existing event types and notification infrastructure, you can create highly targeted alerts. This post function bridges the gap between Jira's standard event system and your workflow's unique requirements, allowing for more flexible and responsive issue management and communication.
To make the most of this post function we recommend you familiarise yourself with Jira events and notification schemes.
Example
As an example, we have a software development project in Jira, and we want to automatically notify the QA team when a high-priority bug is resolved. We would do the following:
- Create a custom event in Jira called High Priority Bug Resolved.
- Create a notification scheme in Jira that listens for this custom event and sends an email to the QA team.
- Locate the transition where we want to add this post function (for example from In Progress to Resolved).
- Add this post function to the chosen transition.
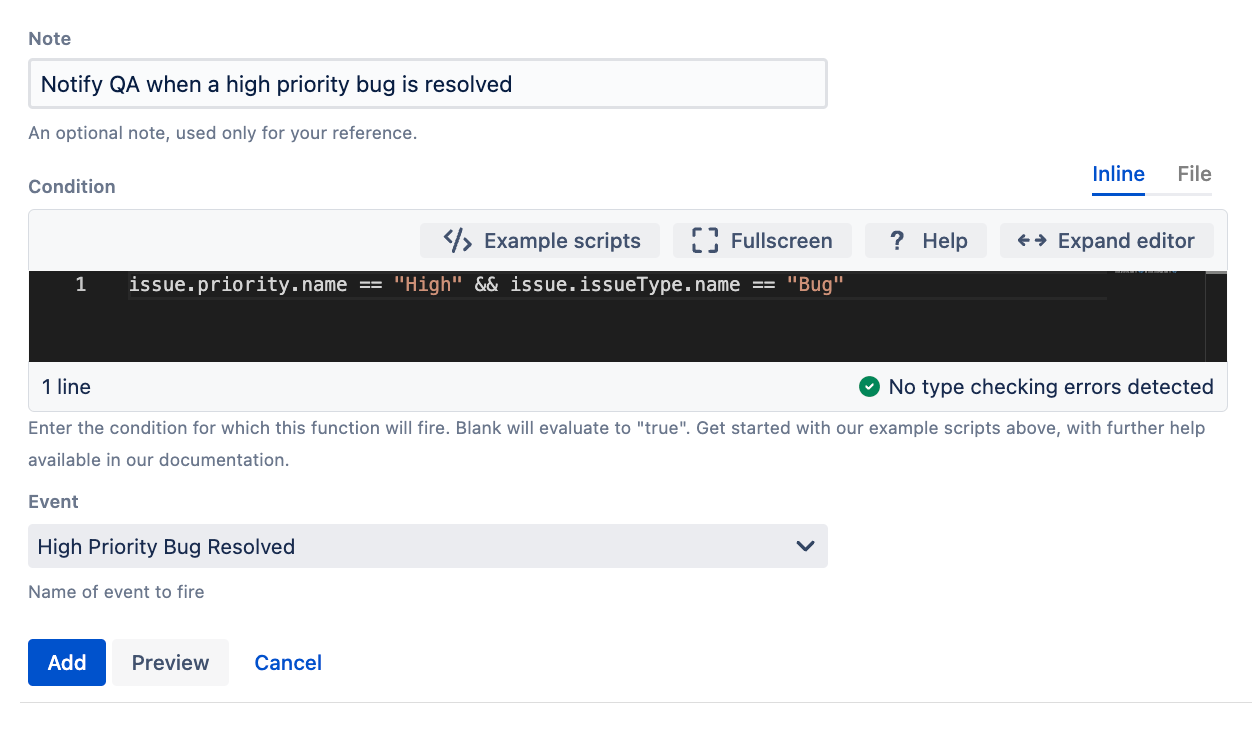
- Use the following condition in the post function:groovy
issue.priority.name == "High" && issue.issueType.name == "Bug" Specify the event to be fired when the condition is true. In this case, we would use the custom event High Priority Bug Resolved.
The above is a summary of the steps you would take to create a Jira event, a notification scheme, and this post function. See below for more detailed steps on how to set up this post function.
Use this post function
- Go to Administration > Issues > Workflows.
- Select Edit on the workflow you want to add this post function to.
- Select the transition you want to add this post function to.
Under Options, select Post Functions.
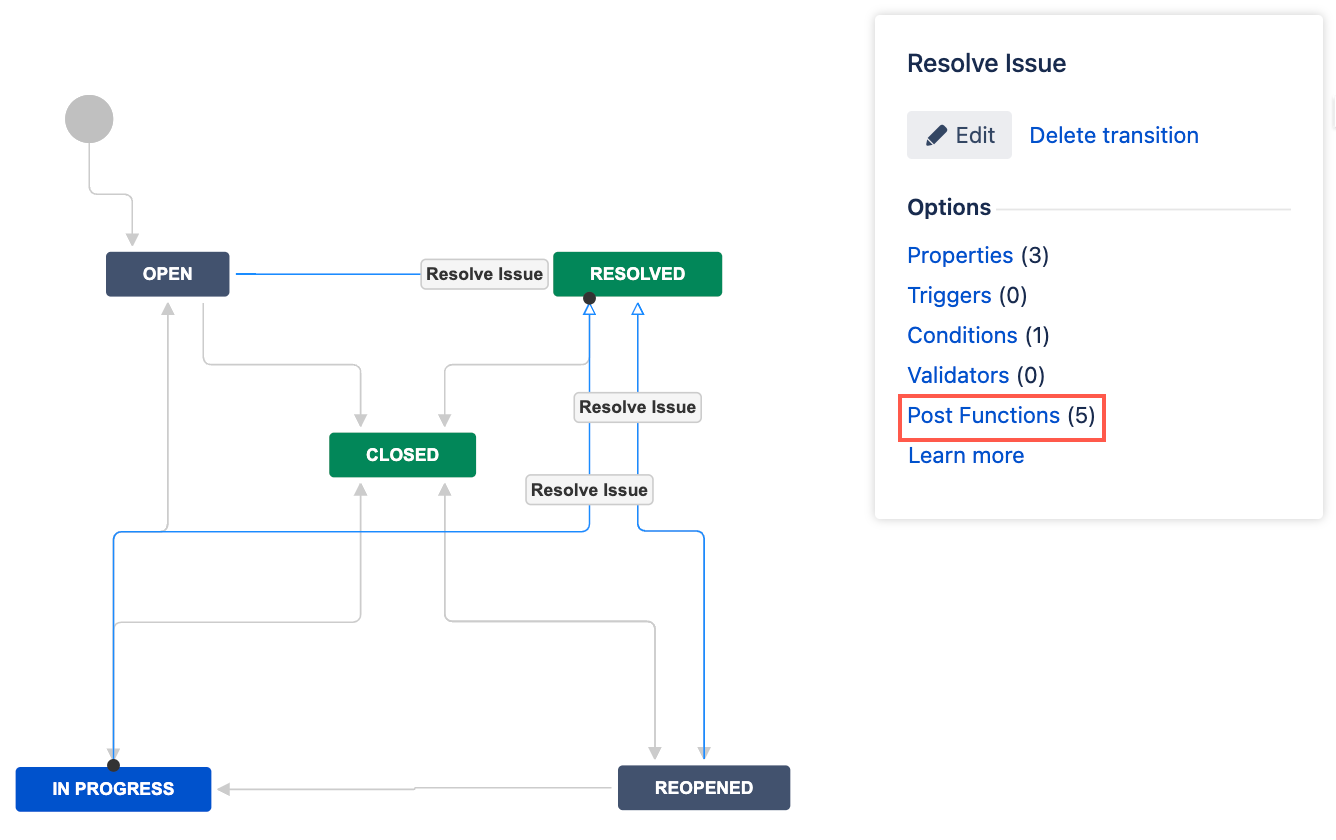
- On the Transition page, select Add post function.
- Select Fires an event when condition is true.
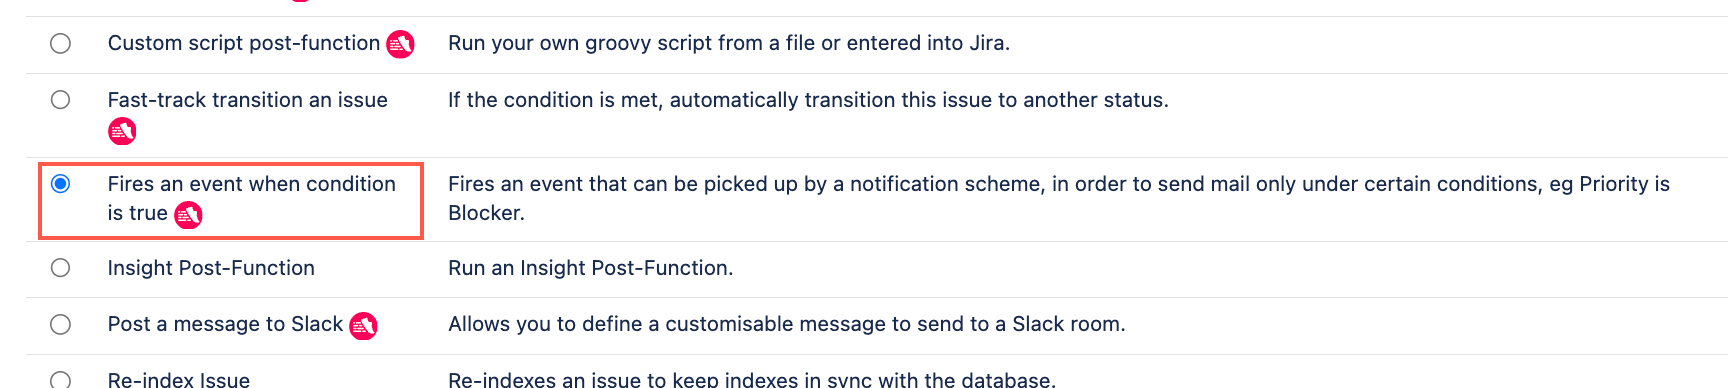
- Select Add.
- Optional: Enter a note that describes the post function (this note is for your reference when viewing all post functions).
- Enter a condition. If no condition is specified, then this post function will always run.
- Choose the event you want to fire when the condition is
true. - Select Preview to see an overview of the change.
Select Add.
If applicable, reorder your new post functions using the arrow icons on the right of the function (they can only move one line at a time). Check out our documentation on Post function order for more information.
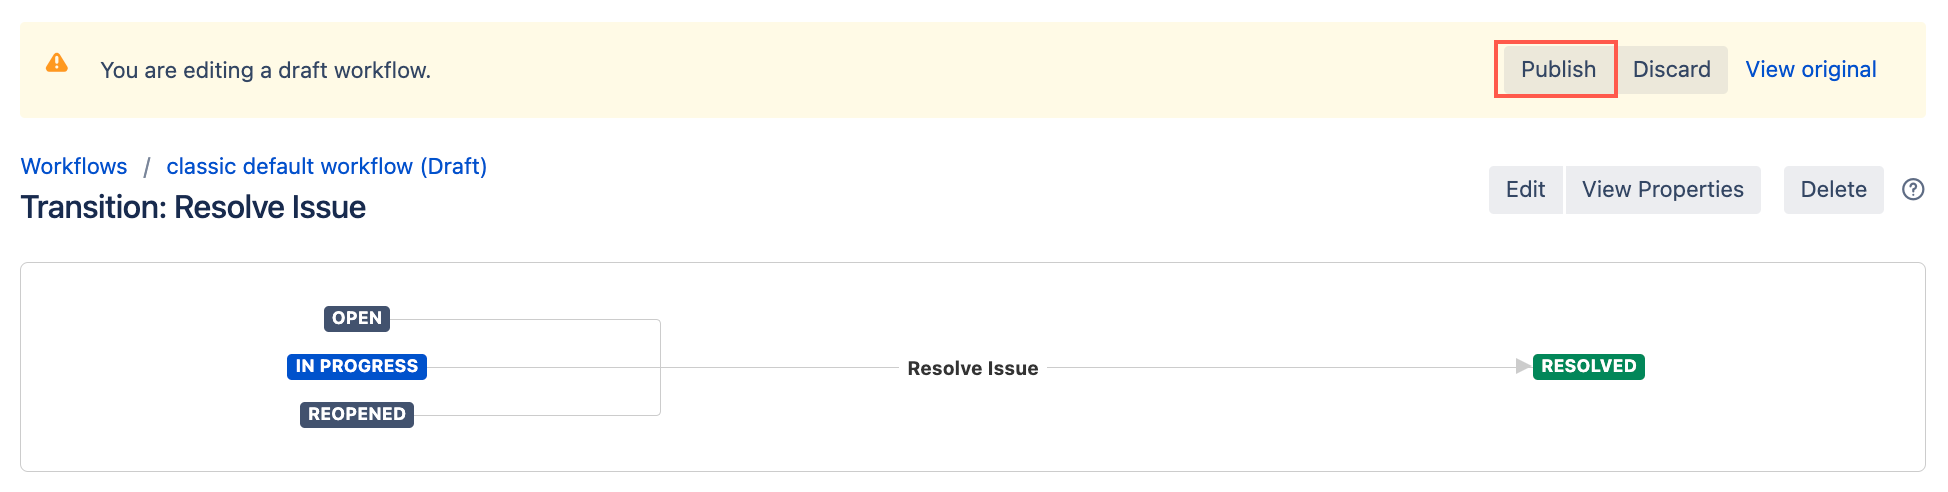
Select Publish and choose if you want to save a backup copy of the workflow.
You can now test to see if this post function works.