
Web Panel
Web panels can be used to add HTML snippets to parts of a page. They could be used to display additional information on a particular build, a plan, or the system navigation. For more information, read up on web panels in the Atlassian documentation.
This page covers how to use HTML to construct a banner and provides Web panel examples to help you construct your own web panel. An additional web panel example can be found on the Fragments Tutorial page.
Using HTML to construct a banner
Security issues with HTML
This HTML guide should only be used if you construct a banner/web panel that does not reference issue or project attributes. If you use user-writable issue or project attributes when constructing the HTML, it can be a security issue as a malicious user may write arbitrary HTML (including script tags containing JavaScript) to these fields, which will be parsed as the user viewing the page.
If you wish to use issue or project attributes in a web panel, we recommend using MarkupBuilder. Alternatively, we recommend escaping your HTML using TextUtils.htmlEncode.
For more information on using MarkupBuilder why this is a security issue, check out our page on how to Avoid Cross-site Scripting Vulnerabilities.
HTML is a markup language for web pages and can be used in the Show a web panel UI fragment. In this section, we provide some tips on how to use HTML to layout a web panel.
You can use writer.write() to input HTML into your script. How you layout your script is up to you, for example, you can lay out your script as follows:
groovywriter.write("<div style='background-color: #ff0000; color: #ffffff; padding: 10px; margin-bottom: 10px; text-align: center; font-family: Arial;'>" +
    "Please note that we currently have a reduced support team due to the holidays.<br>" +
	"Please be patient with us as it may take longer than usual to get back to you.</div>")
In the above script:
- The
"(double quotations) are used to delimit the strings of HTML content being written to the output. - The
+operator is used to link strings in Groovy. This operator should be used to link strings that you want to join together. - The
<br>tag is used to provide a line break in the HTML

Improving readability
The above script can be difficult to read, especially if you add more styles to it. To improve the layout of your script you can use """ to layout your script as follows:
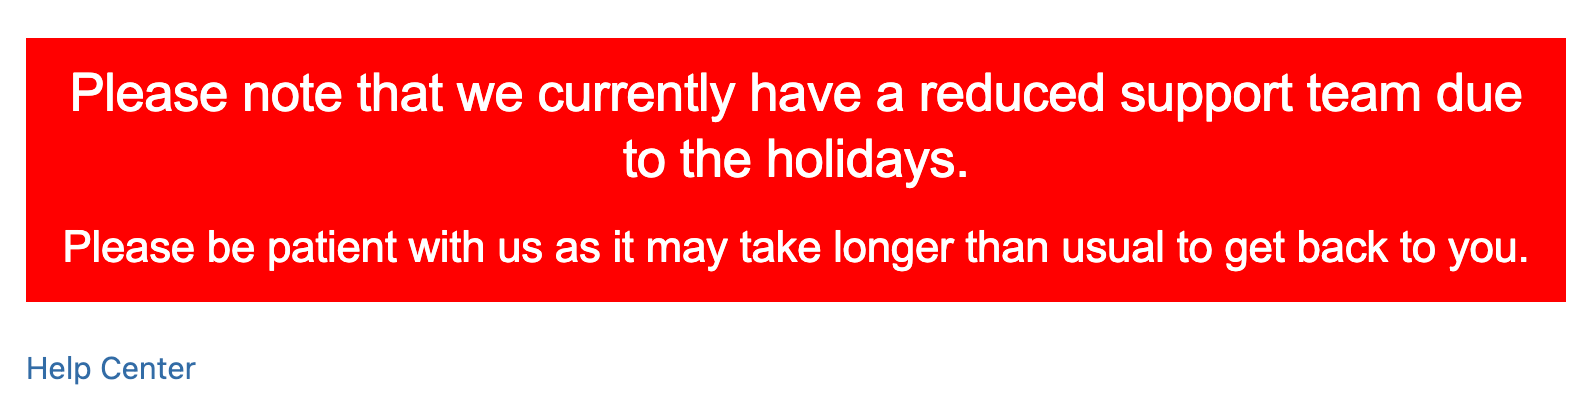
groovywriter.write("""
<div style='
    background-color: #ff0000;
    color: #ffffff;
    padding: 10px;
    text-align: center;
	font-family: Arial;
'>
    Please note that we currently have a reduced support team due to the holidays.<br>
    Please be patient with us as it may take longer than usual to get back to you.
</div>
""")
Using """ (triple double quotes) in Groovy allows you to define a multi-line string literal. This means you can write strings that span multiple lines without needing to link them using the + operator.
HTML style examples
The following table contains simple examples to help you style your banners.
When using any of the following HTML styles, make sure you format them as shown in the above examples.
| Styling | Prefix | Options |
|---|---|---|
Font | font-style: | Arial / Times New Roman / Courier etc. |
Text colors | color: | You can use a Hex code, for example #6DCC5D. Alternatively, you can name a color. For example, Black / Yellow / Red / Blue / Green / Pink / Purple / Brown etc. |
| Background colors | background-color: | You can use a Hex code, for example #6DCC5D. Alternatively, you can name a color. For example, Black / Yellow / Red / Blue / Green / Pink / Purple / Brown etc. |
| Text alignment | text-align: | Center / Left / Right / Justify |
| Padding | padding: | Padding is in length or percentage. For example, the length could be 10 px or 1 cm. Percentage could be 2%. |
| Border |
| Solid / Dotted / Dashed |
| You can use a Hex code, for example #6DCC5D. Alternatively, you can name a color. For example, Black / Yellow / Red / Blue / Green / Pink / Purple / Brown etc. | |
| Line break |
| If you are using |
Paragraph styles
You can use HTML paragraph styles (for example h1, h2 and p) to further format text within a web panel. For example, if you wanted to apply h1 and h2 paragraph styles to the Improving readability script:
groovywriter.write("""
<div style='
    background-color: #ff0000;
    padding: 10px;
    text-align: center;
    font-family: Arial;
'>
    <h1 style='color: #ffffff; margin: 0;'>Please note that we currently have a reduced support team due to the holidays.</h1>
    <h2 style='color: #ffffff; margin-top: 10px;'>Please be patient with us as it may take longer than usual to get back to you.</h2>
</div>
""")
The following changes have been made to the original script:
- The
color: #ffffff;style is added to both the<h1>and<h2>tags to ensure the text color remains white. - The
margin: 0;style on the<h1>tag removes any default margins that may be applied by the browser - The
margin-top: 10px;is added to the<h2>tag to provide spacing between the two headings. This margin value can be adjusted.
Hyperlinks
You can use the <a> tag to add hyperlinks to your web panels—this is the standard way to create a hyperlink with HTML. For example, if you wanted to add more text to the Improving readability script, and that script had a hyperlink to another page or website:
groovywriter.write("""
<div style='
    background-color: #ff0000;
    color: #ffffff;
    padding: 10px;
    text-align: center;
	font-family: Arial;
'>
	Please note that we currently have a reduced support team due to the holidays.<br>
	Please be patient with us as it may take longer than usual to get back to you.<br>
	See <a href='https://www.google.com' style='color: #ffffff; text-decoration: underline;'>this link</a> for more 	information.
</div>
""")
You can see that "this link" is enclosed within an <a> tag, and there is a href attribute that is set to the URL we want to link the text to.
In addition, to make sure the link matches the rest of the text in the banner, the style attribute within the <a> tag is set to color: #ffffff; text-decoration: underline;.

Web panel examples
In this section we provide some web panel examples. You can use these examples to construct your own web panel.
Simple web panel
As a simple example, we want to inform editors of certain projects that the space is to be deprecated, and we'd prefer that they update a page in another space.
- From ScriptRunner, navigate to Fragments.
- Select Create Fragment.
Select Show a web panel, and configure it as follows:
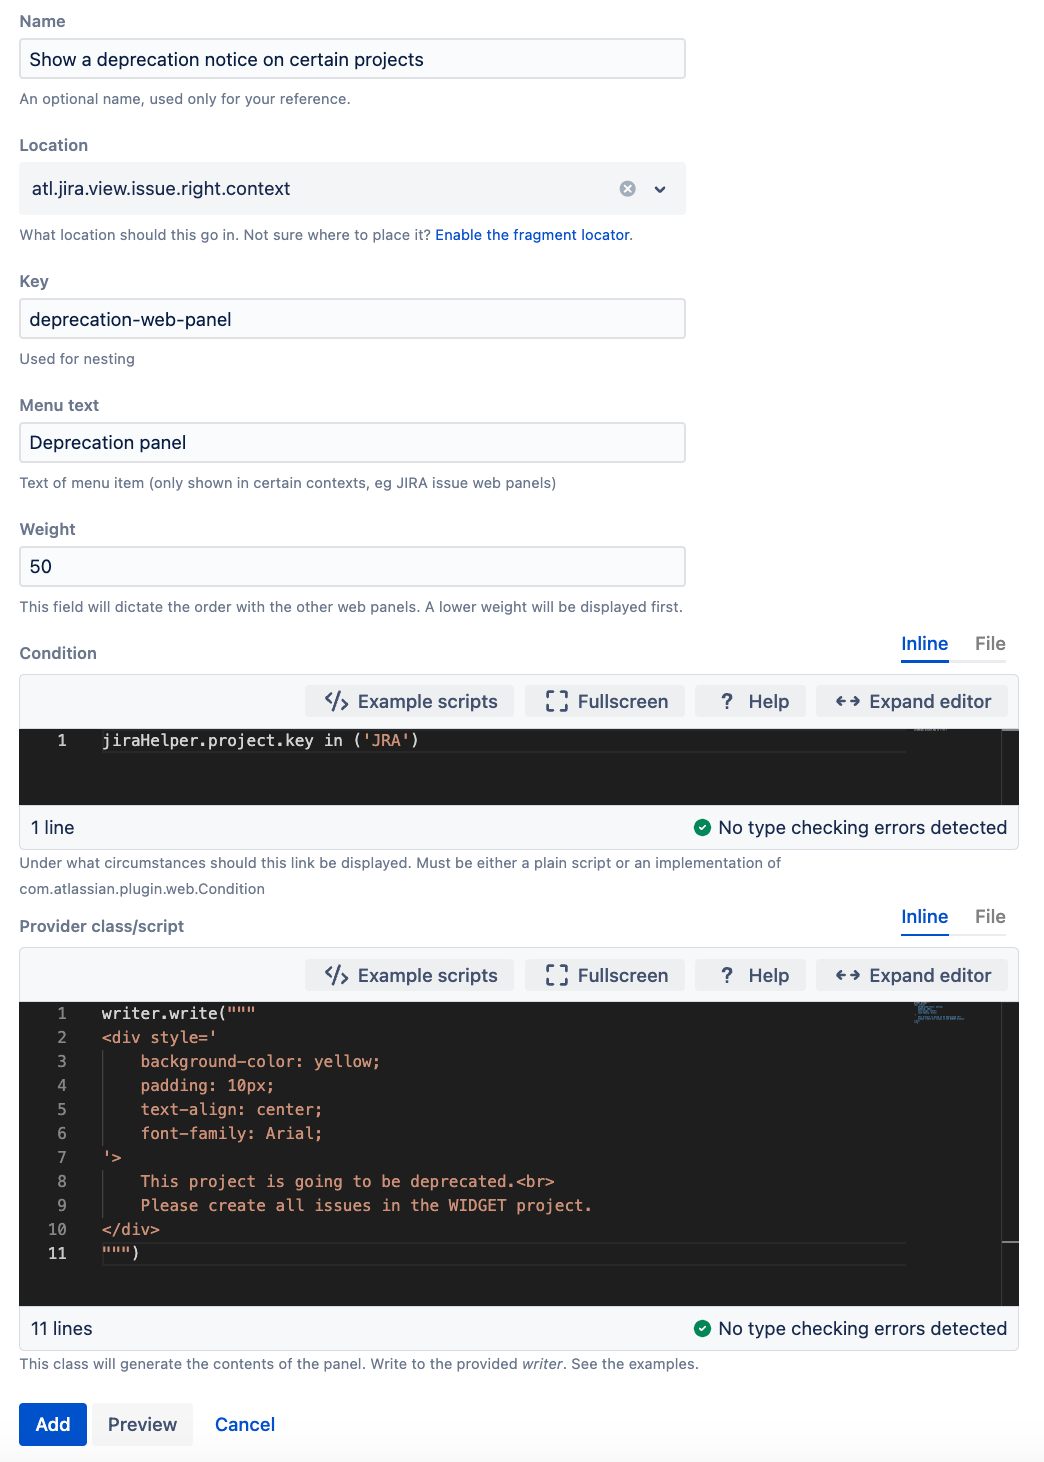
The weight field is optional, and it only takes positive integers. Lower weights will make the panel display at the top of its section. If this field is left blank the panel will appear at the end of its section.
For the Provider class/script, we use the following:
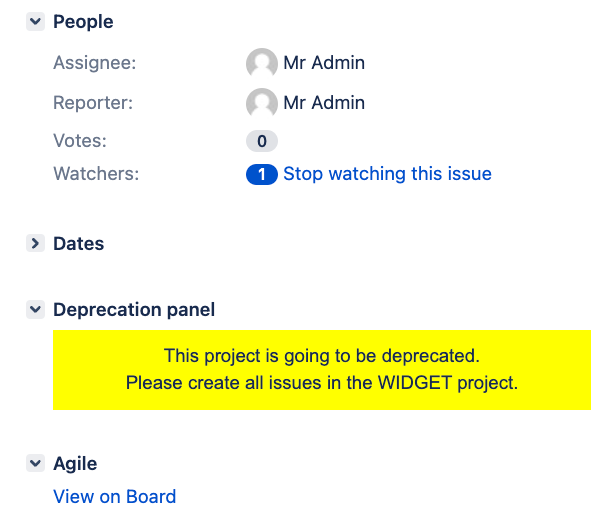
writer.write("""
<div style='
    background-color: yellow;
    padding: 10px;
    text-align: center;
    font-family: Arial;
'>
	This project is going to be deprecated.<br>
    Please create all issues in the WIDGET project.
</div>
""")
This should appear only on issues in certain projects, for example this panel only appears in the JRA project:
Parent issue example
This example shows how you can retrieve the current issue from the context. The context is just a Map, which is application specific, but in JIRA’s case contains the current issue, and a JiraHelper.
- From ScriptRunner, navigate to Fragments.
- Select Create Fragment.
Select Show a web panel, and configure it as follows:
You can see that there is a condition to do nothing if the issue is not a subtask. The condition means that the panel will only display on issues that are subtasks.
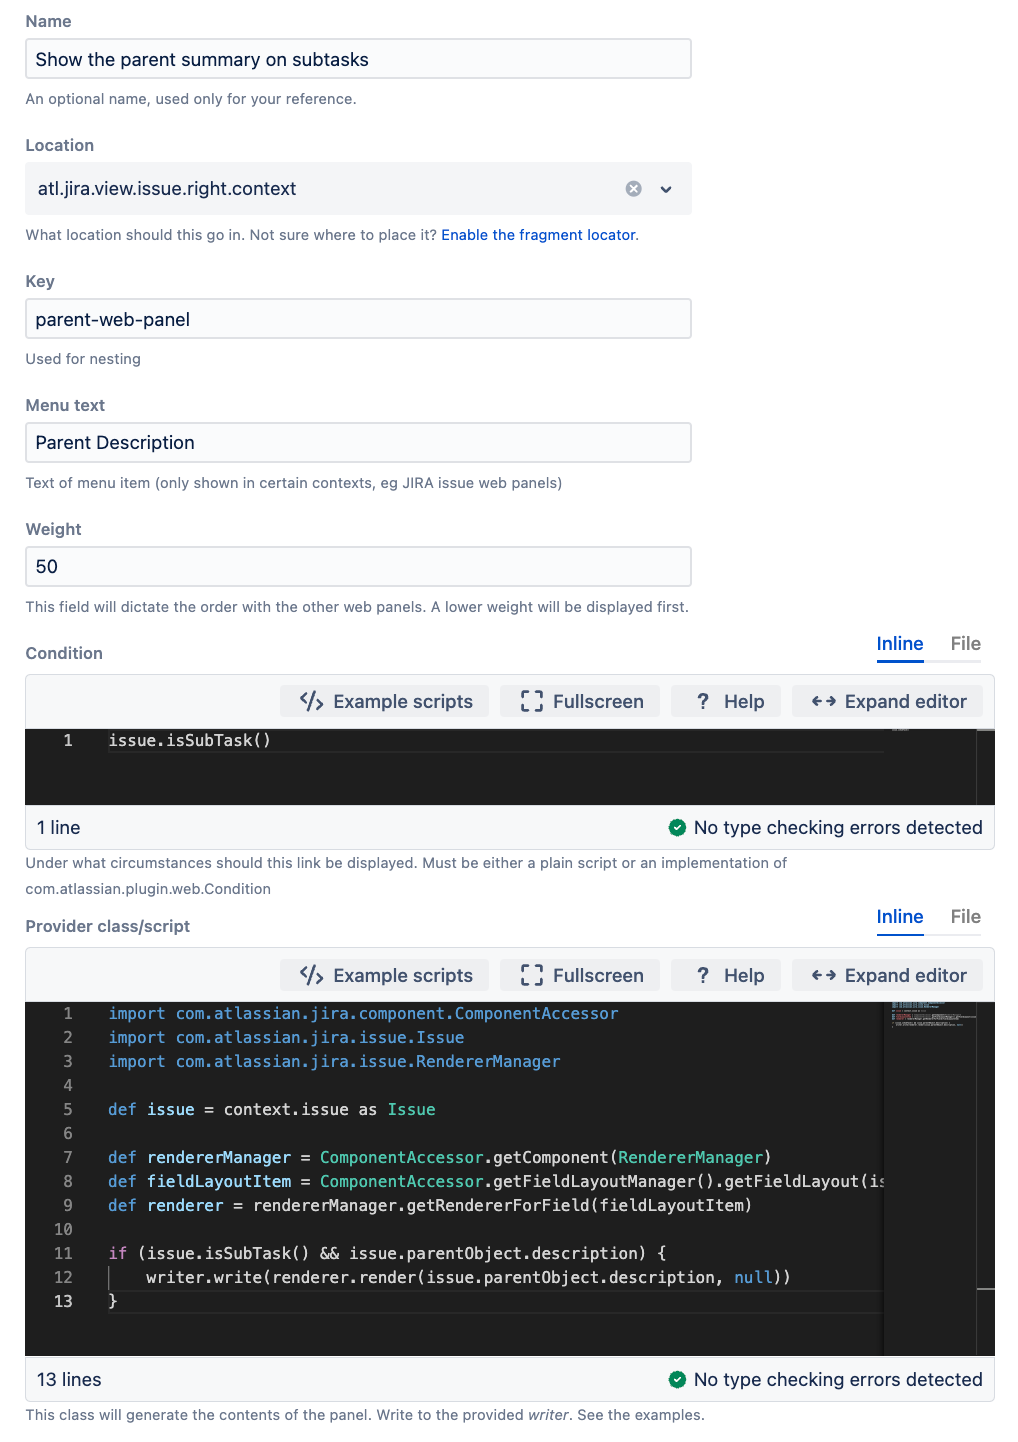
For the Provider class/script, we use the following:
groovyimport com.atlassian.jira.component.ComponentAccessor
import com.atlassian.jira.issue.Issue
import com.atlassian.jira.issue.RendererManager

def issue = context.issue as Issue

def rendererManager = ComponentAccessor.getComponent(RendererManager)
def fieldLayoutItem = ComponentAccessor.getFieldLayoutManager().getFieldLayout(issue).getFieldLayoutItem("description")
def renderer = rendererManager.getRendererForField(fieldLayoutItem)

if (issue.isSubTask() && issue.parentObject.description) {
    writer.write(renderer.render(issue.parentObject.description, null))
}
The following result displays on subtasks:

Conditions
Conditions are in web panels are the same as for web item conditions.