
Clones an Issue and Links
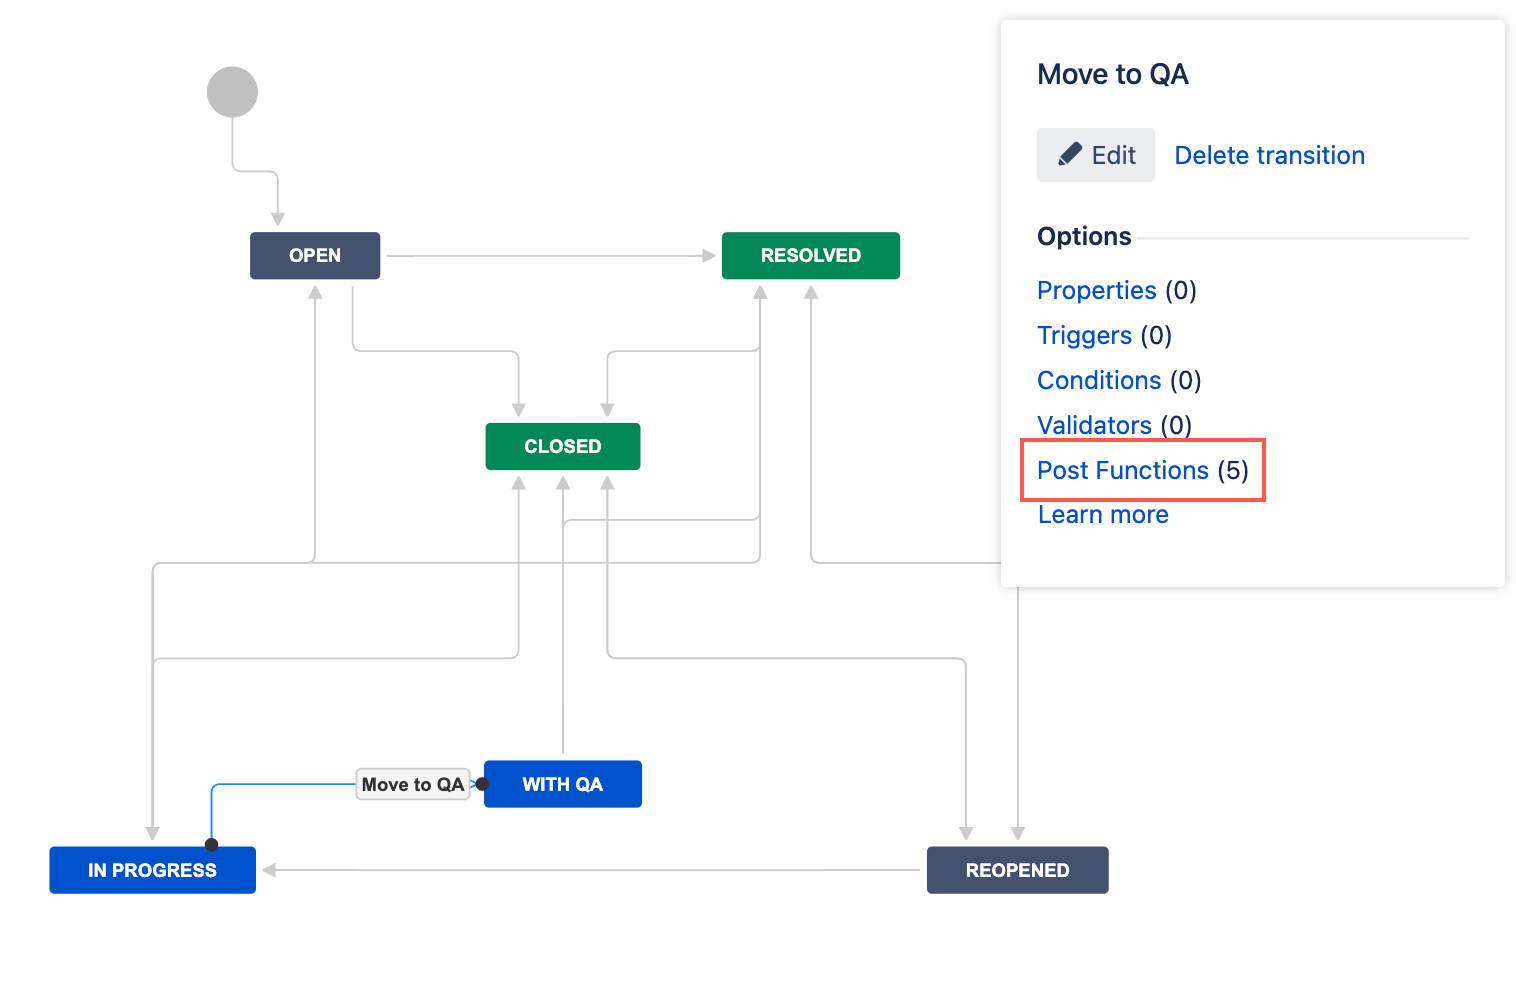
Use the Clones an issue, and links built-in post function to clone the current issue to a new one and create a link between the two. For example, when an issue is moved to With QA, we want the issue to be cloned to the QA project, and we want to update the summary of the cloned issue.
Post function configuration
When using this post function you can specify the following options:
- Which fields are being copied—either all fields, no fields, or specific fields from the source issue to the new one.
- Whether you want to copy comments, organizations and subtasks.
- The user the cloned issue is created on behalf of (As User field). This affects the creator and the reporter of the newly cloned issue. If empty, the currently logged-in user is used.
- The target issue type and target project. If you leave them blank the clone has the same project and type as the cloner.
- The link type and direction.
Required fields
When cloning an issue from one project to another, there may be times when a field is required in the target project but not required in the project of the issue being cloned, and therefore that field may be empty in the issue being cloned. In such a situation the issue is still cloned and the field will remain empty until you go into the target issue and edit it manually.
Overriding field values
If you want to override some field values rather than have them inherited from the source issue, you can specify that in the Additional issue actions field. For example, the following code sets the summary field and a custom field:
issue.summary = 'Cloned issue'
issue.setCustomFieldValue('My custom field name', 'value one')
Control link cloning
When an issue is cloned, both outward and inward links are copied. If issue A depends on issue B, after cloning to issue C, issue C will also depend on issue B. Similarly, if issue B was depended on by issue A, then issue B will also be depended on by issue C.
You can override this behavior and copy links selectively or disable it altogether by providing a callback (a closure) called checkLink in the Additional issue actions field. The callback will be called for every link found and should return true or false. This is passed by one parameter, the IssueLink object.
To disable the cloning of links altogether you can use the following code:
checkLink = {link -> false};To enable cloning of all links except links of the type Clones you can use the following code:
checkLink = {link -> link.issueLinkType.name != "Clones"}Control attachment cloning
When an issue is cloned, all attachments are also cloned. You can control which attachments are copied.
To disable attachment copying completely you can use the following code in the Additional issue actions field:
checkAttachment = {attachment -> false}To clone only the attachments added by the user alavigne you can use the following code in the Additional issue actions field:
checkAttachment = {attachment -> attachment.authorKey == 'alavigne'}After Create actions
Some actions can take place only after the issue is created (add watcher, create issue links, etc.). In this case, you can apply additional actions after the new issue is created using the doAfterCreate callback (closure).
For example, to add watchers to the new issue use the following code in the Additional issue actions field:
doAfterCreate = {
    issue.addWatcher('anuser')
}
You may want to link the new issue to another one. For example, to create a Duplicates issue link between the new issue and an issue with key SSPA-1 you can use the following code in the Additional issue actions field:
doAfterCreate = {
    def issueToLinkTo = Issues.getByKey("SSPA-1")

    issue.link('duplicates', issueToLinkTo)
}
The variable issue outside the doAfterCreate closure is not yet created and trying to access it will result in an error—the issue.getKey() will throw a NullPointerException. On the other hand the issue inside the doAfterCreate callback is created and exists—therefore the issue.getKey() will return the key of the new issue.
Use this post function
- Go to Administration > Issues > Workflows.
- Select Edit on the workflow you want to add this post function to.
- Select the transition you want to add this post function to.
- Under Options, select Post Functions.
- On the Transition page, select Add post function.
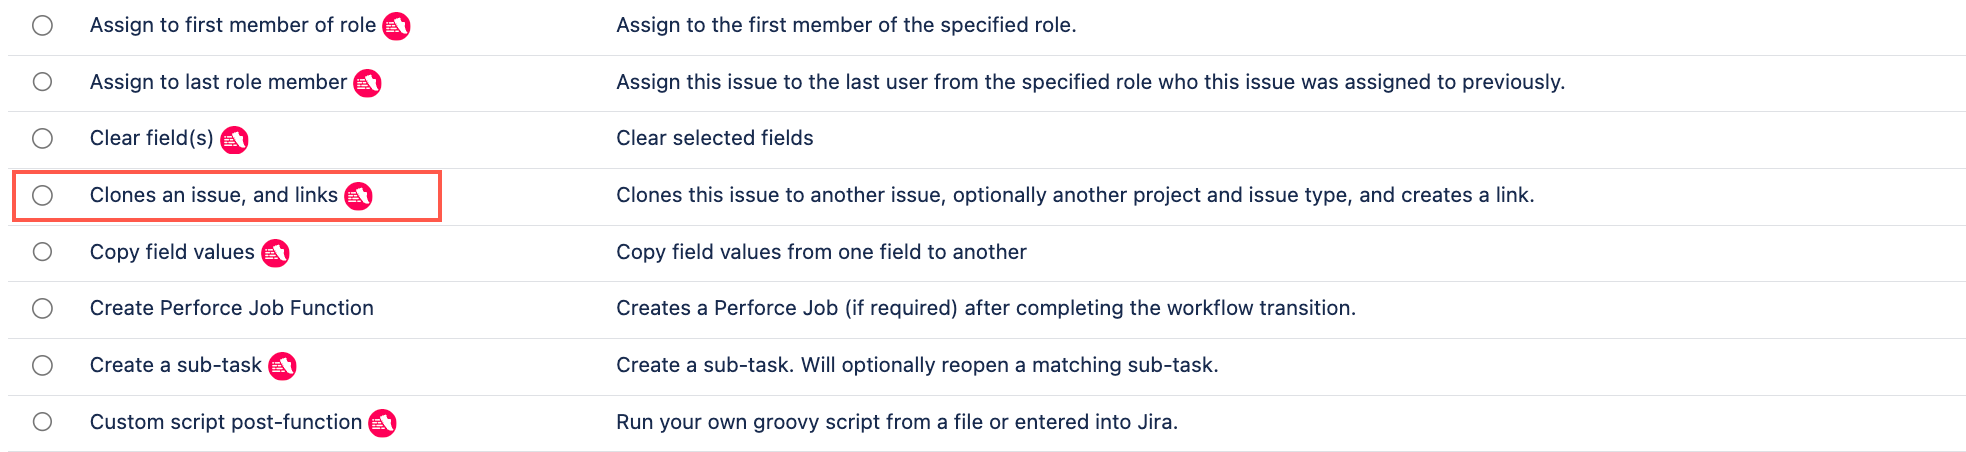
- Select Clones an issue, and links.
- Select Add.
- Optional: Enter a note that describes the post function (this note is for your reference when viewing all post functions).
- Optional: Enter a condition.
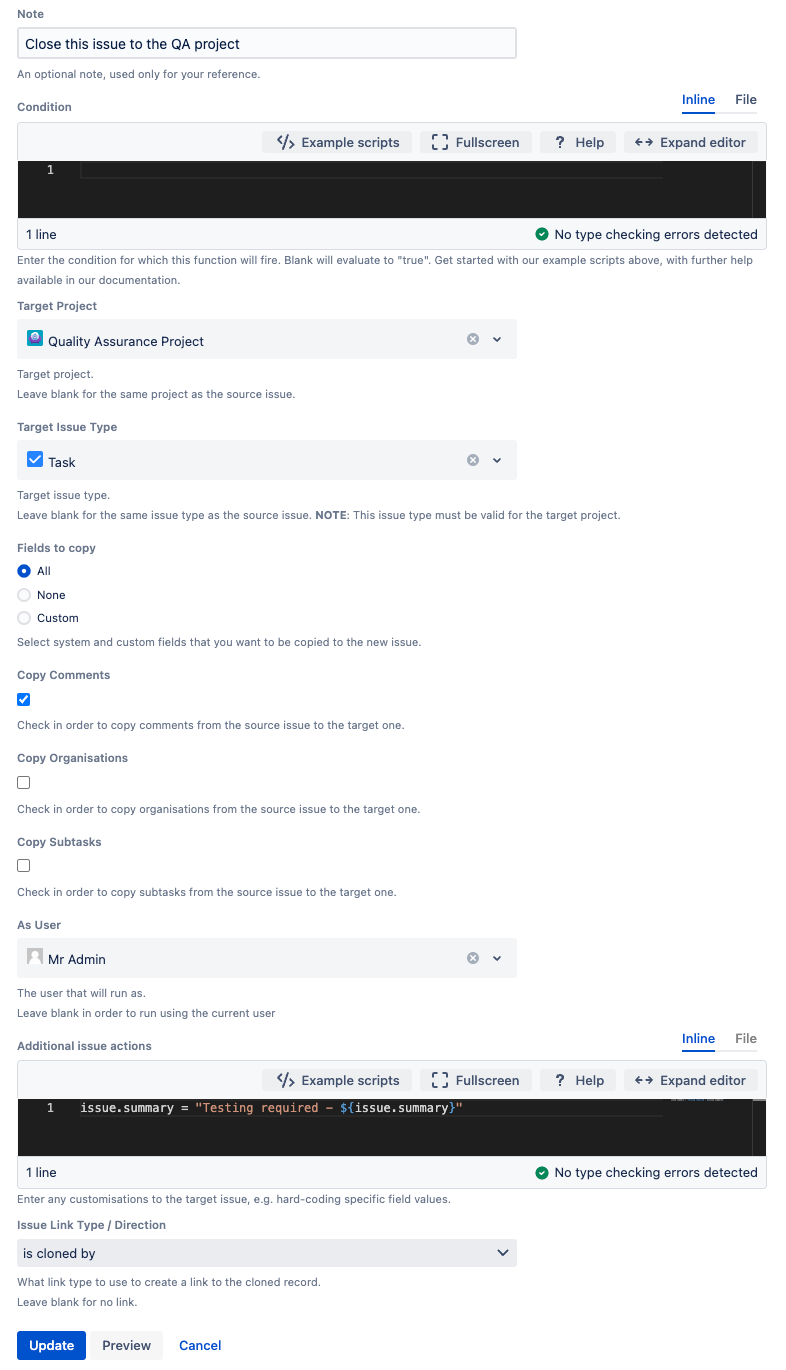
- Select a target project if you want to an clone issue to a different project. Leave this option blank if you want the cloned issue to remain in the same project as the source issue.
Select a target issue type if you want to specify the issue type of the cloned issue. Leave this option blank if you want the issue type to remain the same as the source issue type.
The issue type must be valid for the target project.
- Choose which fields you wish to copy to the cloned issue—All, None, or Custom.
- Choose if you want to copy comments to the cloned issue.
- Choose if you want to copy organizations to the cloned issue.
- Choose if you want to copy subtasks to the cloned issue.
- Enter a user you want this post function to run as. Leave this option blank if you want this post function to run as the current logged in user performing the transition.
Optional: Enter any additional actions you want to occur.
For example, if we want the new summary to include the summary of the source issue so we would use
issue.summary = "Testing required - ${issue.summary}".- Select the issue link type you want to use to create a link to the cloned issue. For example, if you select is cloned by then clones displays on the cloned issue and is cloned by displays on the source issue. Leave this option blank if you do not want to create a link between the source issue and newly cloned issue.
- Select Preview to see an overview of the change.
- Select Add.
If applicable, reorder your new post functions using the arrow icons on the right of the function (they can only move one line at a time).
This post-function should be placed immediately after the Re-index an issue to keep indexes in sync with the database function and before any other field update post functions. Check out our documentation on Post function order for more information.
Select Publish and choose if you want to save a backup copy of the workflow.
Test your post function
You can now test to see if this post function works.