
Send a Custom Email
Use this listener to send an email based on a Jira issue event and custom condition. For example, you can use this listener to send an email to certain recipients when an issue with Critical or High priority is created. Further examples include using this listener to send an email that is requesting approval for a sub-task, for instance, or letting the QA team know an issue is ready for test. If you'd rather use a workflow function to perform this function you can use our Send a Custom Email post function instead.
If you would rather send a notification than an email, you could use our Fires an Event when Condition is True post function.
This listener has multiple elements to it, each of these are summarised here and, where necessary, detailed more below:
- Applied to: Choose if you want to apply this listener to specific or all projects in your instance.
- Events: Choose the event/s this listener will fire on. You can select system events and custom events.
- Condition and configuration: Set a condition to control when this listener fires. You can also pass additional variables to the body and subject template using the
configmap, and dynamically control recipients using themailvariable. - Email template: Write an email template using plain text or the GStringTemplateEngine.
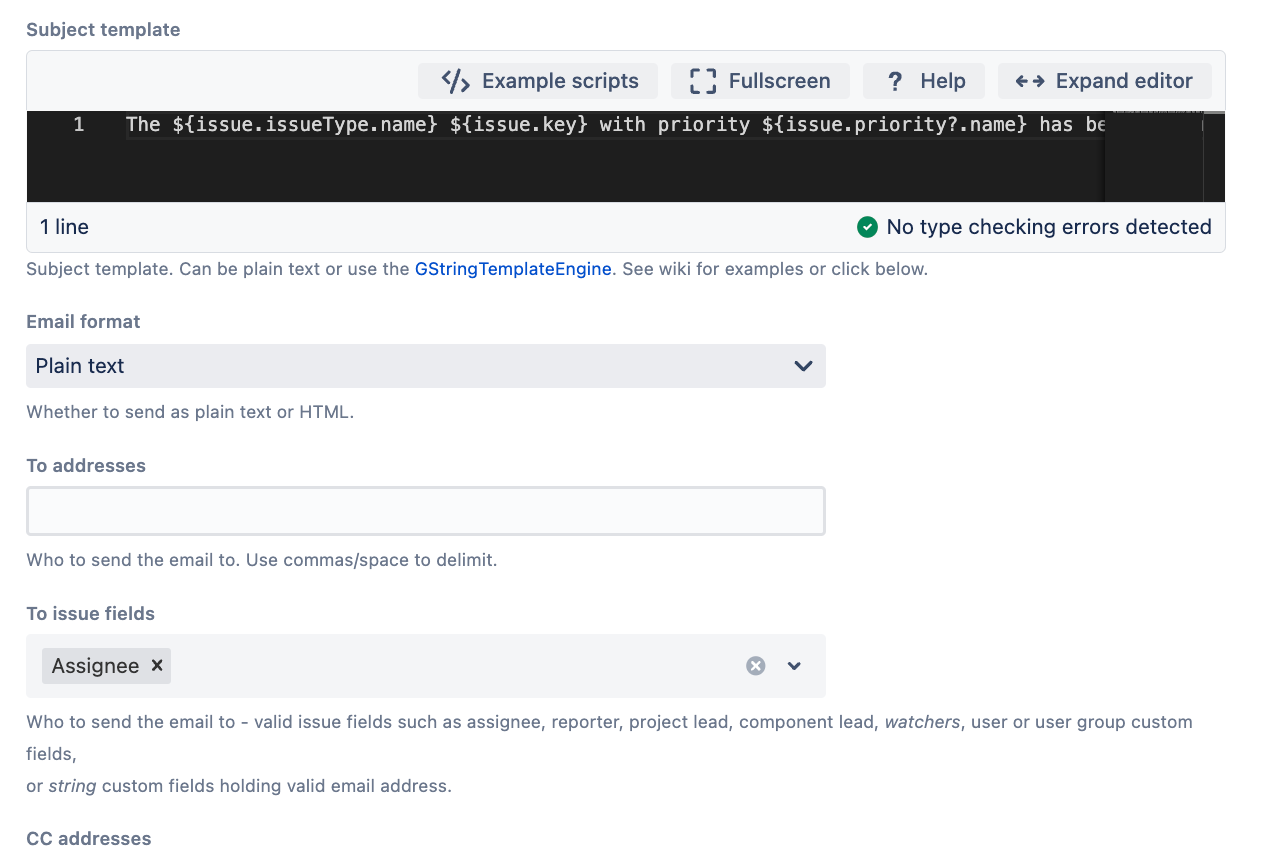
- Subject template: Write the subject template using plain text or the GStringTemplateEngine.
- Email format: Choose whether to send the email as plain text or HTML.
- To addresses/To issue fields: Choose who to send the email to. When adding To issue fields, acceptable issue fields include user fields (for example assignee, reporter, watchers) and string fields containing valid email addresses. Recipients must be active users to receive emails. To bypass this restriction, add email addresses directly to the
mailobject's recipient list. CC addresses/CC issue fields: Choose who should be CC'd on the email. When adding CC issue fields, acceptable issue fields include user fields (for example assignee, reporter, watchers) and string fields containing valid email addresses. Recipients must be active users to receive emails. To bypass this restriction, add email addresses directly to the
mailobject's recipient list.- Include attachments: Choose whether to include attachments in the email.
- Custom attachment callback: Enter a function which will be called with each
Attachmentobject. This option is only relevant if you select the Custom option when choosing to include attachments. - Reply-to email address: Set the email address for replies.
- Preview Issue key: Enter an issue key to preview what the mail will look like.
- Disable validation: Choose to disable the validation of the configuration when you are set from/to/cc dynamically.
Use this listener
You can find step-by-step instructions on how to use this listener below.
Prerequisite
You must configure an SMTP mail server to send mail.
Condition and configuration
In the Condition and configuration code editor you can enter a condition to ensure certain conditions are met before the email is sent. You can also use this code editor to pass additional variables to the Email template and Subject template using the config map, and dynamically control recipients using the mail variable. We provide the following examples that you can use in the Condition and configuration code editor:
Getting custom fields
To get custom fields that are accessible in your Email template and Subject template, you must use a config map instead of the import keyword, as this is not available in the template engine. This is done in the Condition and configuration code editor. You can also pass functions that you can call from the Email template.
As this code editor is also used for the condition, you must continue to return a boolean value to tell the system whether to send the email.
The following is a simple example of how to set up a config map in the Condition and configuration code editor:
This example allows easy access to the story points value and a string capitalization function in email or subject templates by using config.storyPoints and config.capitalize(string) respectively.
import com.atlassian.gzipfilter.org.apache.commons.lang.StringUtils
import com.atlassian.jira.component.ComponentAccessor
import com.atlassian.jira.issue.CustomFieldManager

def customFieldManager = ComponentAccessor.getComponent(CustomFieldManager)
def storyPointsCf = customFieldManager.getCustomFieldObjectByName("TextFieldB")

// add value of story points to config map
config.storyPoints = issue.getCustomFieldValue(storyPointsCf)

// add a closure
config.capitalize = { String str ->
    StringUtils.capitalize(str)
}

return true
Using the above, you could write your email template as follows:
Static type checking warnings
Your config map may trigger static type checking warnings in your email template. These could be false positive warnings and your mappings should still function correctly. If you do see errors, we recommend you test your custom email to check it works as expected.
Dear User,

Story Points: ${storyPoints}

Function: ${capitalize.call('hello sailor')}
If you want to optimize the performance of your script you can use the following in the Conditions and configuration code editor:
groovydef condition = issue.status.name == "Open" && ...
if (! condition) return false

def expensiveConfigVars = [foo: "bar"]

config.putAll (expensiveConfigVars)
This code only populates the config map if the condition is met, implements an early return based on a condition check, and separates expensive operations into their own map. This approach prevents unnecessary computations when the script's conditions aren't met.
Controlling To and From addresses
The following examples replace the To addresses, To issue fields, CC addresses, CC issue fields, Reply-to email address options. If you are dynamically setting any of these addresses you can leave the appropriate fields empty.
In addition you must check the Disable validation option at the bottom of the form. By checking this box, you're telling Jira to skip its usual checks (for example, checking form fields) and allow the listener to be saved and executed based on your custom script logic.
Control over To addresses
You can dynamically set the email recipients and sender based on issue attributes or custom fields. This is done in the Condition and Configuration code editor using the mail object (com.atlassian.mail.Email ).
For example you can set recipients based on issue attributes as follows:
if (issue.priority.name == "Highest") {
    mail.setTo("head-honcho@acme.com")
} else {
    mail.setTo("chair-moistener@acme.com")
}
You can also set recipients from a custom field as follows:
import com.atlassian.jira.component.ComponentAccessor

def multiSelectAddressesCF = ComponentAccessor.getCustomFieldManager().getCustomFieldObjectByName("Multi Select Email Adresses")
def recipients = issue.getCustomFieldValue(multiSelectAddressesCF)?.join(",")

mail.setTo(recipients)
Control over From and Reply-to addresses
By default we typically use the From address associated with your configured SMTP server. This approach is adopted because many corporate mail relays are set up to accept emails from only one authorized sender. Allowing users to customize the From address has often led to confusion when the mail relay blocked these customized addresses. Therefore, instead of changing the From address, we recommend setting the Reply-to address. You can do this either within the form itself (using the Reply-to email address option) or by using the mail.setReplyTo(...) function in your code.
If you want to personalize how the sender's name appears in the recipient's mail client, you can use the mail.setFromName() function. For example, mail.setFromName("Example name"). If you needed to set the From address you could use the following:
mail.setFrom("example-name@example.com")Exclude watchers from custom email recipients
You may want to exclude watchers from the email recipients. For example, you can use the following code to set the email recipients programmatically in the Conditions and configuration code editor:
import com.atlassian.jira.component.ComponentAccessor

def locale = ComponentAccessor.getLocaleManager().getLocaleFor(currentUser)
def watchers = ComponentAccessor.getWatcherManager().getWatchers(issue, locale)

def cf = ComponentAccessor.getCustomFieldManager().getCustomFieldObjectByName("Multi User Picker CF")

//get the users' email addresses, in a comma separated string, that are members of the Multi User Picker custom field and are not watchers
def recipients = issue.getCustomFieldValue(cf)?.findAll { !watchers.contains(it) }?.collect {
    it.emailAddress
}?.join(",")

mail.setTo(recipients)
Adding generated attachments
You may wish to generate your own attachment and include it in the email. For example, you may want to add:
an automatically generated invoice
a custom PDF or Office document
an Excel file with the output from a query
You can add the attachment in the Conditions and configuration code editor, for example:
import javax.mail.internet.MimeBodyPart
import javax.mail.internet.MimeMultipart
import javax.mail.internet.MimeUtility

import javax.activation.DataHandler
import javax.activation.FileDataSource

def mp = new MimeMultipart("mixed")

def bodyPart = new MimeBodyPart()
bodyPart.setContent("some text content", "text/plain")

//def attFds = new FileDataSource("/path/to/file.xls")
//bodyPart.setDataHandler(new DataHandler(attFds))

bodyPart.setFileName(MimeUtility.encodeText("foo.txt"))
mp.addBodyPart(bodyPart)
mail.setMultipart(mp)

true
Above we demonstrate how to add a simple text attachment and how to attach a file from the file system.
Email and subject templates
You can write the main body of your email in the Email template code editor. You can write the subject of your email in the Subject template code editor. Your templates can be plain text or use the GStringTemplateEngine. For example, your email template could look as follows:
Dear ${issue.assignee?.displayName},

The ${issue.issueType.name} ${issue.key} with priority ${issue.priority?.name} has been assigned to you.

Description: $issue.description

<% if (mostRecentComment)
    out << "Last comment: " << mostRecentComment
%>

Custom field value: <% out << issue.getCustomFieldValue("TextFieldB") %>

Regards,
${issue.reporter?.displayName}
Rendering wiki markup fields
If you are sending HTML mails you will want fields containing wiki markup to be converted to HTML. You can use the following code in your templates to do this:
${helper.render(issue.description)}Only the standard Atlassian Wiki Renderer for Jira is supported, not custom plugins supplying their own renderers.
Including query results
You can include the results of a query in your email template - this will utilise the same velocity templates that Jira uses. For example:
${helper.issueTable("project = FOO and assignee = currentUser()", 10)}The number 10 is an optional parameter that indicates the maximum number of issues to show. If there are more than this number, we do not currently provide links to the issue navigator to retrieve them.
There is an outstanding Jira bug JRA-40986 which prevents images being inlined into the email, so recipients will need network connectivity to the Jira instance in order for images to show.
Getting old and new custom field values
You may want to retrieve a compare old and new custom field values to include this information in the custom email. For example, you could use this following code in your template:
<%
def change = event?.getChangeLog()?.getRelated("ChildChangeItem").find {it.field == "Name of custom field"}
if (change) {
out << 'Old: ' + change.oldstring + "\n"
out << 'New: ' + change.newstring
}
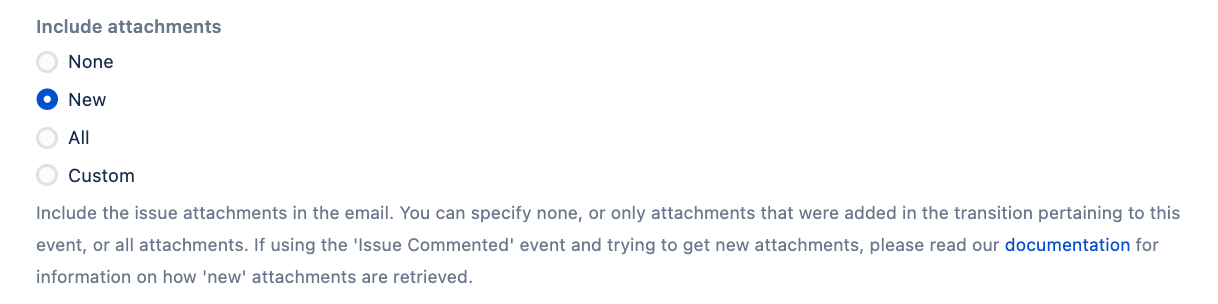
%>Include attachments
The Include attachments function allows you to include issue attachments in your email. This feature is particularly useful for communicating with offsite collaborators who may not have Jira accounts. You have the following attachment options:
- None: Do not include any attachments
New: Include only attachments added during this transition
By default, New on the Issue Commented event will get any attachments found in the comment body. On Issue Created all attachments will be added. On other events, such as Issue Updated, any attachment that was added as part of that event’s changeLog will be included.
- All: Include all attachments
- Custom: Define a custom attachment callback for precise control over attachment selection. Select Example scripts in the code editor for examples.
To ensure proper filename encoding for attachments, especially when dealing with long filenames or non-ASCII characters, you may need to adjust JavaMail properties in your Jira startup settings. This is particularly relevant for compatibility with certain versions of Microsoft Outlook.
To address this, set the following properties in your Jira instance’s startup scripts:
mail.mime.encodefilename=true
mail.mime.decodefilename=true
The necessity and effectiveness of these settings may vary depending on your specific environment. Different email clients implement RFC 2231 in various ways, so results may differ across systems.
Use this listener
- Navigate to ScriptRunner.
- Select Listeners > Create Listener.
- Select Send custom email.
- Enter a name that describes the listener (this name is for your reference when viewing all listeners).
- Enter the project/s this listener will be applied to.
- Enter the event/s this listener will fire on.
Optional: Enter a condition and any configuration you require. If no condition is specified, then this listener will always run on the chosen event/s.
You can pass additional variables to the body and subject template using the
configmap, and dynamically control recipients using themailvariable.- Write an email template. This can be written in plain text or you can use the GStringTemplateEngine.

- Write the subject template. This can be written in plain text or you can use the GStringTemplateEngine.
- Select the email format you want to send the email as.
- Enter whom you want to send the email to in To addresses and/or To issue fields.
- Enter whom you want to CC the email to in CC addresses and/or CC issue fields.
- Choose if you want to include attachments. You have the option of None, New, All, or Custom.
If you selected Custom in the previous step, enter a custom attachment callback.
Select Example scripts in the code editor for examples.
- Enter a reply-to email address.
- Enter a preview issue key.
- Choose if you want to disable validation of the configuration.
Select Preview to see an overview of the configuration.
If you are facing issues with characters appearing as question marks (???) then, in most cases, problems are due to a misconfiguration in the encoding, see Jira Application internationalization and encoding troubleshooting.
Select Add.