Update Fields
Updating custom fields is a very common task. There are three ways to specify custom field values:
- Use textual names for fields, for readable and simple code. For example, for a select list you specify the option value.
- Use object IDs if you feel concerned about names changing. For instance, in a select list you can use an option ID.
- Use the underlying objects (
Option,Version) - this is useful when copying values from one issue to another.
We also cater for common automation tasks, such as setting an additional fix version or multi-select value without retrieving the current value, adding the new one, and then setting the new list of values.
In addition to the examples provided on this page, check out our Example script on updating the value of custom fields.
Custom fields
Custom fields can be set by numeric ID or name. The numeric ID of a custom field is just the number portion of its ID. For example, if the String ID is customfield_12345, the numeric ID is 12345. Use the custom field name for readable and portable scripts. To read the value of a custom field, see the Reading Custom Field Values section below.
Using the ID
We recommend that you use the ID if you like to rename your custom fields or have multiple fields of the same name.
Check out our video on how to use custom fields with HAPI.
Reading the value of custom fields
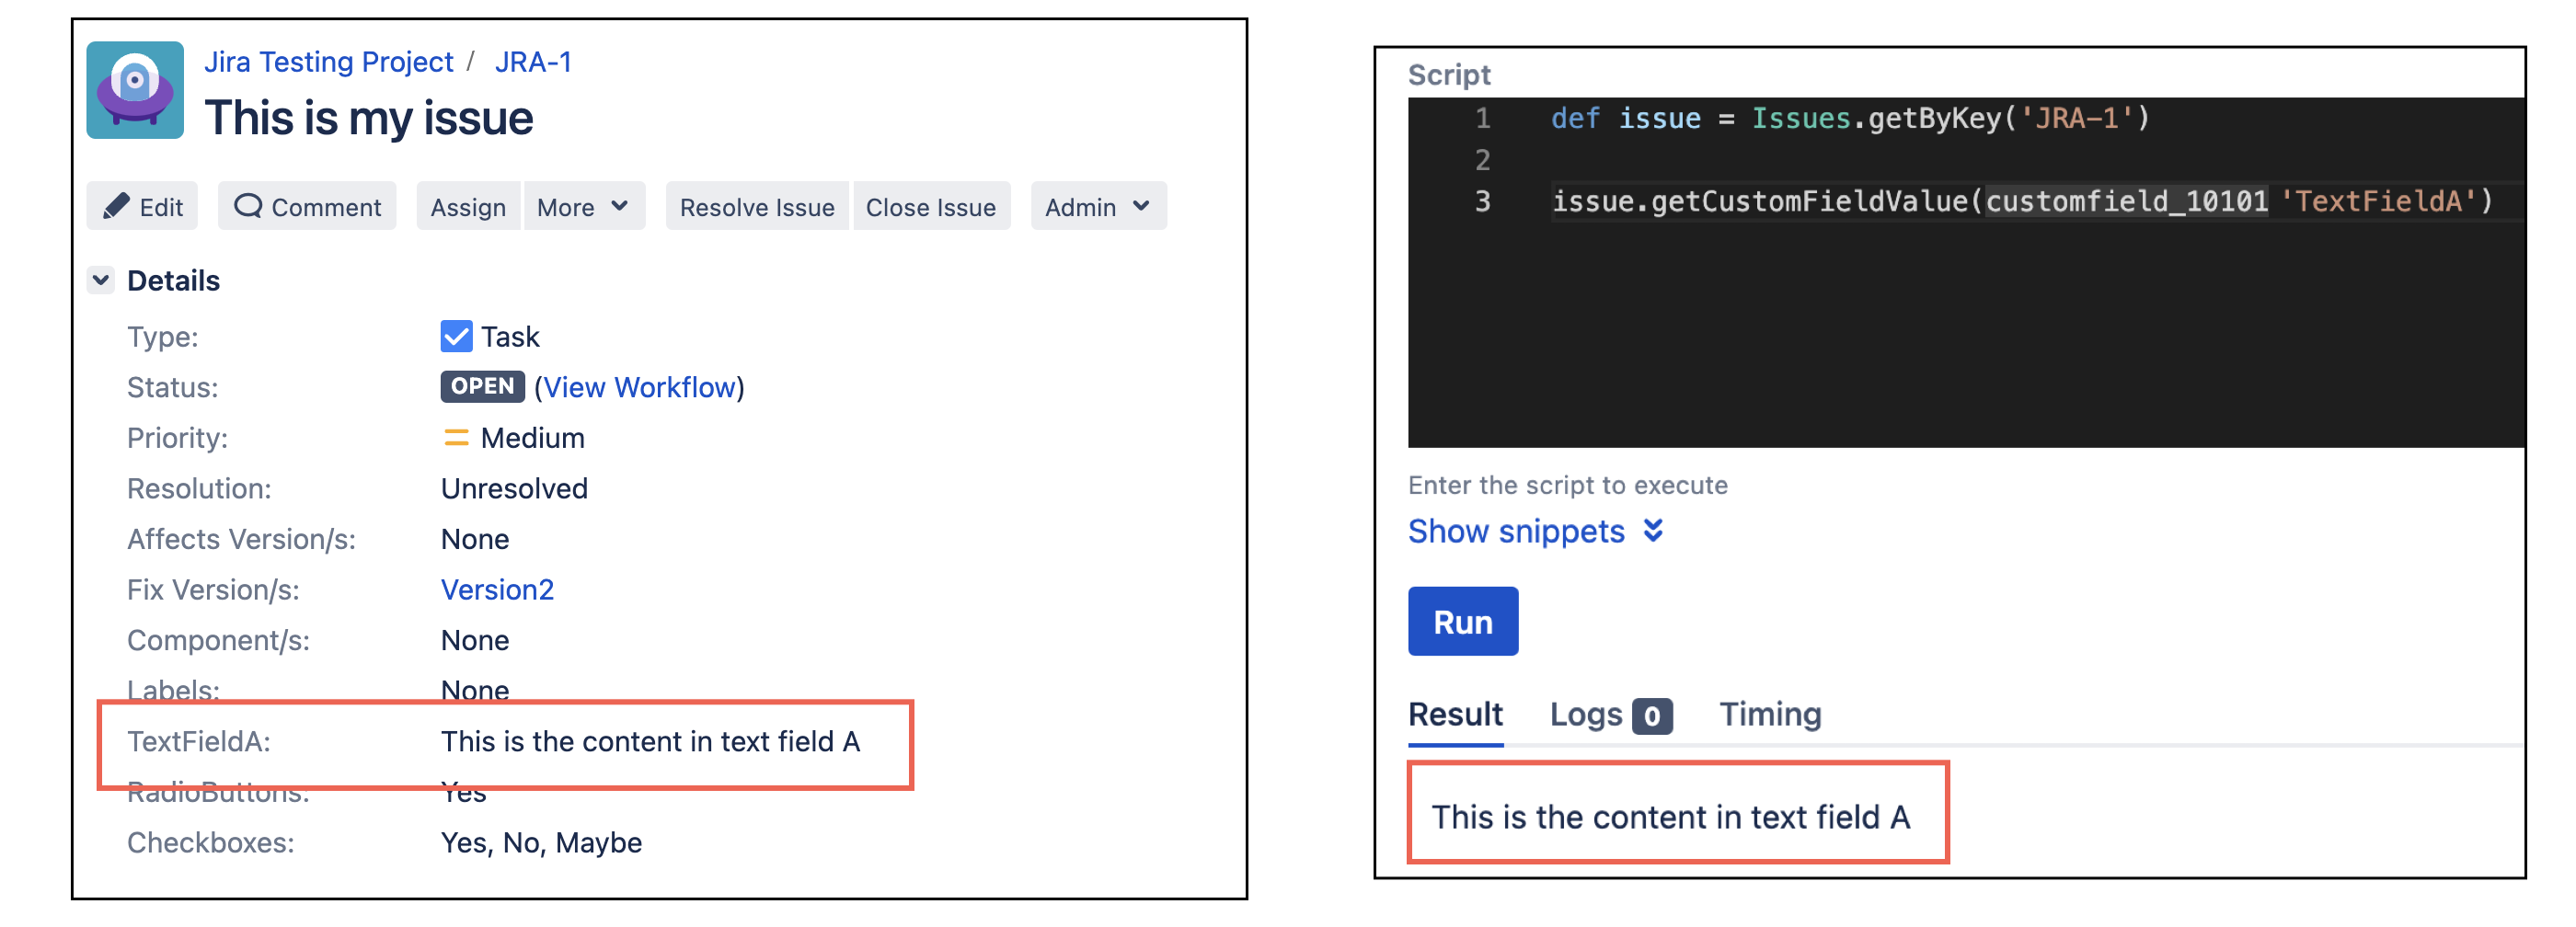
You can use the HAPI shortcut to get custom field values:
            // by custom field name
            issue.getCustomFieldValue('My text field')

            // or by custom field ID
            issue.getCustomFieldValue(10146)
Using this shortcut means you don't have to use CustomFieldManager to look up the custom field instance first.
Caching
It's important to note that an issue's fields are cached when the Issue object is first retrieved. Therefore, if you retrieve a custom field value and then update the field, whatever the value was before you updated the field is returned. To ensure the updated value is returned you can use refresh().
For example, the following logs out null rather than the updated value:
groovydef issue = Issues.getByKey('JRA-1')

log.warn(issue.getCustomFieldValue('Select List'))

issue.update {
	setCustomFieldValue('Select List', 'First Option')
}

log.warn(issue.getCustomFieldValue('Select List'))
If we add refresh() to the Issue object it returns the expected result of First Option:
groovylog.warn(issue.refresh().getCustomFieldValue('Select List (multiple choices) example'))
Updating text fields
Text fields can be set using the following:
In this example we're using custom field values to add a text field to the issue.
            issue.update {
                setCustomFieldValue('My text field', 'foo')

                // or
                setCustomFieldValue(10104, 'foo')
            }
A second option allows for greater flexibility when updating a field. Supply a closure with instructions on exactly how to update the field. You can use one or many of these instructions within the closure. In this example we're using methods to update various parts of the issue description:
            issue.update {
                setDescription {
                    set('Greenhopper is a tool for Agile software development')

                    // add to the existing value
                    append('this will be added to the end')

                    // prepend to the existing value
                    prepend('this will be added to the beginning')

                    // replace all instances of the first string with the second
                    replace('Greenhopper', 'Jira Software')
                }
            }
This option can be used on all string fields. For example description, environment, summary, short and long text custom fields, etc.
Bulk updating text fields
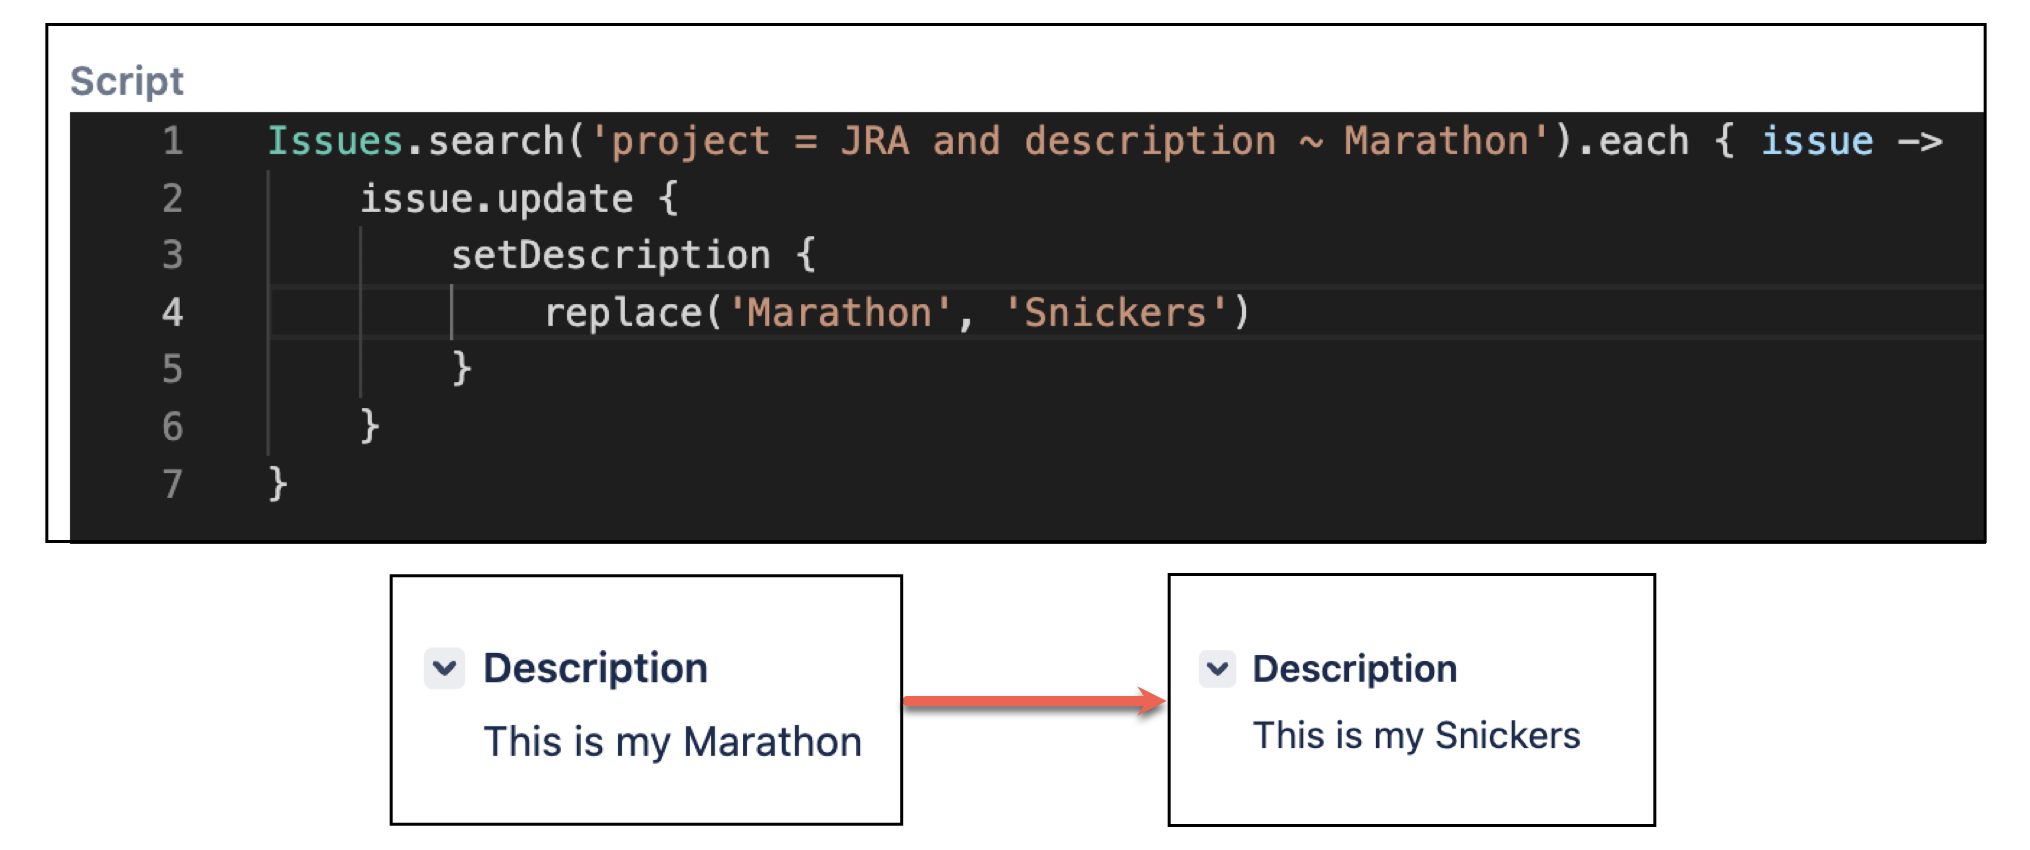
You can use a JQL query to bulk update fields, as shown below:
In this example you are working on a product, and you changed its name in the early stages of development. Now you wish to edit the name in the description of all issues.
            Issues.search('project = ABC and description ~ Marathon').each { issue ->
                issue.update {
                    setDescription {
                        replace('Marathon', 'Snickers')
                    }
                }
            }
Check out Search for issues for more information on searching for issues and running JQL queries.
Update date and date time fields
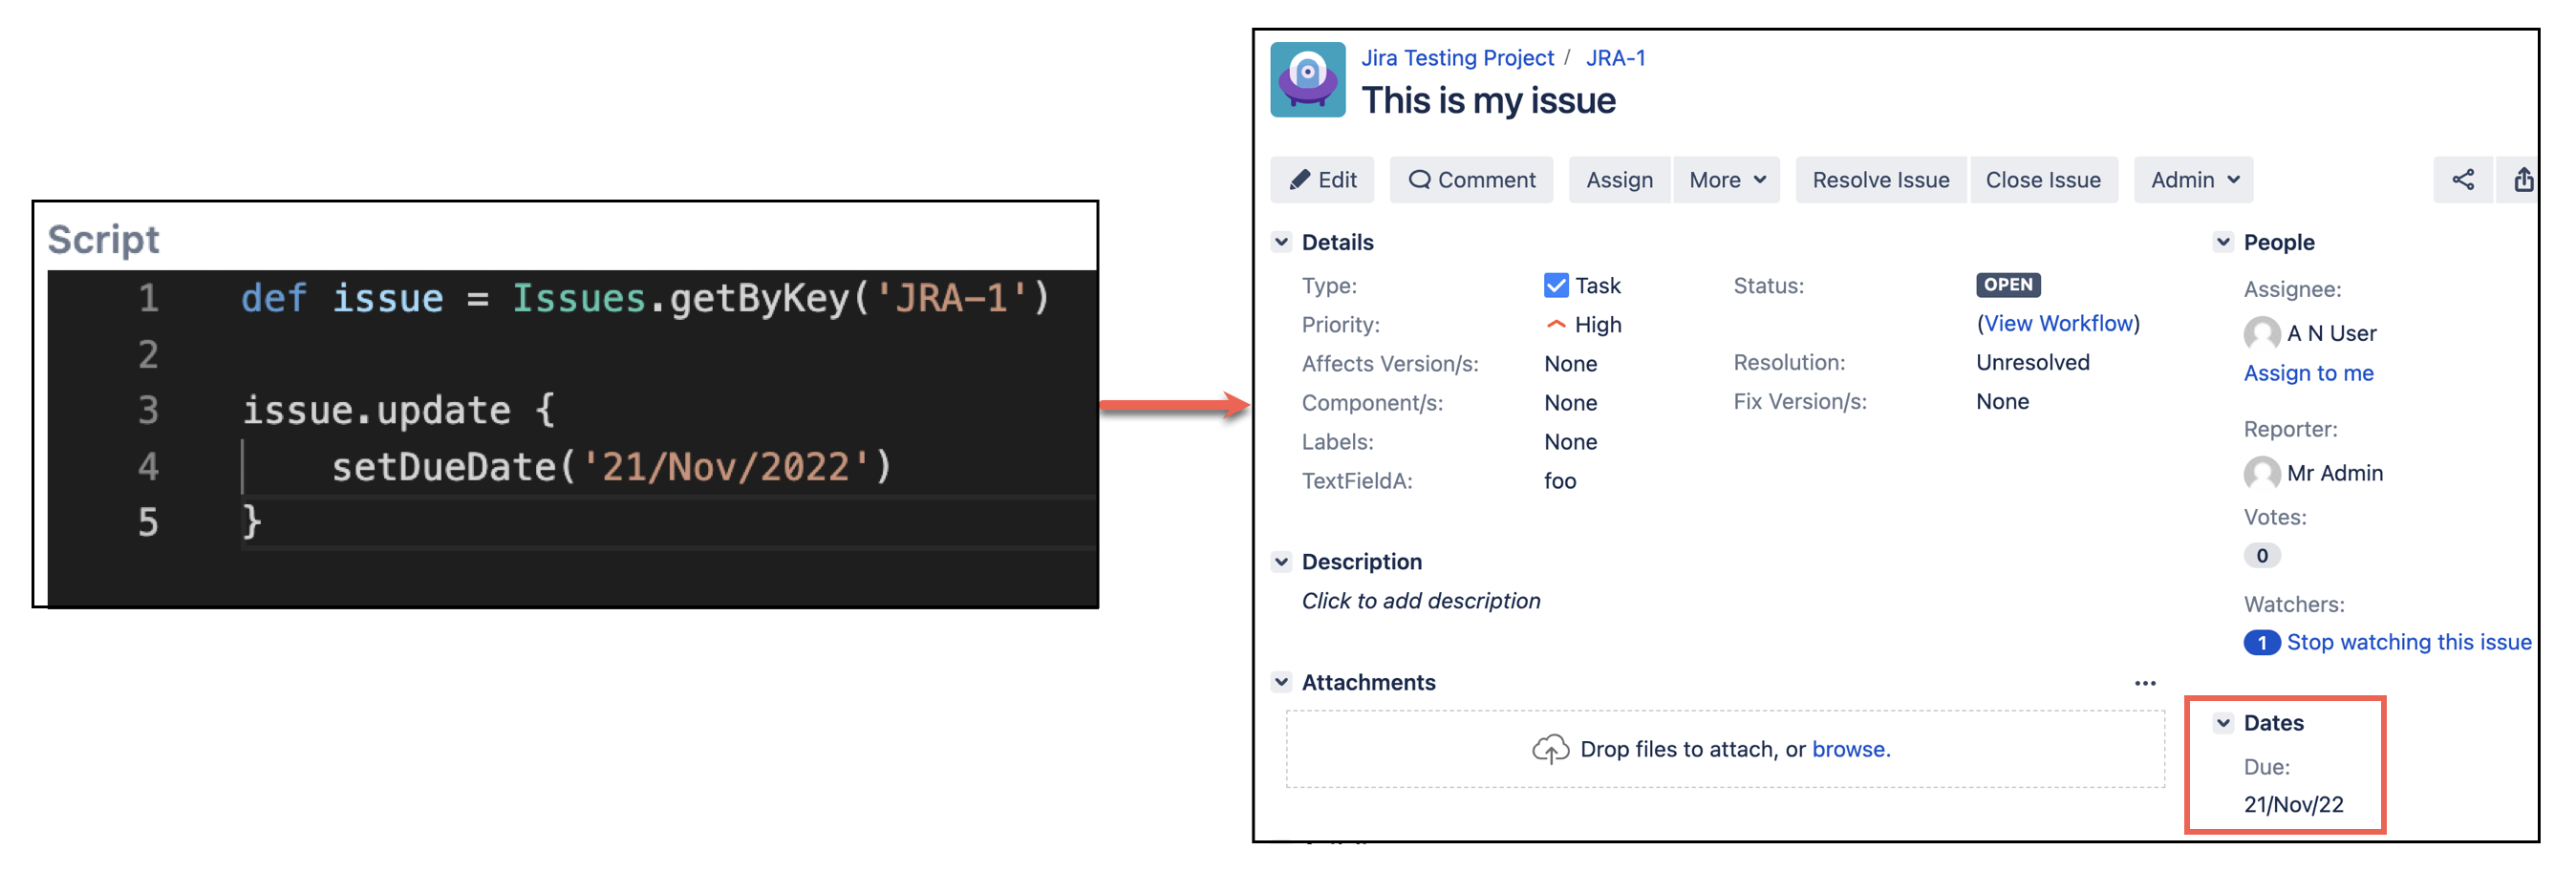
Date system fields, such as due date and Date Picker custom fields, can be set as follows:
In this example we're setting the due date.
            issue.update {
                setDueDate('21/Nov/2022')

                // additionally you can use a Timestamp, e.g. for copying from another issue
                setDueDate {
                    set(otherIssue.dueDate)
                }

                // or use a LocalDate object, for instance to set the date to 7 days from now
                setDueDate {
                    set(LocalDate.now().plusDays(7))
                }
            }
The actual date format depends on your server locale. Find the expected format by running this script in the console:
            import com.atlassian.jira.component.ComponentAccessor
            import com.atlassian.jira.util.DateFieldFormat

            ComponentAccessor.getComponent(DateFieldFormat).getFormatHint()
Adjusting existing dates
You can easily adjust existing dates by utilizing the setter that takes a closure. Calling get() returns the current set time or date time if one is set or now if none is set. This is returned as a LocalDateTime or LocalDate. You can adjust the existing date as follows:
In this example we're adding 7 days to the existing due date. If the current due date is empty, the current date will be used as the one to add 7 days to.
            issue.update {
                setDueDate {
                    set(get().plusDays(7))
                }
            }
Date Time Picker custom fields are almost the same, except they have overloads taking a LocalDateTime rather than a LocalDate.
Updating options, versions, and component fields
There are several types of fields that work with Option, including single and multi-select fields, radio buttons, and checkboxes.
Working with post-functions
When updating fields in a post-function you need to use set {...} instead of update {...}. Read more about why on the Update Issues page.
Setting a single value
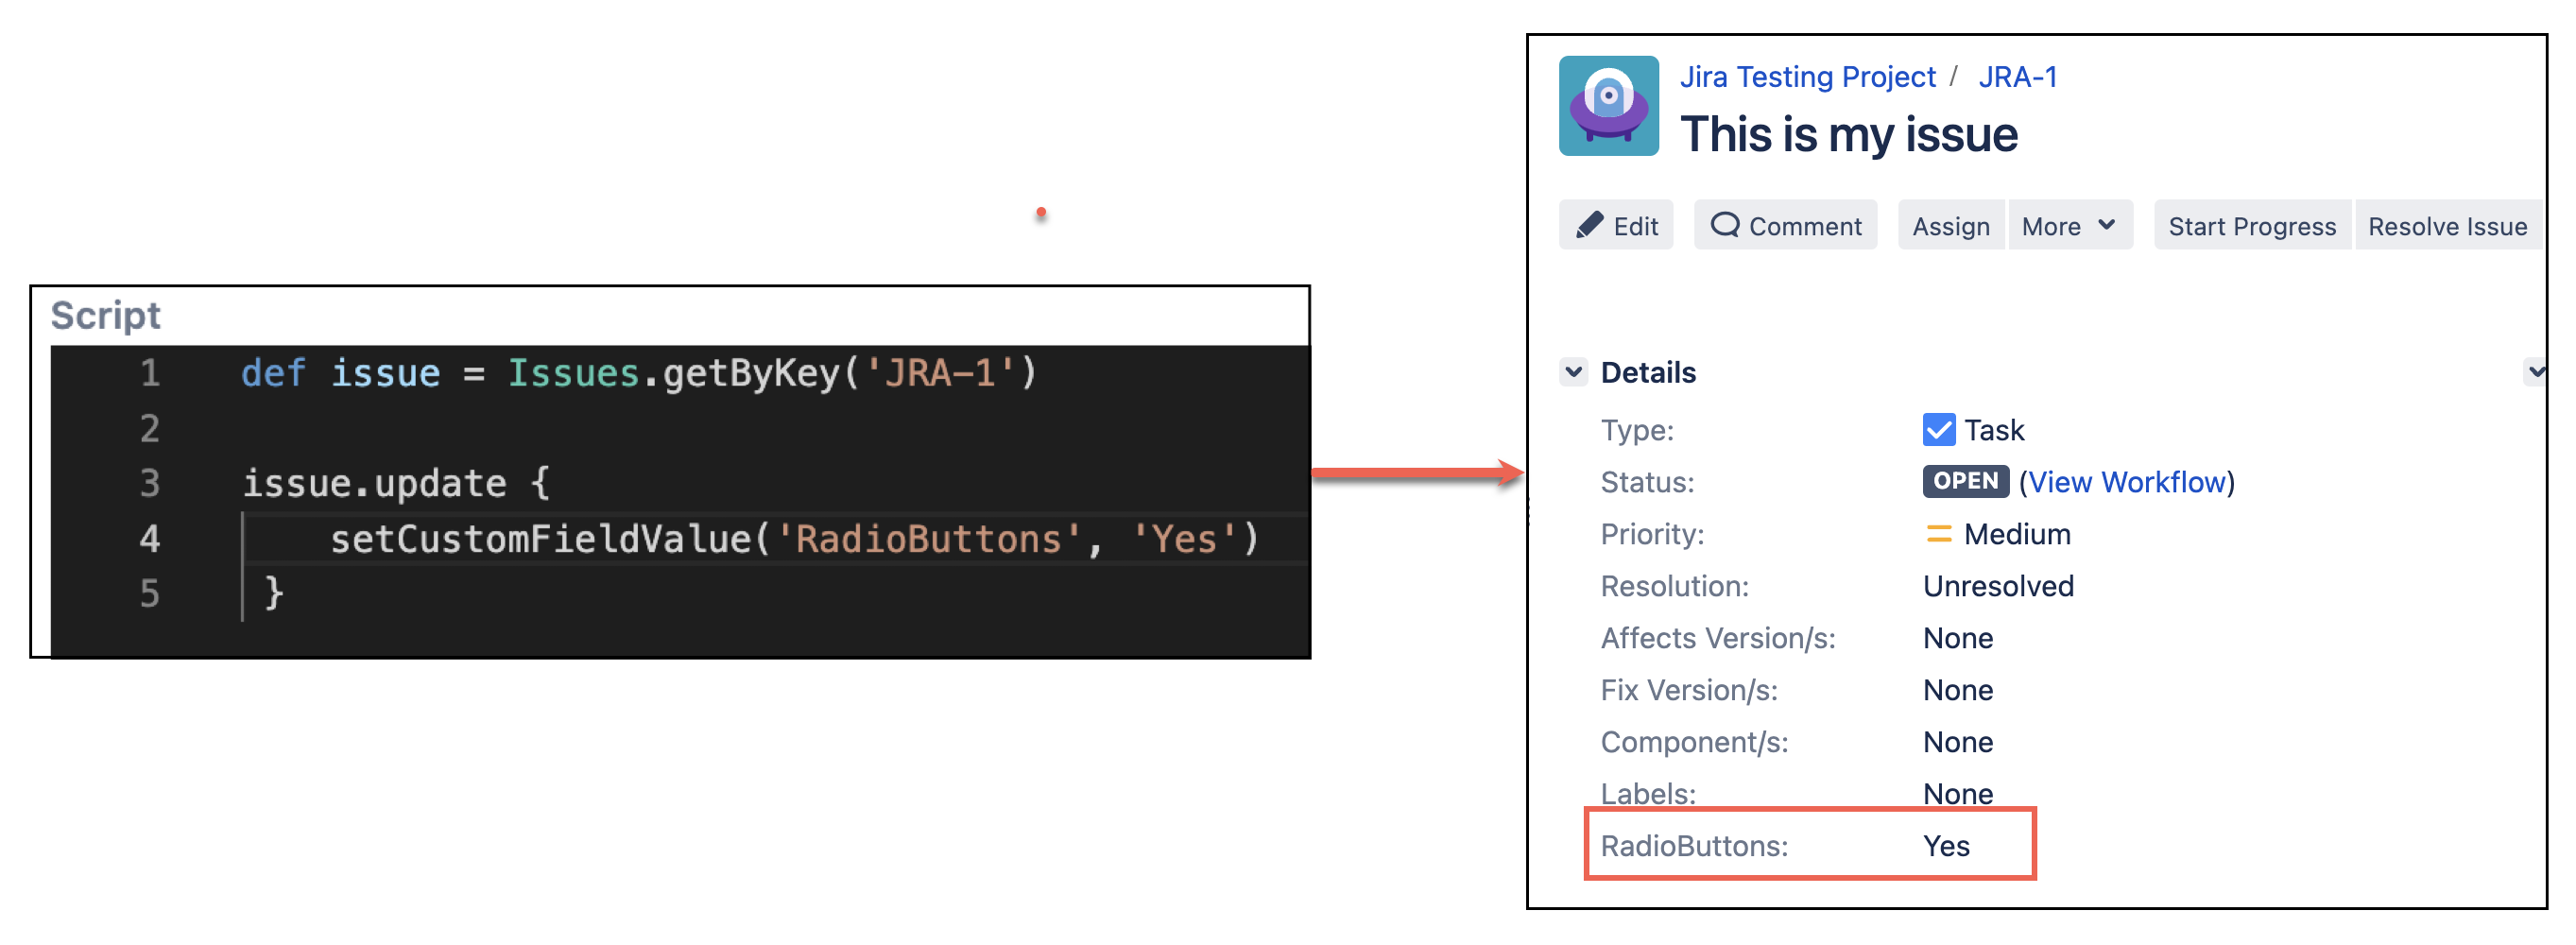
To set a single value (radio-buttons, and single-select custom fields):
In this example we're setting a single radio button field.
                issue.update {
                    setCustomFieldValue('My radio buttons', 'Yes')
                }
Setting multiple values
To set multiple values:
In this example we're setting multiple checkbox fields.
                issue.update {
                    setCustomFieldValue('My checkboxes', 'Yes', 'Maybe')
                }
Adding to an existing selected option
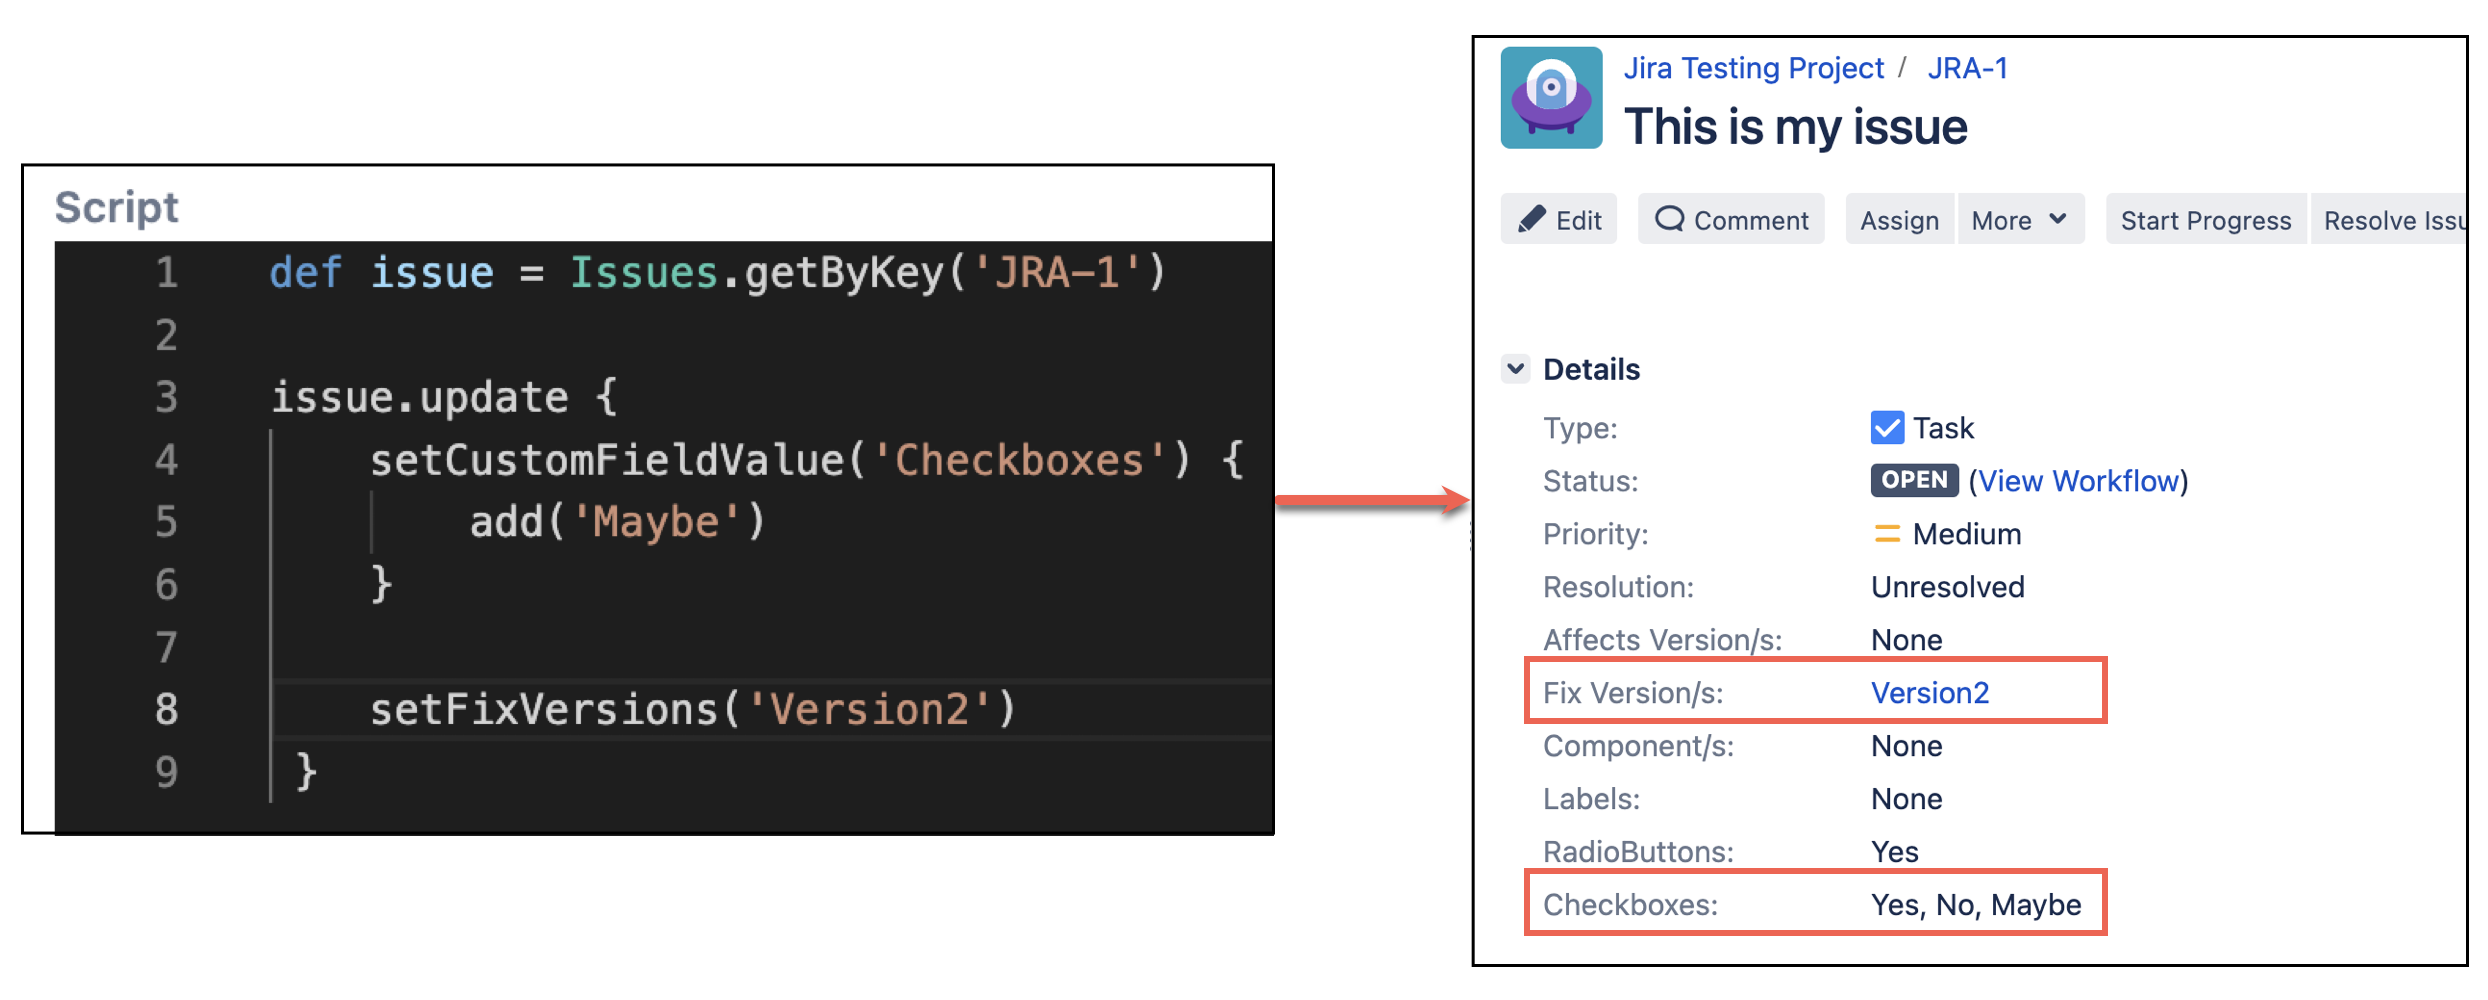
You can add an existing selected option using add(). This is also valid on other fields that are a "collection" of object; for example affects/fix versions and components:
In this example we're adding an additional checkbox value and adding a fix version.
            issue.update {
                setCustomFieldValue('My checkboxes') {
                    add('Maybe')
                }

                setFixVersions {
                    add('v2.0')
                }
            }
Removing a selected value
Similarly, you can remove a selected value if it is present or replace one with another:
In this example we're removing the No checkbox value and replacing the Maybe value with Yes.
            issue.update {
                setCustomFieldValue('My checkboxes') {
                    remove('No')

                    replace('Maybe', 'Yes')
                }
            }
Setting values by option ID
The add, remove, and replace methods have overloads which let you set the "object" rather than the textual name. For example Version, Option, or the object's ID.
To set by option ID:
In this example we're setting the checkbox 'Yes' and 'Maybe' values by their ID.
            issue.update {
                setCustomFieldValue('My checkboxes') {
                    set(10012L, 10014L)
                }
            }
Setting user fields
User fields have similar methods as above. The assignee field has a couple of special methods:
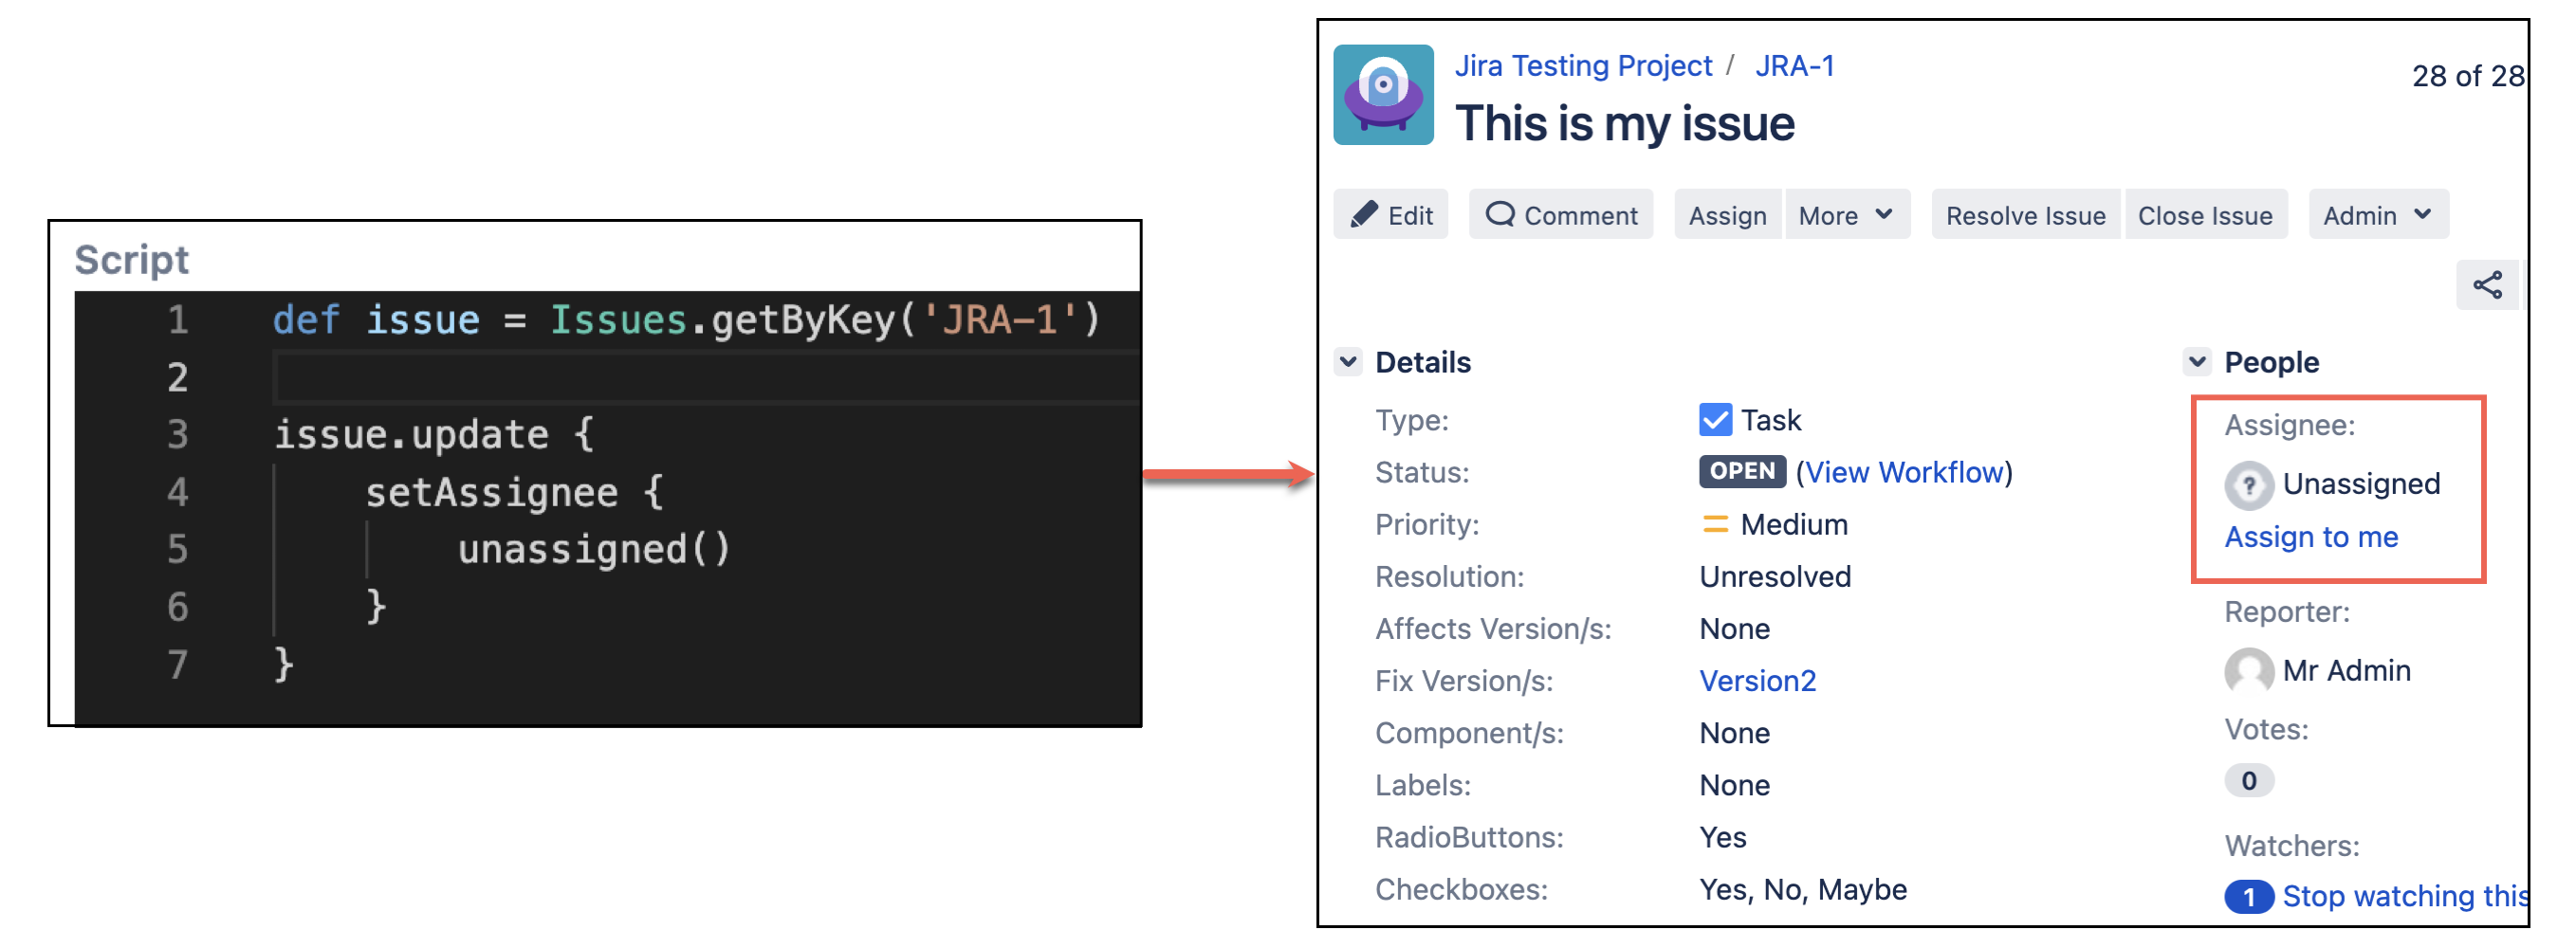
In this example we're unassigning someone from an issue, or we're automatically assigning someone to the issue.
            issue.update {
                setAssignee {
                    // this is the same as setAssignee(null), but the following line is more expressive
                    unassigned()

                    // set "automatic" assignee - again, more expressive than setAssignee('-1')
                    automatic()
                }
            }

