Before You Start
This initial tutorial guides you through creating a sample project, finding ScriptRunner within Jira, and creating resources you will need for later activities.
Create a Sample Project
Walk through the following steps to create a sample project you can use for the rest of the tutorials:
You have the option to create a scrum software development project or a process management project.
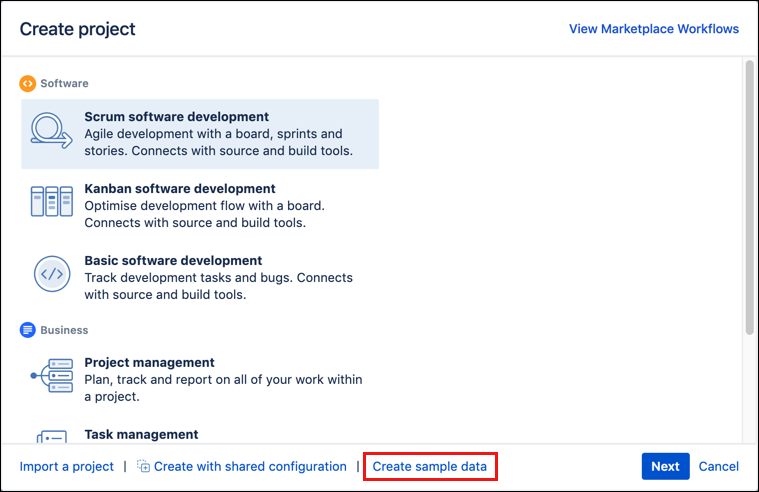
From the top ribbon, click Projects, and then click Create Project.
In the Create Project window, select Create Sample Data at the bottom of the window.
Select the type of project you want to create, and then click Next. TIP: We recommend creating a scrum software development project or a project management project for these activities.
Enter your Name, Key, and Project Lead details.
When you are all set, click Submit to create your project.
Voila! You get a project created with sample data so you can work with different scenarios in the labs. In this example, we created a Scrum software development project called Demonstration Project Scrum, and we see issues in a sample sprint and the backlog of the project.
Review Manage Apps Page
In this quick activity, you access the ScriptRunner app to view information. Knowing where to go for this information is important if you are managing ScriptRunner or need to contact Adaptavist support for help with ScriptRunner.
From the Administration menu, select Add-ons.
On the Manage Apps page, under Atlassian Marketplace, click Manage Apps.
Under User-Installed Apps, click to expand Adaptavist ScriptRunner for Jira. Review information about ScriptRunner. This information includes versions, license details, links to documentation, and modules enabled.
(Optional) Create Resources for Activities
This exercise ensures that you have the resources needed for different activities if you plan to complete all the tutorials. If you want to follow the instructions but use your own data, you can do so.
| Activity | Resources Needed |
|---|---|
Aggregate JQL Search | Create four issues with work logged and remaining estimates. |
Script Condition - All Sub-Tasks Must be Resolved | Create an issue with a few sub-tasks. Example: Main Issue: Upgrade Server Subtasks:
|
Script Post-Function - Assign an Issue for Review | Create a workflow that includes:
This workflow needs to be associated with the correct project as well. In our example, we use the Virtual Tour Server Management project. |
Create a Simple Behaviour | Create a custom field called Customer Type (Select List) with the following options:
|
Create a Select List with Other | Create a two custom fields:
|
Fast-track transition an issue | Create workflow that includes some type of review status. This could be:
|
What’s Next?
After you have finished the activities above you are ready to get started with the rest of the tutorials:


