
Scheduled Jobs
Before you start
![]()
![]()
Visit ScriptRunner HQ to see example scripts.
View our training modules for Scheduled Jobs.
What are Scheduled Jobs?
Scheduled Jobs allow you to automate the running of scripts at regular intervals saving your administrators time, and reducing the risk of human error. You can specify when, and how often, a job should run.
How to use Scheduled Jobs
You may want to use a Scheduled Job to:
Create an issue once per month.
Email a report to users, on a schedule.
Delete inactive users on a monthly basis.
Change the status of an issue depending on the time it has been open.
Automatically escalate an issue based on the elapsed time using Escalation Services.
Say, I have a team of consultants who need to fill out expenses at the end of every month. I can create a Scheduled Job to automatically create a task for each user at the end of every month to remind them to complete their expenses.
As a Jira administrator, it's key to keep my instance healthy and reduce costs by removing inactive users. I can set up a job to run a script that deletes inactive users on a monthly basis.
Create a Scheduled Job
You can use Scheduled Jobs to ensure code runs either at a specified time of day/week/month, or on an interval, in order to perform an automated task in your Jira instance.
The minimum interval between code executions is 1 hour. The scheduler is triggered every hour and gathers all the tasks to be executed within that hour. The task executions are queued and workers will consume them in no predefined order. That means that the execution time of the task can not be guaranteed to be the same every hour. As an example: if you configure a job to be run every hour, it might be run at 01:02 and then 02:24 and then 03:00 and then at 04:46 etc depending on how busy our systems are.
Follow the steps below to use this feature:
- Navigate to ScriptRunner → Scheduled Jobs.
Depending on whether or not you have already created scheduled jobs, you are presented with either a landing screen or a list of previously created jobs. - Click Create Scheduled Job from the initial landing screen if none have been previously created. If you would prefer to make use of our built-in examples, click Add Examples to add two scheduled job examples.
OR
Click Create Scheduled Job from the previously created list.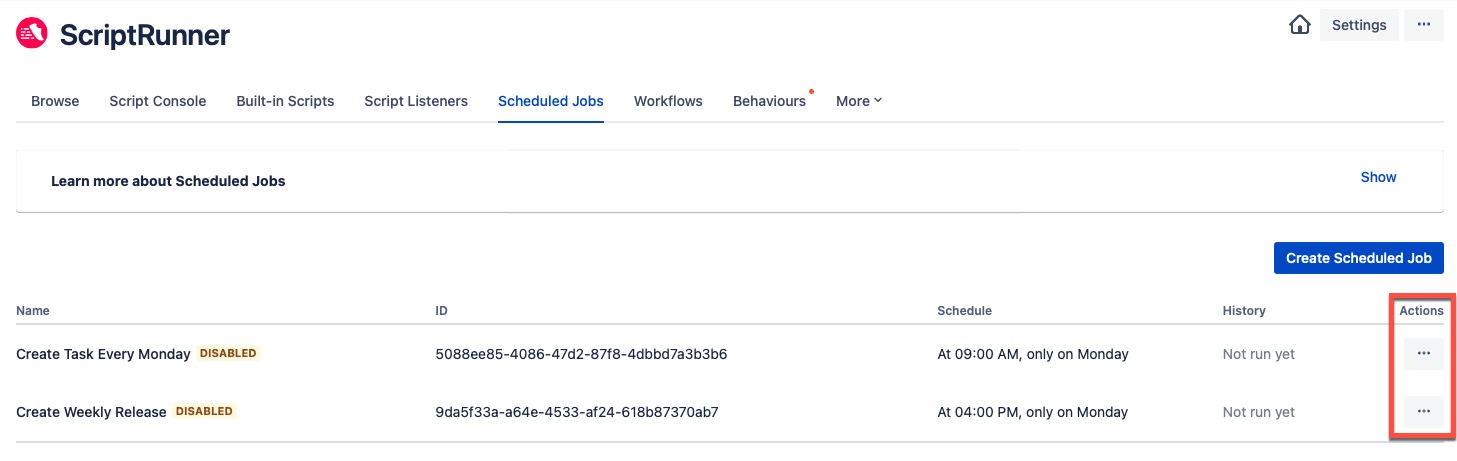
- (Optional) Click Edit or Delete via the Actions ellipsis for the relevant scheduled job you would like to modify/delete.
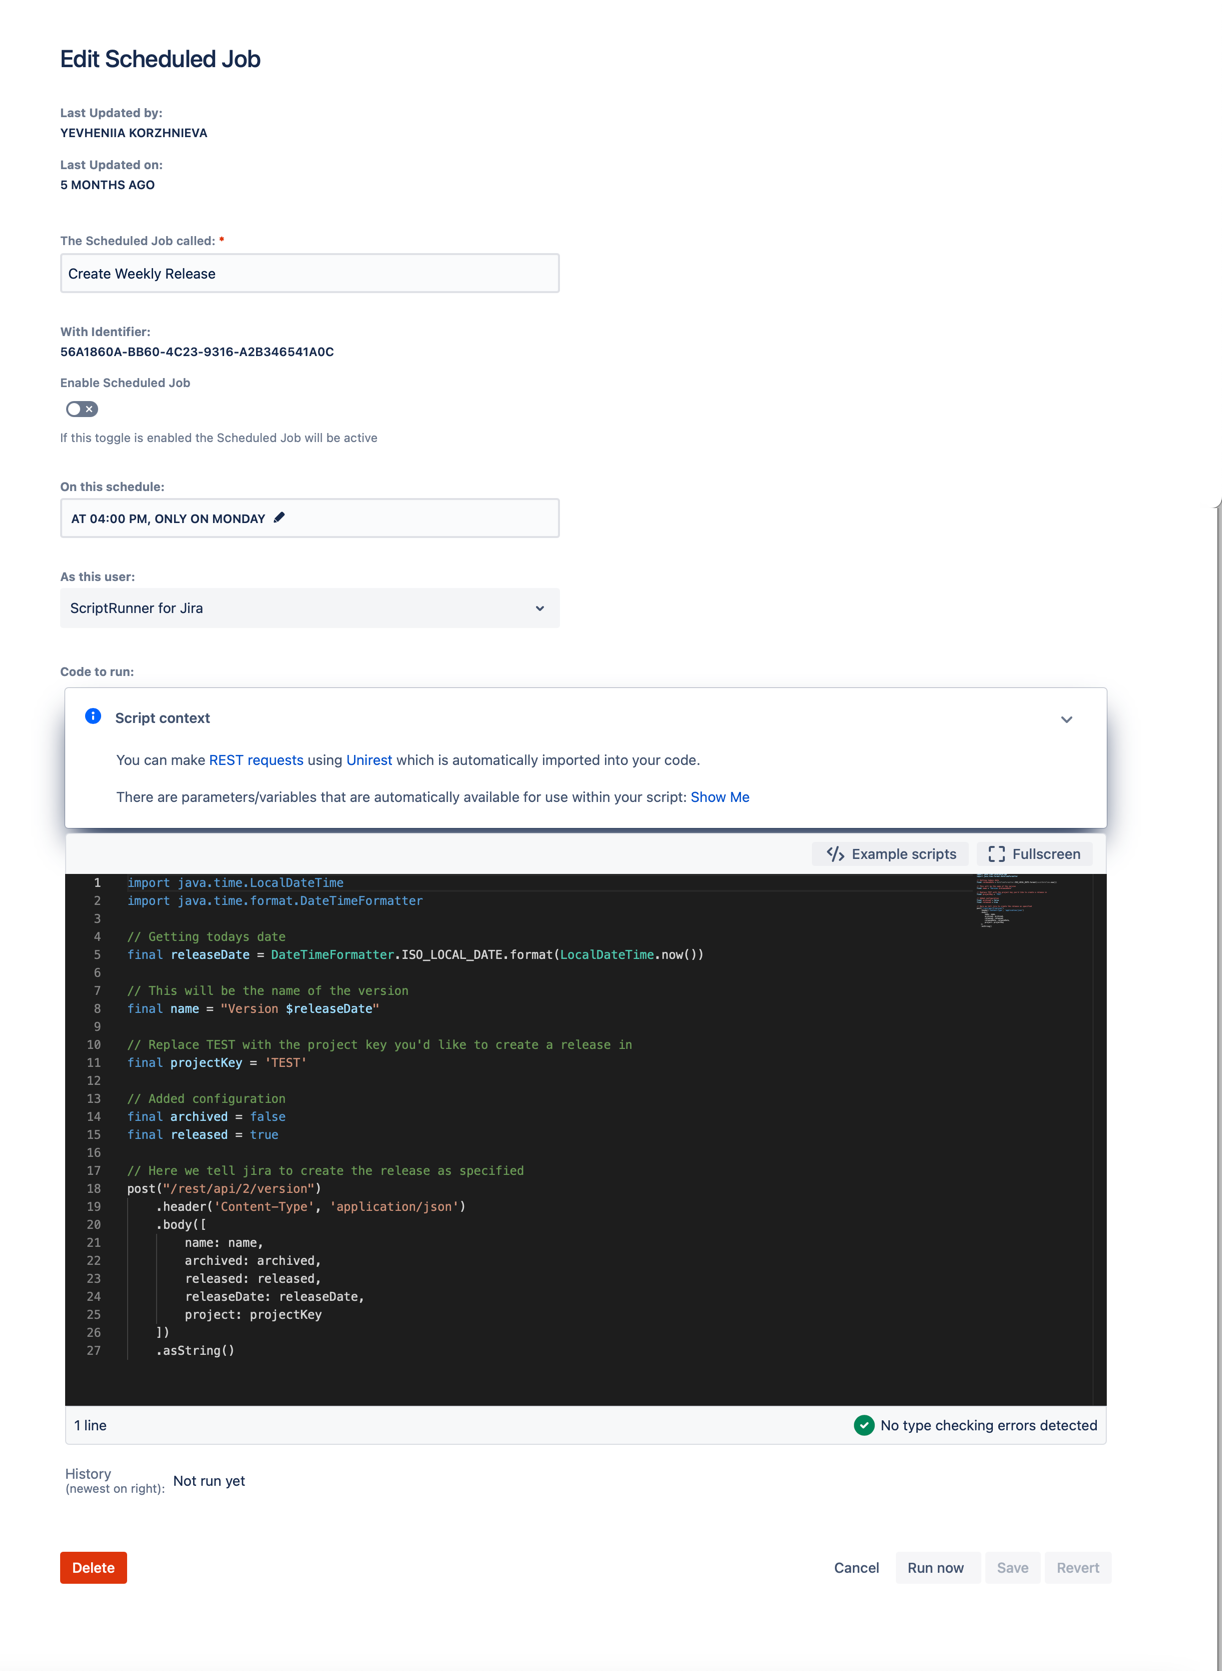
You will see the Create Scheduled Job screen, as shown below:
- Enter a name in The Scheduled Job called field.
- Activate the Enable Scheduled Job toggle. When set to Enabled, the scheduled job is active as soon as it has been saved.
- Click on the edit pencil within the On this schedule field.
- The Scheduler dialog lets you choose between running your script on several days during the week (e.g. Monday, Wednesday, Friday), or running your script on particular days of the month (e.g. the last day of the month, the 2nd Tuesday of the month).
- You can enable a monthly schedule.
- Additionally, you can select an hour interval during which time your script will run.
Enter the name of the user you wish to run the service for in As this user:.
- Write your script in the Code to Run field.
OR
Alternatively, you can click the Example scripts button to view a list of example scripts related to this feature.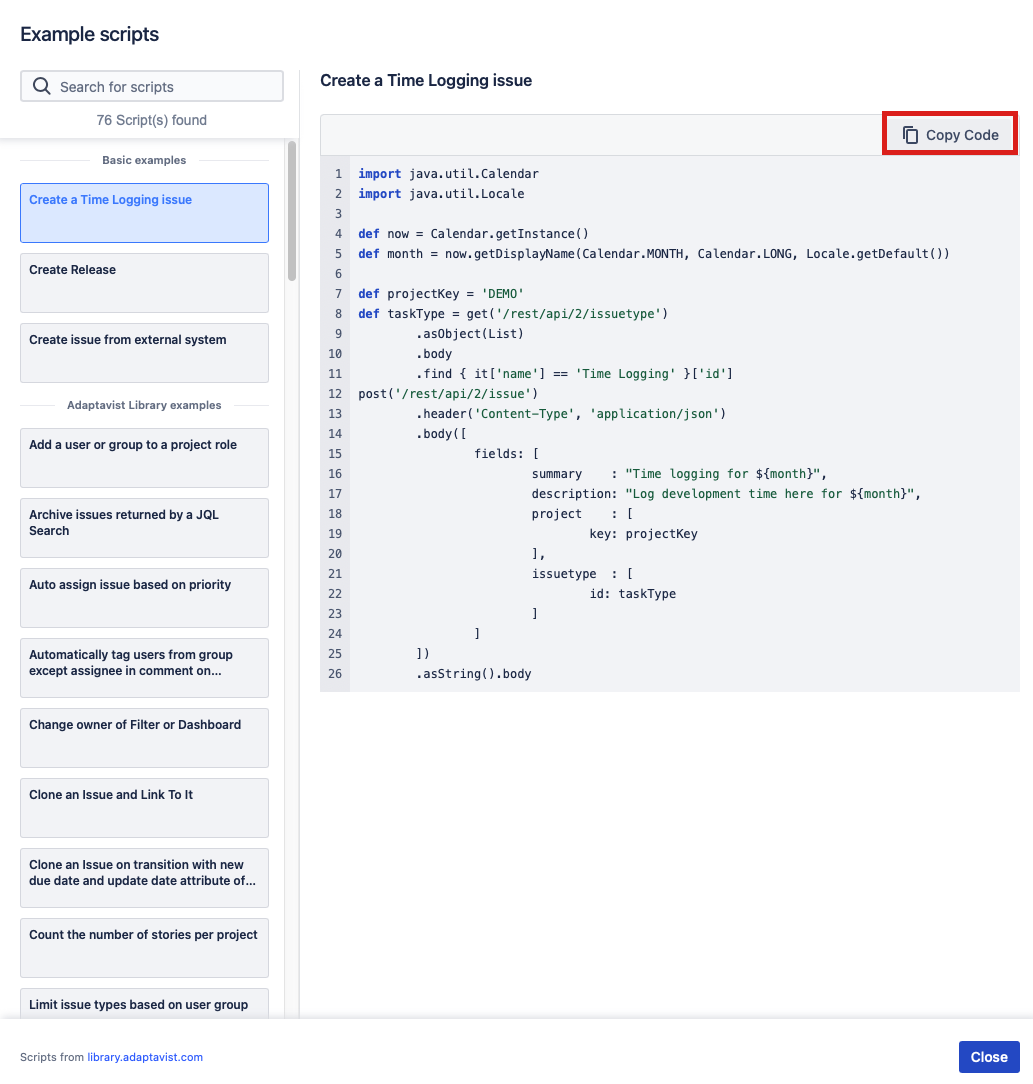
So, rather than writing your own script, you can reuse one of the many examples provided, as follows:- Choose an example script from the list provided and the code automatically appears. You also have the option to search for a particular script.
- Click Copy Code and then Close.
- Paste the copied code in the code editor.
- Click Save. You can test your script using the Run Now button, which will execute the script and return the results and logs.
Edit a Scheduled Job
Navigate to ScriptRunner → Scheduled Jobs. A list of all scheduled jobs is shown.
Click Edit on the Actions ellipsis of the scheduled job you wish to edit.
- Amend the fields as required. As previously noted, you can click the Run Now button to test your script.
- Click Save when all changes have been made. You can also click Revert to undo those changes.