
Macro Parameters
While creating a custom macro, you can set up a parameter for the user to enter information that the script uses to return information to the page where the macro is used.
Implicit parameters
The parameters that are available for use that you don't have to add using this method are:
pageVersionmacroIdspaceKeypageId
Implicit parameters are stored in the same map array as user-defined parameters outlined on this page and can be used in the same way. Avoid giving user-defined parameters the same name as these implicit parameters. You cannot have two items in a map array with the same name.
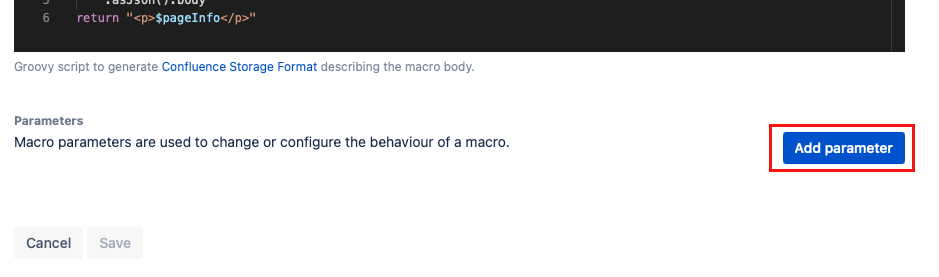
Set up the macro parameter
When you create a custom macro, you can add a field that requests the user to input information when the macro is used on a Confluence page. To set up a new parameter, follow these steps:
- Navigate to General Configuration > ScriptRunner > Macros > Create Custom Macros.
- Fill out the fields on the screen, including Macro Name, Description, Enabled, Body Type, Output Type, and Script to Execute.
- Select Add Parameter to add a field that requests the user to input information.
Once you select Add Parameter, the Add Macro Parameter dialog box appears.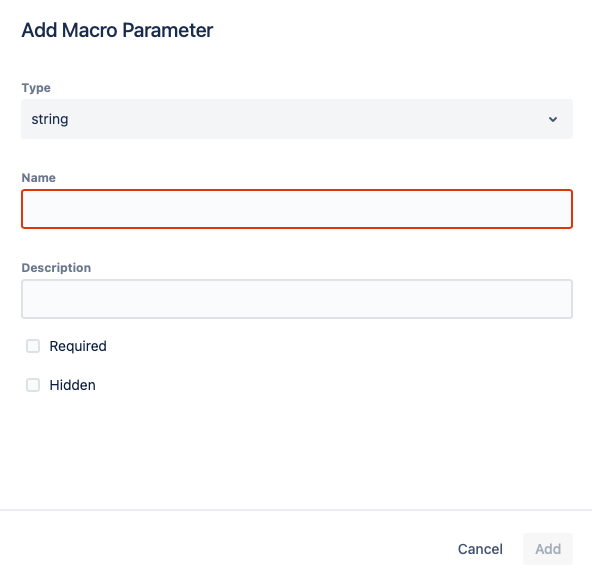
Fill out the fields:- Type: Select the type of field you want to create.
- Attachment: Allows users to select an attachment from the page when editing the macro on the page. The filename of the attachment is passed to the macro.
- Boolean: Allows users to add a checkbox field to the macro.
- Confluence Content: Allows users to select a Confluence page or blog post when editing the macro on a page. The page name is passed to the macro.
- Int: Allows users to pass a number to the macro when editing the macro on the page.
- Label: Allows users to choose a label(s) when editing it on a page and have the selected label(s) passed to the macro.
- Spacekey: Allows users to select one or more Confluence spaces when editing the macro on a page. The space key is passed to the macro.
- String: Allows users to add a text input field to the macro.
- URL: Allows users to enter a URL when editing the macro on a page.
- Username: Allows users to select user(s) when editing the macro on a page. A list of accountId(s) is passed to the macro.
- Name: The name of the macro parameter. This appears to you and the user.
- Description: The description of the macro parameters. This appears to you and the user.
- Required: If the parameter is required, tick the box.
- Hidden: If you'd like the parameter to be hidden, tick the box.
Multiple: You can add multiple values for certain parameter types.
- Type: Select the type of field you want to create.
Select Add.
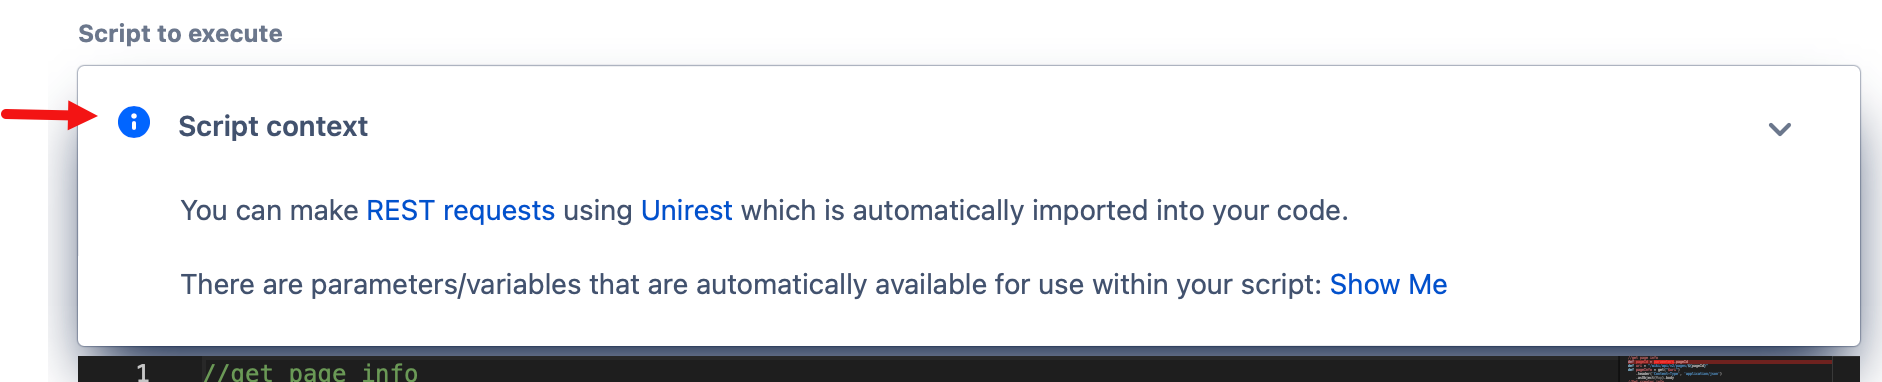
Script Context
The parameter now appears in the Script Context above the Scripts to Execute field.
The parameter you added appears in a table on the Custom Macros field: 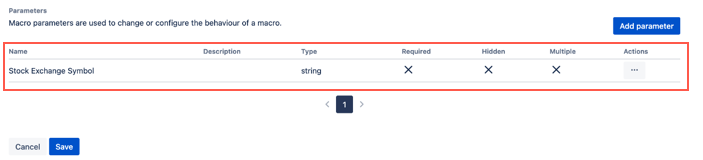
You can select Actions and then Remove the Parameter (![]() ) if it's no longer needed.
) if it's no longer needed.
Result
Now, when a user adds your custom macro to a page, they are asked to add input to the parameters. Then, the script that the custom macro uses can use that parameter to return information on the page where the macro is used.
How to use the parameters you add
The parameters that you define are stored in an array called parameters and can be accessed using the parameter name as follows:
- If you have not used spaces in the Name:
parameters.parameterName - If you have used spaces in the Name:
parameters.'Parameter Name'
Example
Visit Example: Get Jira Issue Information on a Confluence Page to see how to add custom macro parameters.