
Bulk Delete Attachments Job
Using the Bulk Delete Attachments job, you can schedule attachments to be deleted based on selected criteria. An example is available at the bottom of the page.
Create a Bulk Delete Attachments job
Follow these steps to create a job:
- Navigate to General Configuration > ScriptRunner > Jobs.
- Select Create Job.
- Select Bulk Delete Attachments Job.
- Enter a Name to help you identify the job.
Enter the User that the job runs as.
You can create a user specifically for the automated jobs. For example, automation user.
- Enter the Space you would like the job to operate within.
- Select the page tree and/or pages on which you want the attachments to be evaluated for Page Tree(s).
- Select the Attachment Age to choose the age of attachments that will be deleted.
Your choices are- Preset Filters
- Older than 6 months
- Older than 1 year
- Older than 2 years
- Created within the last month
- All
- Custom Filters
- Created with the last
If you choose this, Created Within the Last appears, where you can select your numerical value and Days, Weeks, Months, or Years. - Older than
If you choose this, Older Than appears, where you can select your numerical value and Days, Weeks, Months, or Years.
- Created with the last
- Preset Filters
- Select the checkbox for Notifications if you want to send notifications for the update.
- Select Add.
You can also select Run Now to run the job immediately.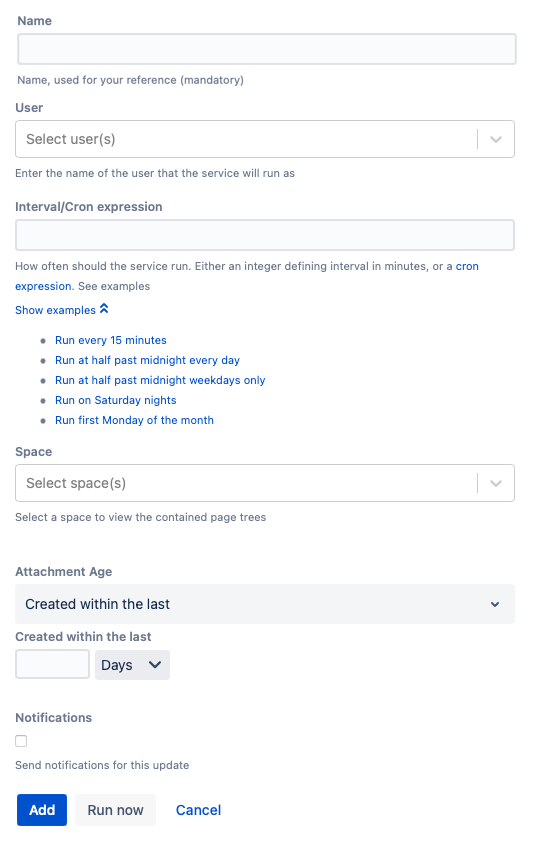
Examples
Delete all attachments older than three years in a space
If you want to maintain a Demonstration Space by deleting all attachments older than 3 years every year, follow these steps:
- Enter Delete attachments older than 3 years old every January 1 for Name.
- Enter admin for User.
- Enter 0 0 0 1 1 ? for Interval/Cron Expression.
- Select Demonstration Space for Space.
- Select all the page trees for Page Tree(s).
- Select Older Than for Attachments Age.
- Enter 3 and select Years for Older Than.
- Leave the Notifications checkbox blank.
- Select Add.
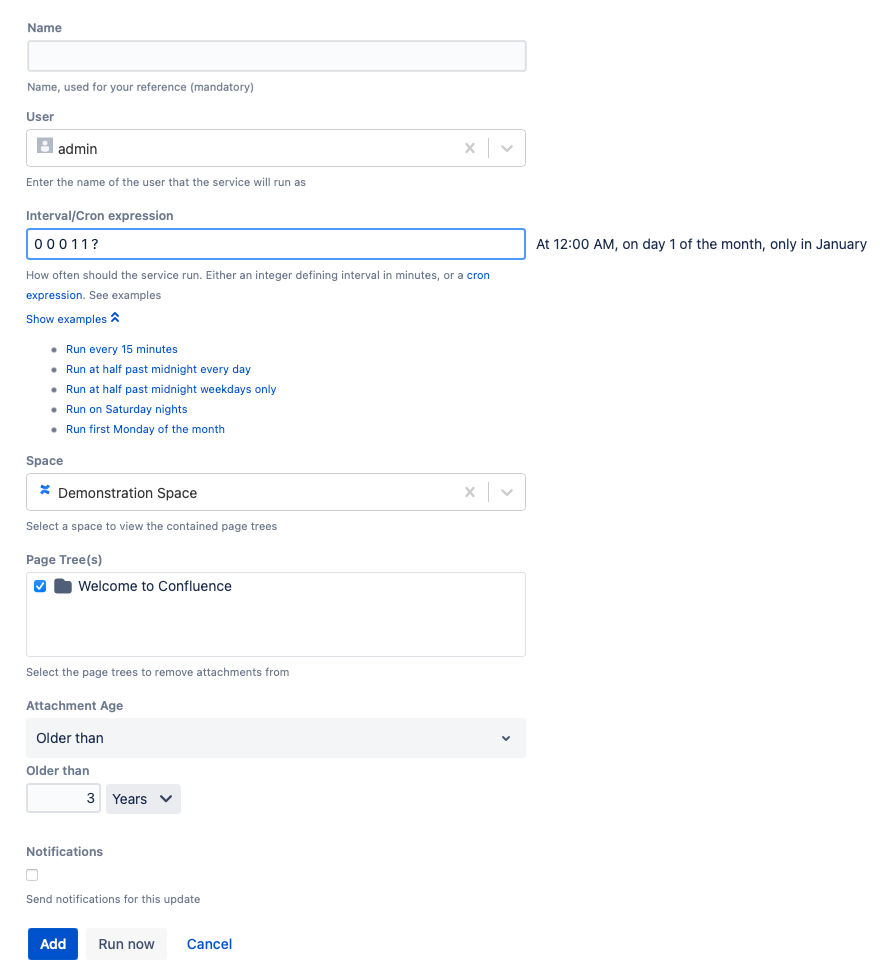
That job is now saved to the main Jobs page, and it will run every January 1 at 12 AM.