
Create a Confluence Toolbar Dropdown Option
If a web section does not work correctly in Confluence, there is a workaround. You can include Javascript (JS) to add necessary classes and attributes to the parent dropdown to make it work. Follow this two-step process to create a dropdown section that includes JS:
Part one: Create a web item
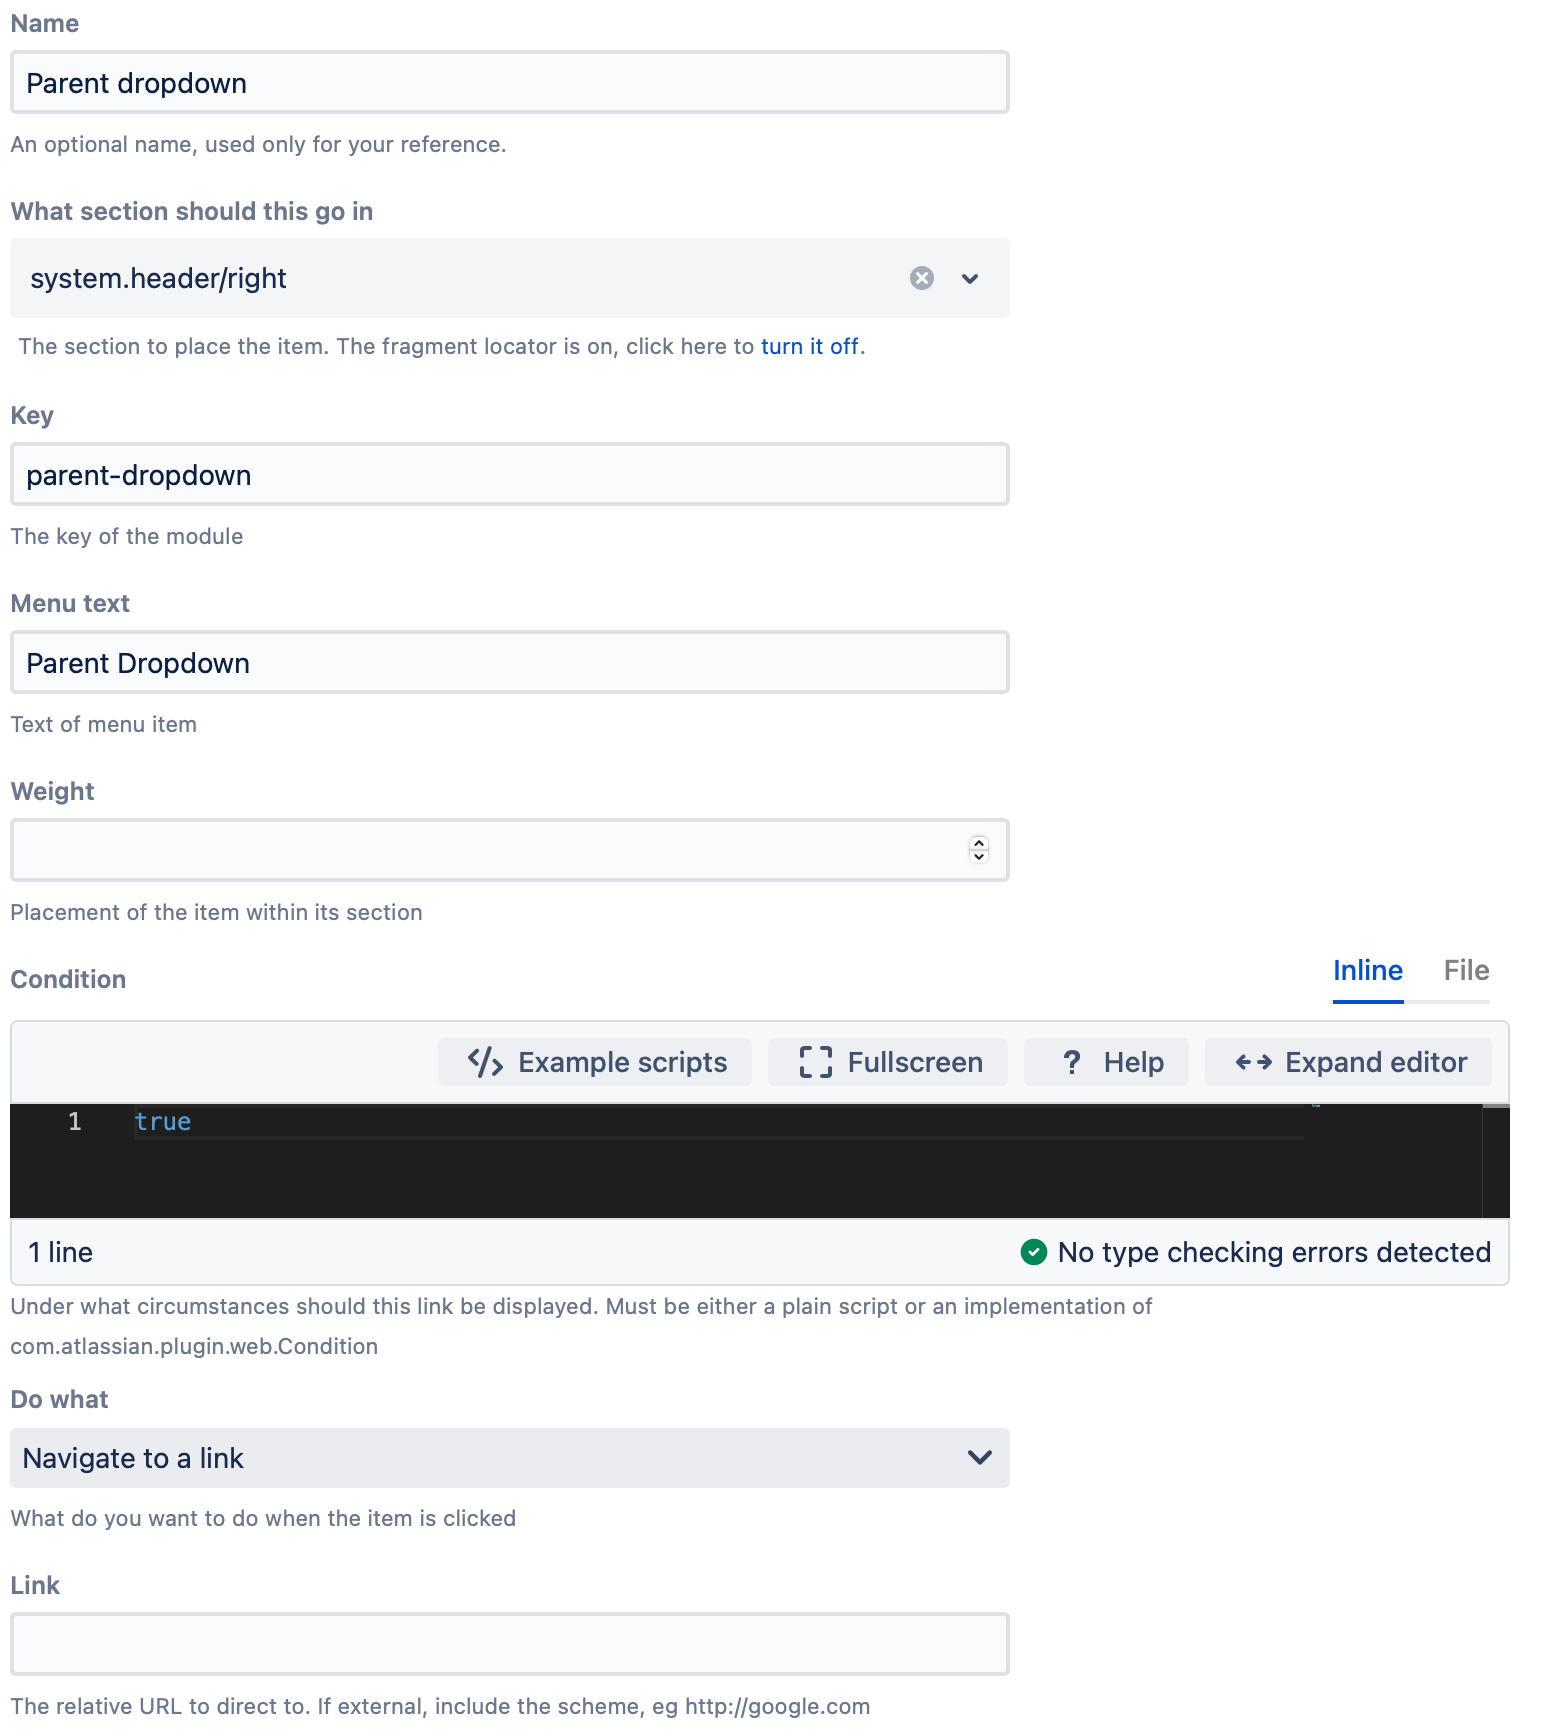
The first step of this process is to add a web item. This creates the main button in the toolbar:
- Navigate to General Configuration > ScriptRunner > Fragments.
- Select Create Fragment.
Select Custom Web Item.
Fill out the form to create your web item:
- Select Add.
Result
This is the menu button you will see after clicking Add:

Part two: Create a web panel
This process's second step is adding a web panel, which adds the dropdown buttons. Follow these steps:
- Navigate to General Configuration > ScriptRunner > Fragments.
- Select Create Fragment.
- Select Show a Web Panel.
Fill out the form to create a web panel to add a web section, child menu, and JS:
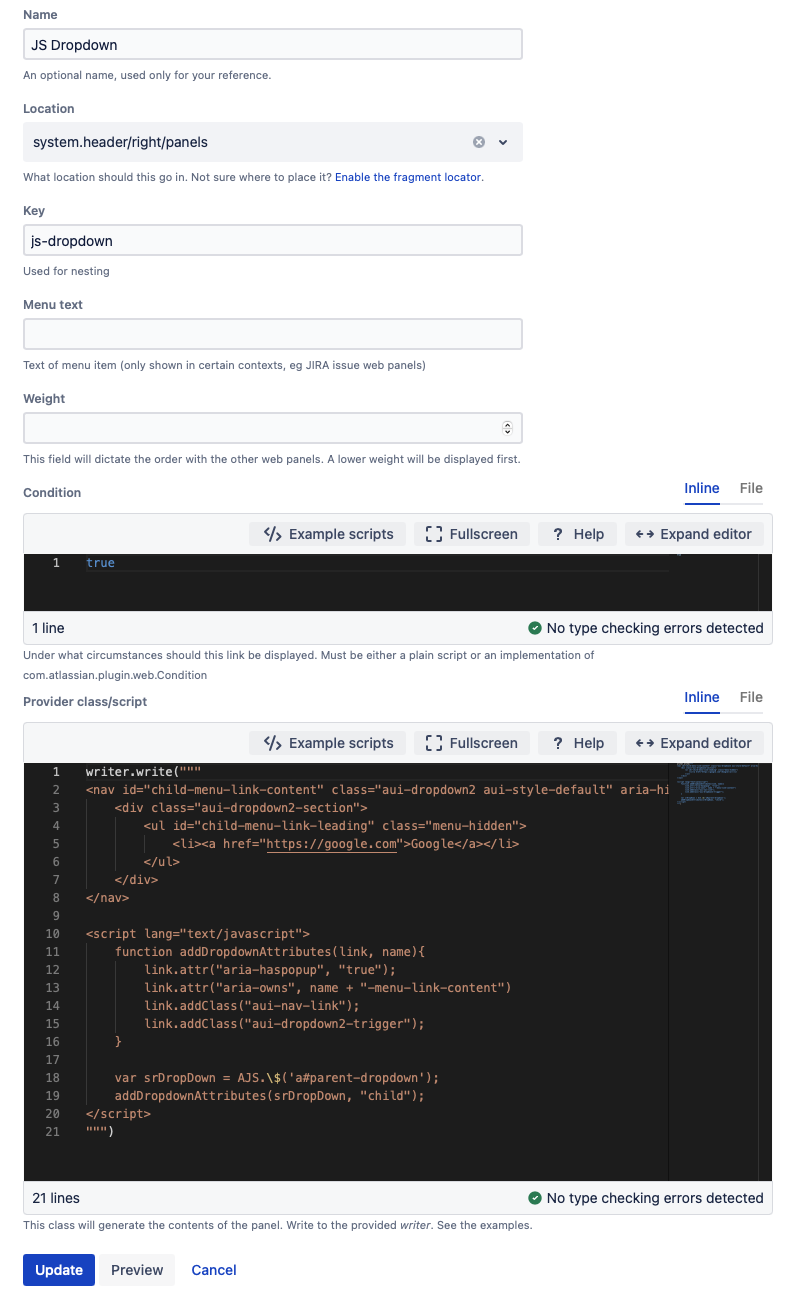
Code for Provider Class/Script Field
The code used in the example follows:
groovywriter.write(""" <nav id="child-menu-link-content" class="aui-dropdown2 aui-style-default" aria-hidden="true"> <div class="aui-dropdown2-section"> <ul id="child-menu-link-leading" class="menu-hidden"> <li><a href="https://google.com">Google</a></li> </ul> </div> </nav> <script lang="text/javascript"> function addDropdownAttributes(link, name){ link.attr("aria-haspopup", "true"); link.attr("aria-owns", name + "-menu-link-content") link.addClass("aui-nav-link"); link.addClass("aui-dropdown2-trigger"); } var srDropDown = AJS.\$('a#parent-dropdown'); addDropdownAttributes(srDropDown, "child"); </script> """)- Select Add.
Result
The dropdown appears like this in the Confluence instance:
