Web Resource
Using web resources, you can include JavaScript and CSS resources in certain contexts, like blog posts, or the editor.
You can read more about web resource modules for Confluence.
Setup
Web resources need to be loaded from a plugin or a specified directory. You can provide a list of directories using the system property plugin.resource.directories. It makes sense to use the default scripts directory, which is automatically created in your application home directory.
If you do use the scripts directory, you can modify your setenv.sh(or.bat) script with the following code:
groovyCATALINA_OPTS="-Dplugin.resource.directories=/app/home/scripts -Dother.properties... ${CATALINA_OPTS}"
You can provide multiple comma-separated directories. Then, the resource loader searches the directories in order until it finds a matching file.
Reloading
There is no negative performance impact to adding resources. When the resource is found, it is cached.
This means that you cannot change your resource and have it instantly reloaded. After changing the resource, you need to edit the web-resource item in the UI, update, and then hard refresh in your browser.
This is not the case when running with -Datlassian.dev.mode=true, in which case reloading should work. This means you should work on your web resources in a dev environment, then transfer them to your production environment when you are finished.
Examples
Modifying CSS
This is an example to modify the CSS only on blogposts.
Create a resource:
test-resources/red-blogposts.css.In a text editor, create this directory and file under one of the directories you have defined in
plugin.resource.directories.If you use the script directory, this would be
<app.home>/scripts.Enter the following contents:
body {
    color: red !important;
}
- Go to Administration > Fragments > Create Fragment.
- Select Install Web Resource.
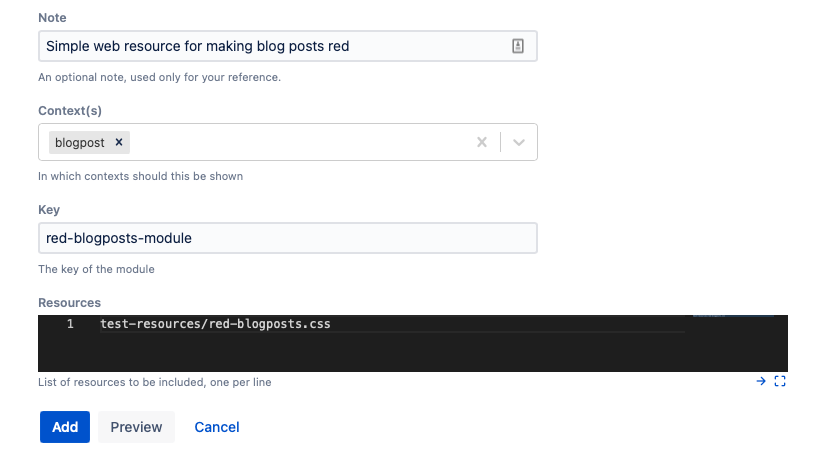
Configure the form to look like this:
Click Add.
If you get an error, make sure you created the directory
test-resources.Create a new blog post.
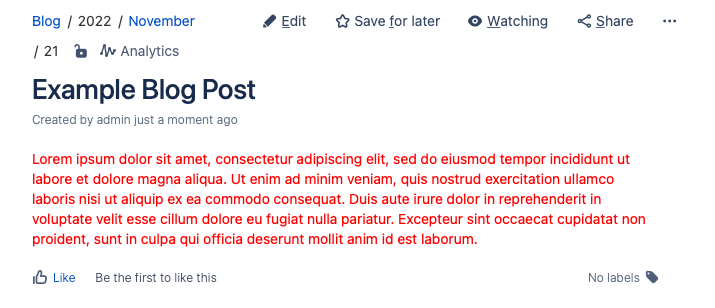
Your blog post will look like this:
Further Examples
- A more complicated example would be to wire up the buttons of a custom dialog using a JavaScript resource


