Web Item
A web item is a button or link that appears at the location you choose.
Here are some things you can do with web items:
Redirect to another location
Invoke a script endpoint and run code, which can respond with:
A flag
A dialog
A redirection to another page
Examples
Google Link Example
A basic example of a web item is a link to Google at the top of the navigation bar.
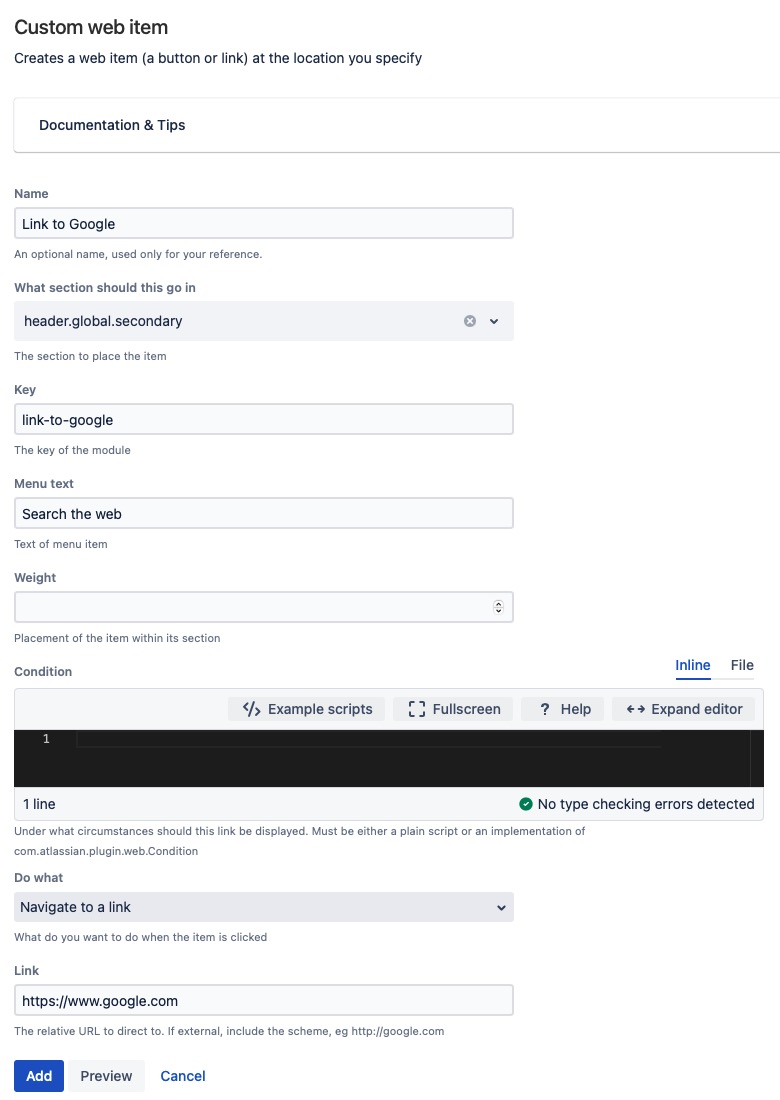
Fill out the web item form:
You can understand the Section field's value by reading the Atlassian Web Item documentation, or you can use the Fragment Locator tool.
The Weight field determines the web item's placement. If you set it to 1, the link becomes the first item on the left.
- Click Add to register the fragment.
- Go to the dashboard in a new tab.
Click the link to go to Google.
Tools menu link
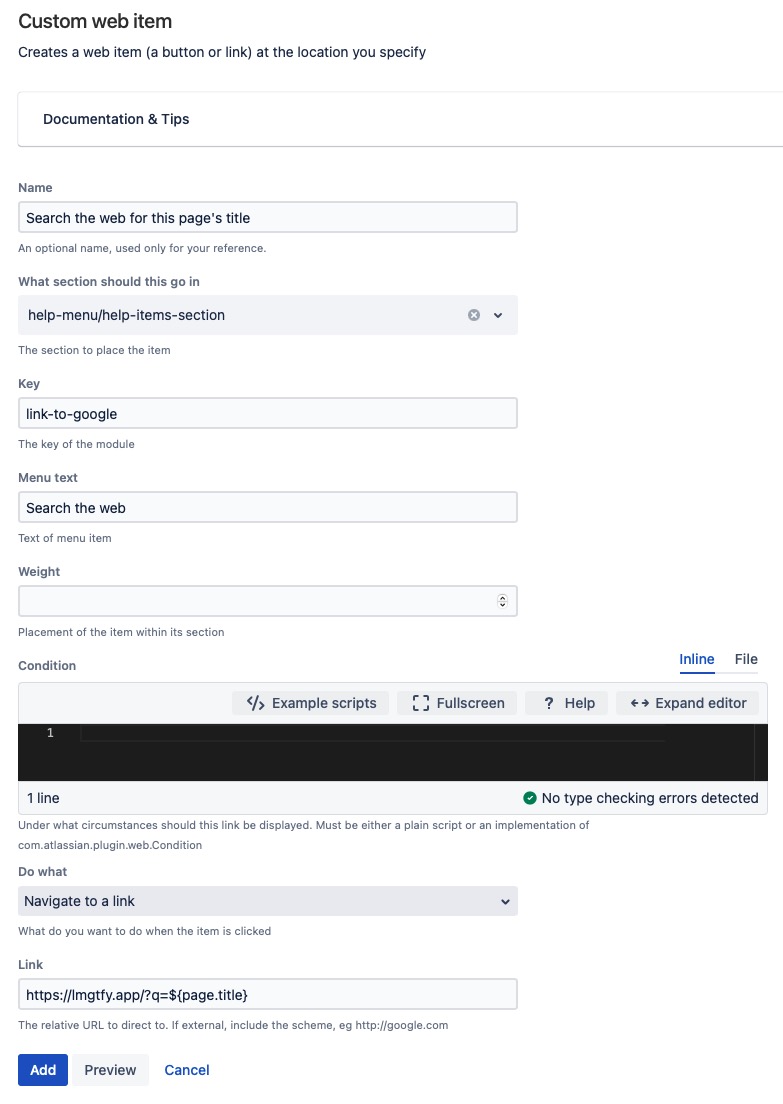
For a more complicated web items example, you can add a link to the Help menu, which does a Google search on the title of the current page.
Create a web item with the following values:
The Key field needs to be different for each new module you create. If you don't change the Key, the module from the first part of the tutorial is overwritten.
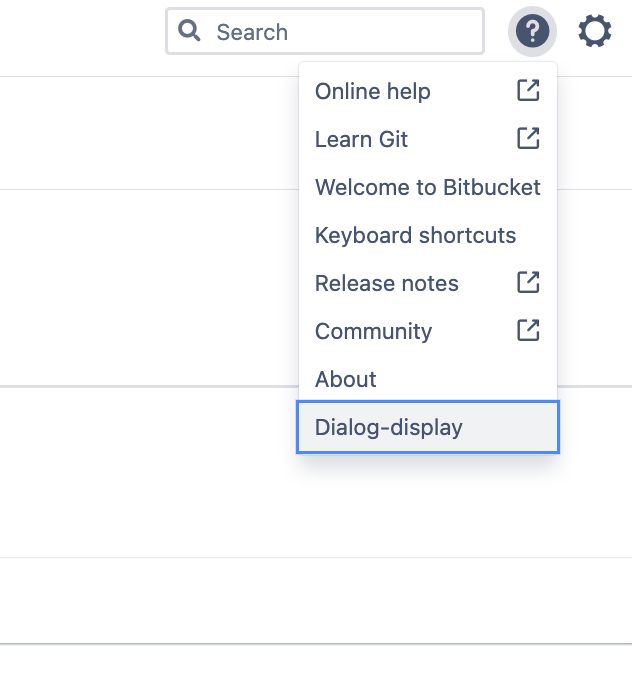
You should now be able to see this in the drop down menu:
The URL is processed with velocity before rendering. The variables you can use depend on the context of the web item.
Conditions
The Condition field is used to define whether the link should be shown or not, and it can use anything available in its context. What is available in the context depends on the particular web section and the page it is viewed on. Details of the current user can also be used.
In addition to using a script, you can use a concrete class that implements conditions, which extends the existing condition or one provided by the application.
Dialogs (advanced)
You can create and use some dialogs. In this case, JavaScript is needed for interactions.
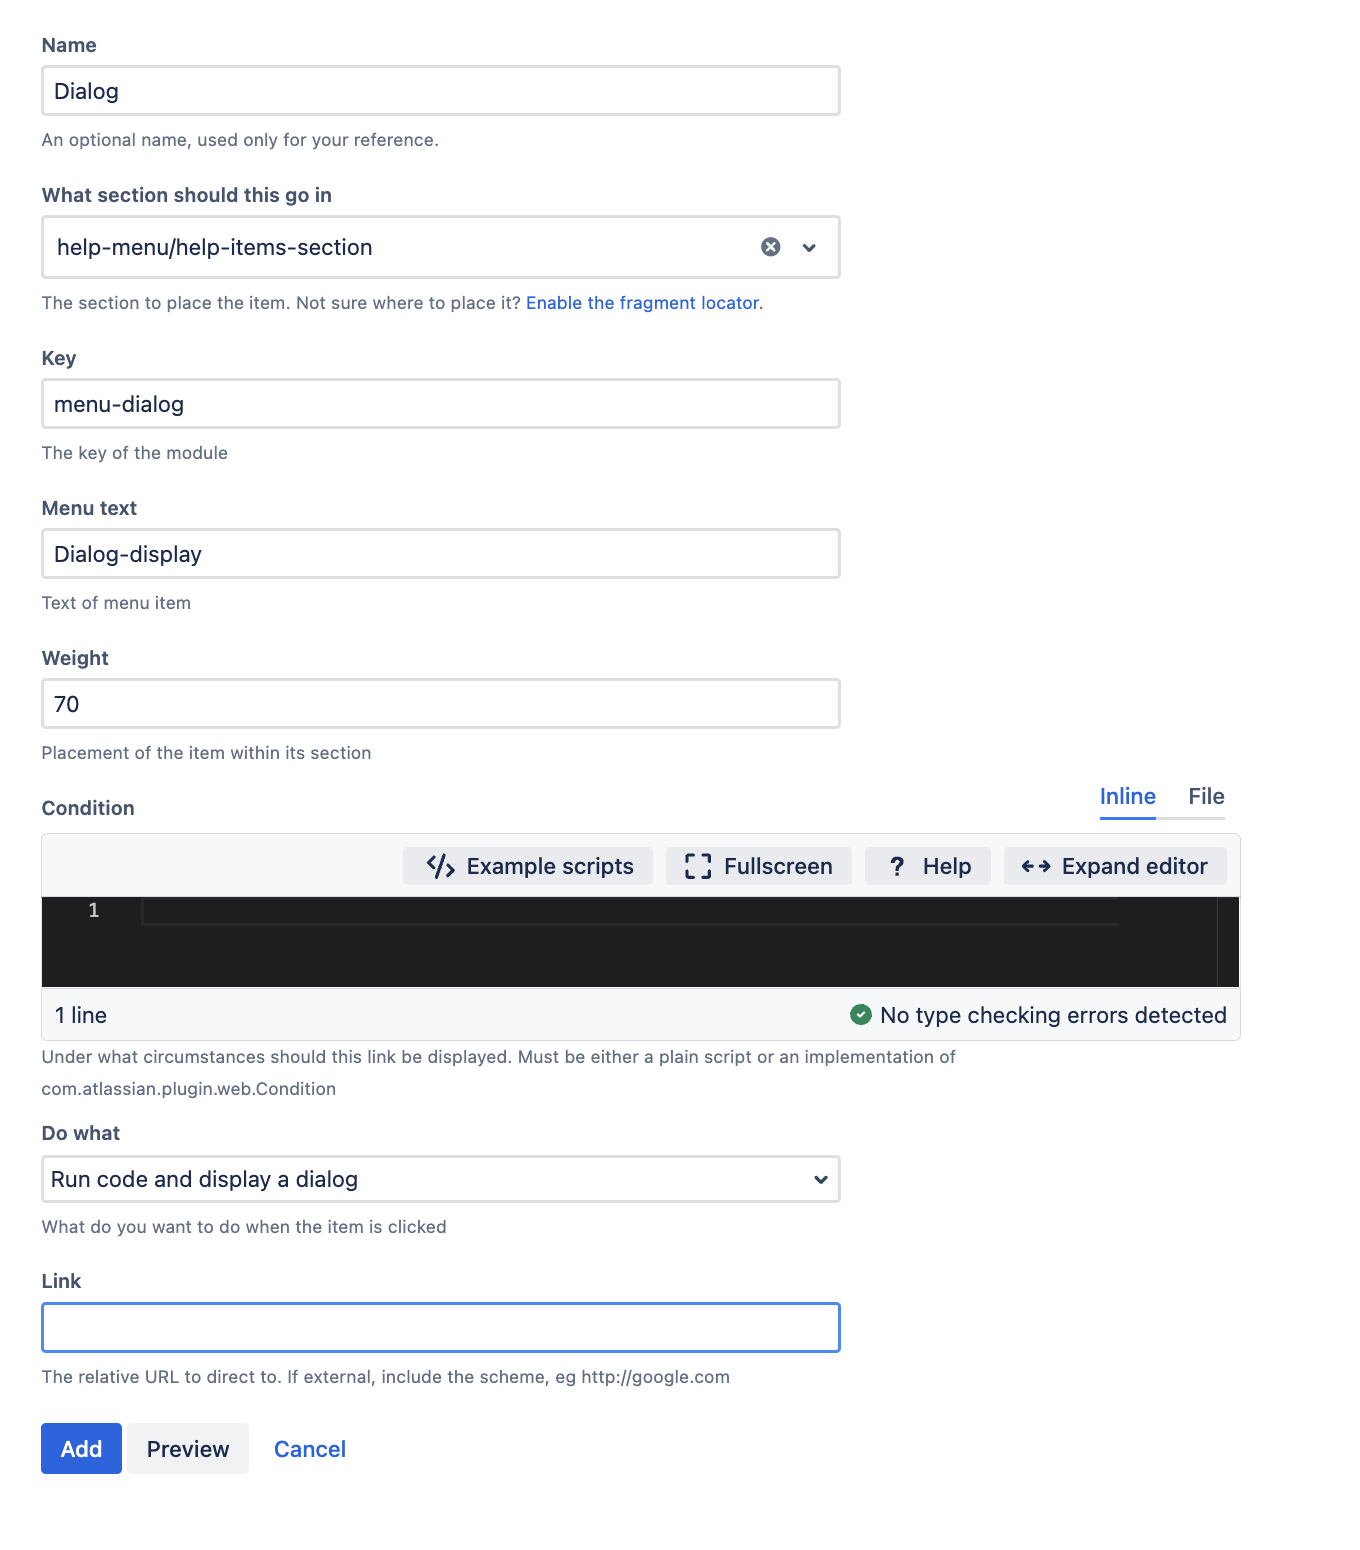
To display a dialog when the user clicks on a web item see the following steps:
- Create a new Custom web item.
- From ScriptRunner, navigate to UI Fragments > Custom web item.
Fill out the Custom web item form as below. Make sure to select Run Code and Display a Dialog value for the Do What field, and leave the Link field empty for now.
Select Add to create the web item.
- Set up a new Custom REST Endpoint that will return a HTML for an AUI dialog 2 when it is accessed.
Navigate to Scriptrunner > REST Endpoints > Add a New Item.
Select Custom Endpoint and place the code below in the Inline Script field:
import com.onresolve.scriptrunner.runner.rest.common.CustomEndpointDelegate
import groovy.transform.BaseScript

import javax.ws.rs.core.MediaType
import javax.ws.rs.core.MultivaluedMap
import javax.ws.rs.core.Response

@BaseScript CustomEndpointDelegate delegate

showDialog { MultivaluedMap queryParams ->

    def dialog =
        """<section
            id="static-dialog"
            class="aui-dialog2 aui-dialog2-medium aui-layer"
            role="dialog"
            aria-modal="true"
            tabindex="-1"
            aria-labelledby="static-dialog--heading"
            aria-describedby="static-dialog--description"
            hidden
			data-aui-remove-on-hide="true"
		>
			<!-- Dialog header -->
			<header class="aui-dialog2-header">
				<!-- The dialog's title -->
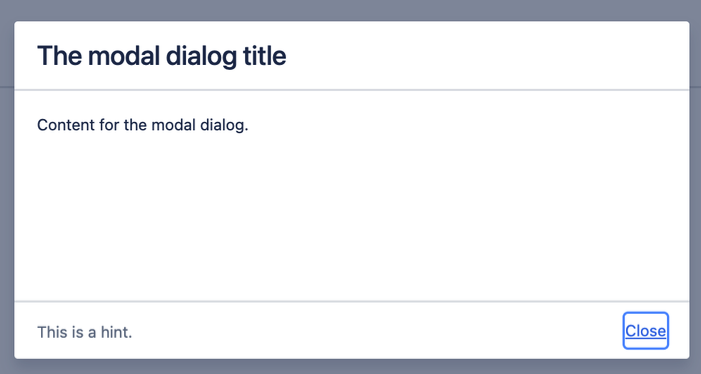
				<h1 class="aui-dialog2-header-main" id="static-dialog--heading">The modal dialog title</h1>
			</header>
			<!-- Main dialog content -->
			<div class="aui-dialog2-content" id="static-dialog--description">
				<p>Content for the modal dialog.</p>
			</div>
			<!-- Dialog footer -->
			<footer class="aui-dialog2-footer">
				<!-- Actions to render on the right of the footer -->
				<div class="aui-dialog2-footer-actions">
					<button class="aui-button aui-button-link" id="dialog-close-button">Close</button>
				</div>
				<!-- Hint text is rendered on the left of the footer -->
				<div class="aui-dialog2-footer-hint">This is a hint.</div>
			</footer>
		</section>
		"""
	Response.ok().type(MediaType.TEXT_HTML).entity(dialog.toString()).build()
}
Save your endpoint.
- Copy the url of your newly created endpoint to the Link field of the Web Item you created in step 1.
Results
Now, if you navigate to the Web Item and click on it:
The following dialog displays:
Additional details (Close functionality)
Note that in the current implementation the Close button will not actually close the dialog. To add this functionality, you need to use JavaScript.
Add the following code after the </section> closing tag in your endpoint script:
<script>
    AJS.toInit(() => {
        document.getElementById("dialog-close-button").onclick = function(e) {
            e.preventDefault();
            AJS.dialog2("#static-dialog").hide();
        };
    });
</script>
The data-aui-remove-on-hide attribute controls the removing of the dialog from the DOM when the dialog is hidden (for example, when pressing the ESC key).
You can include your additional dialog with a web resource fragment.
You can now save your REST endpoint. When you click on the web item you have selected, the dialog will appear, with the Close button functioning correctly.
Redirects
Return a redirect to run code and then redirect to another page, or load the same page after updating it.
Make sure to select Navigate to a link value for the Do What field.
Further examples
Showing recent projects from a particular project category ( Atlassian Answers )


