
User guide
Step-by-step guide
How to use and enable visual graph of requirements
Adding Requirement
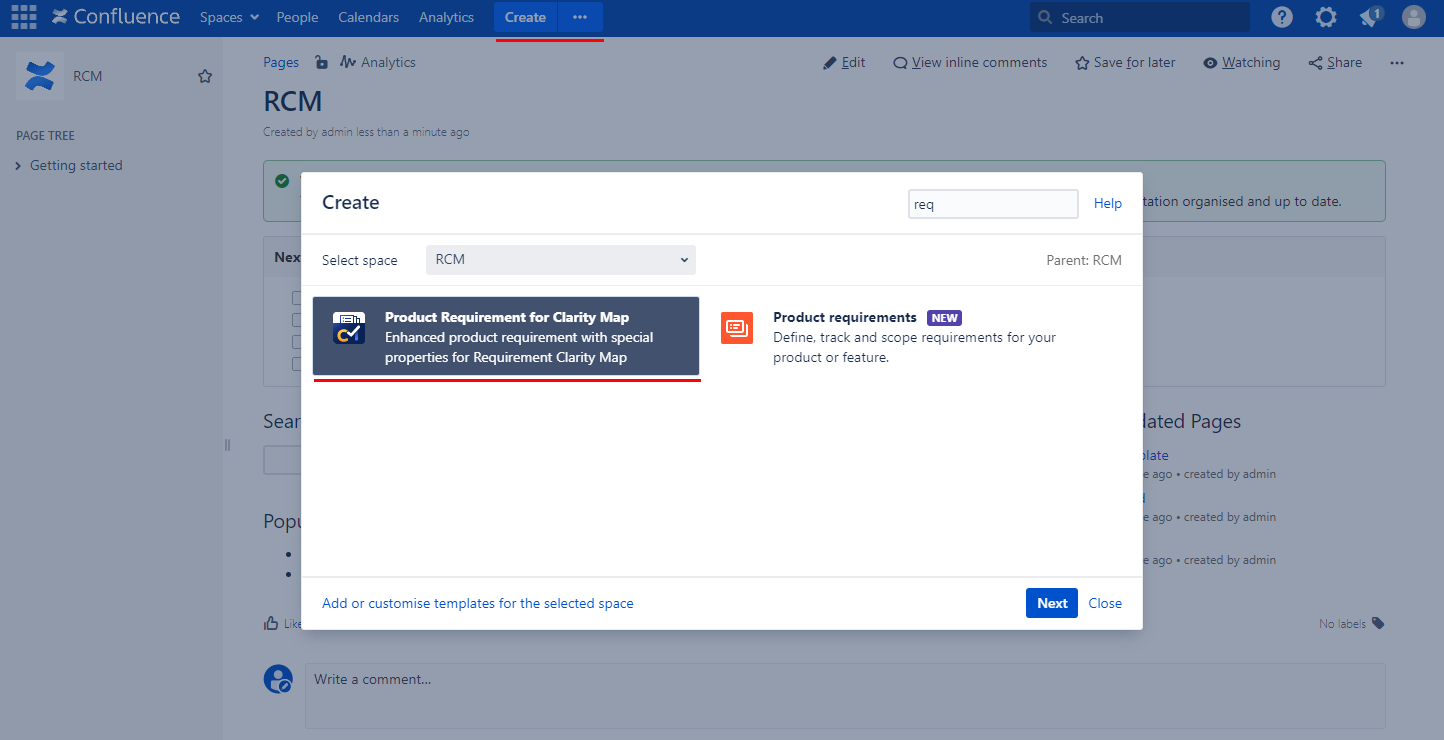
To add requirement use "..." next to Create button, there after find "Product Requirement for Clarity Map
On this page:
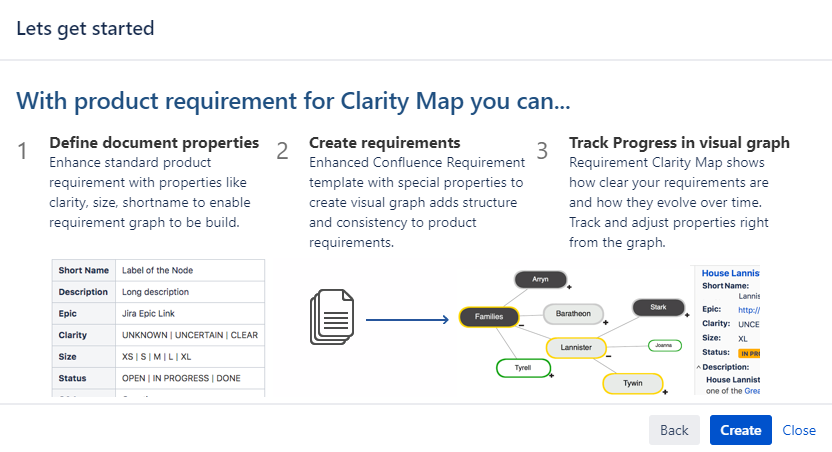
Specifying properties
After confirming page creation you get confluence page that is done based on template inherited from standard confluence requirement blueprint
Properties relevant for Requirements Clarity map
Property name | Description | Format, possible values |
|---|---|---|
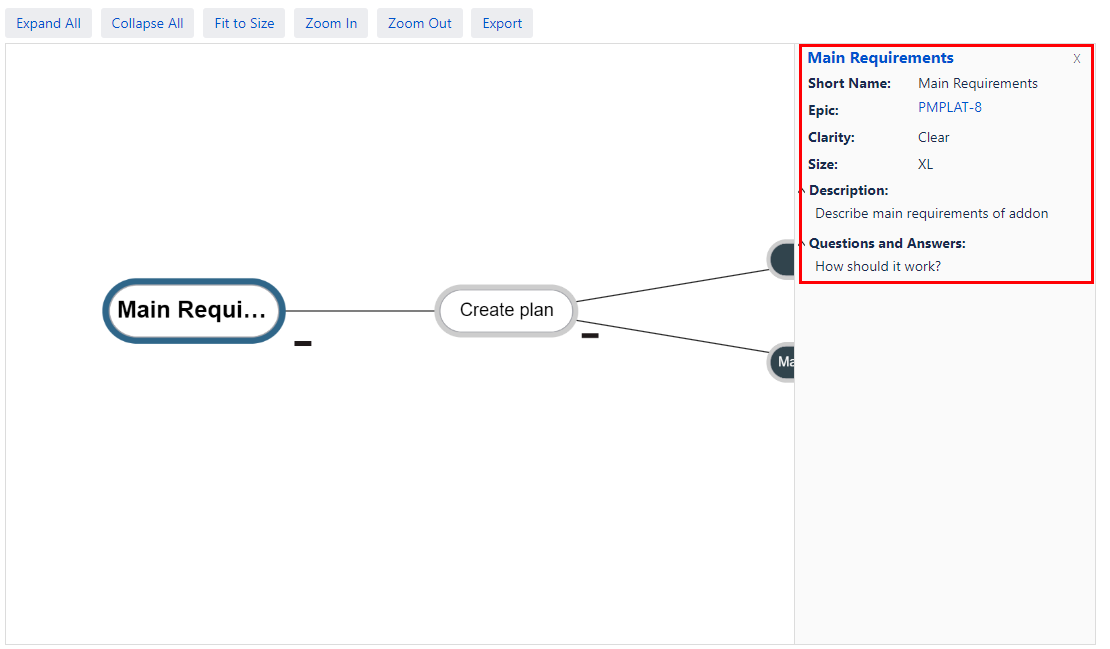
Short name | A title of the node for Clarity Map Graph | Char : 15 |
Description | Long description of requirement | Text |
Epic | link to Jira issue, presumably epic | |
Clarity | How clear is requirement. Defines fill color on Clarity Map Graph |
|
Size | How big is requirement. Defines size of the node on Clarity Map Graph. T-shirt size based qualification of size of requirement |
|
Question and Answers | Open questions and answers for given requirement | Text |
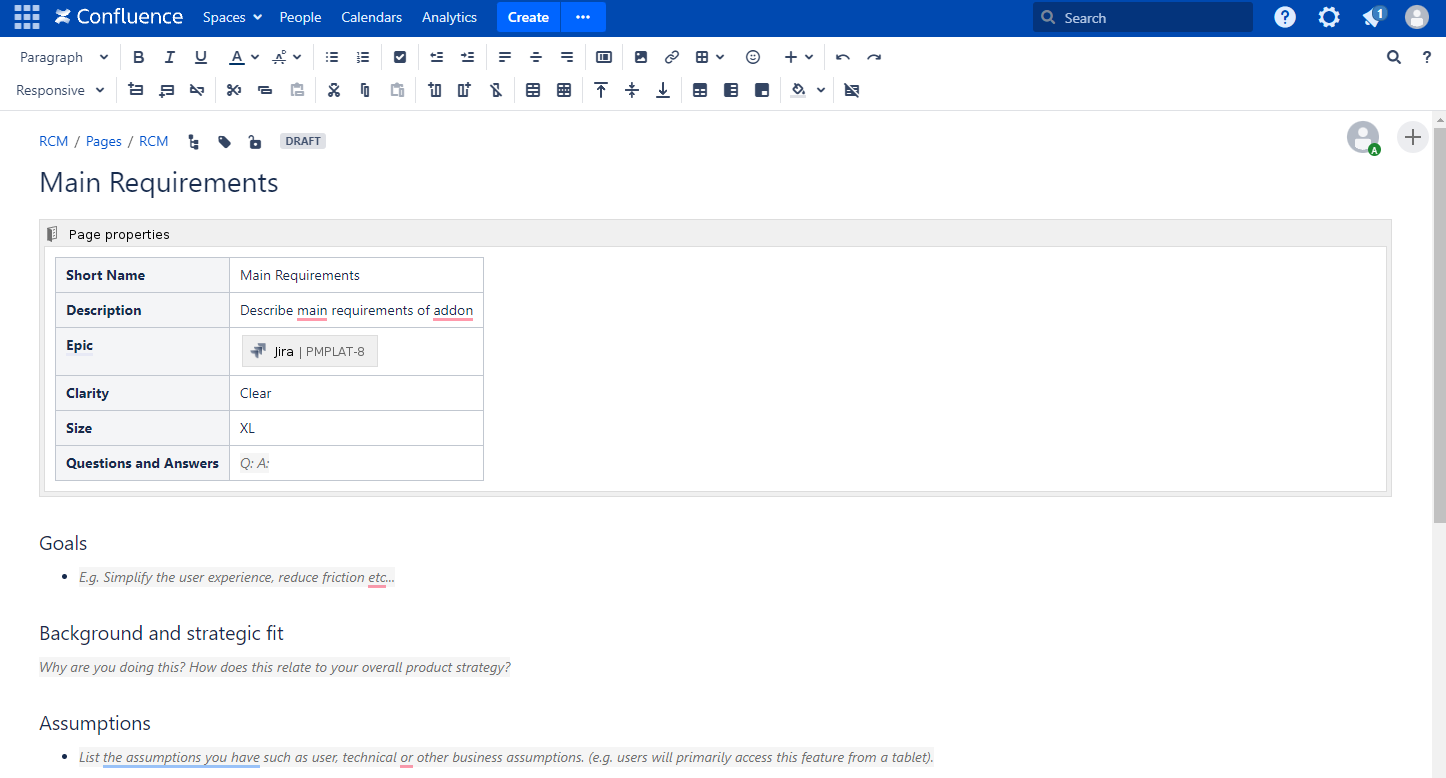
Enabling Requirements Clarity Map for existing requirements
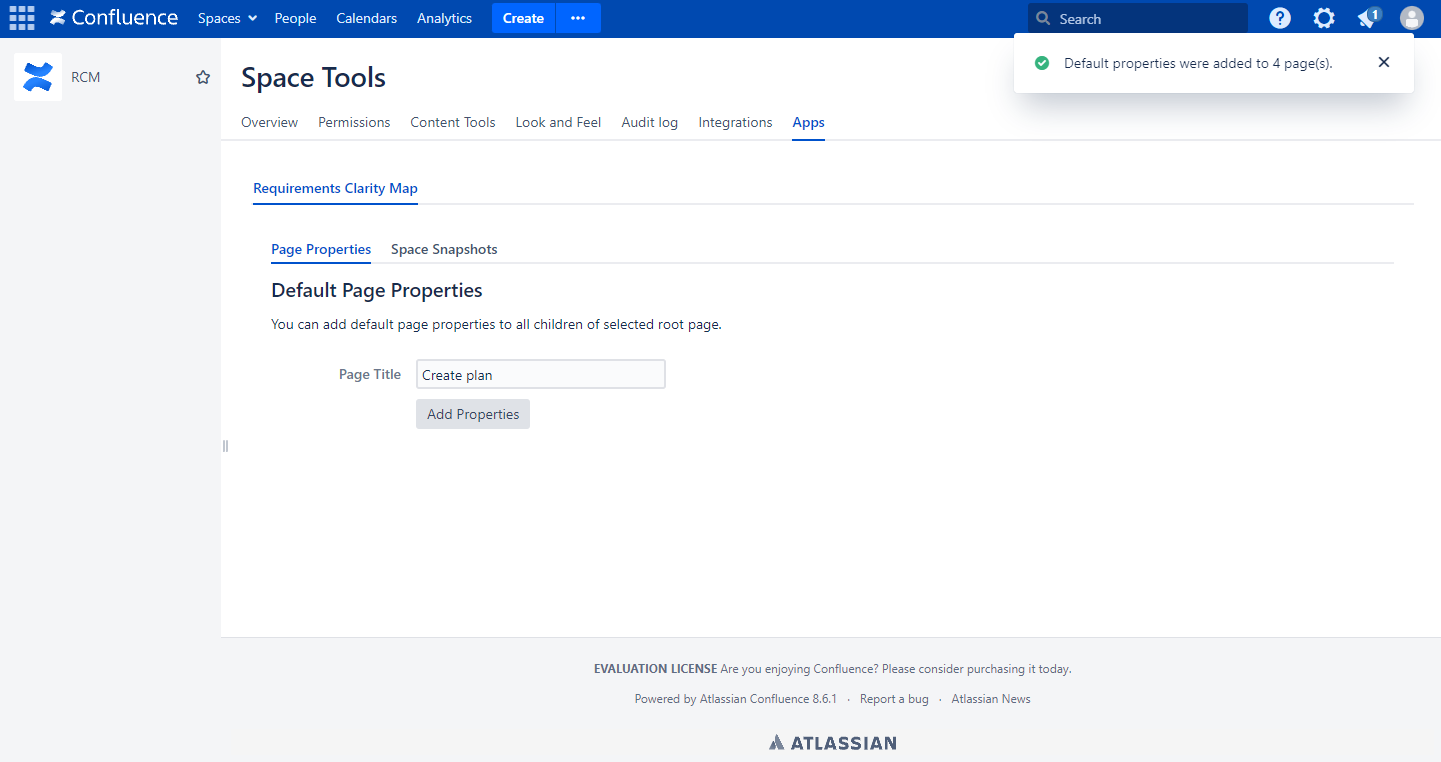
Goto Space Tools > Apps
Select space and root element of requirement hierarchy > Add Properties.
Adding Requirement Graph
You go with "+" sign on control button bar and then " ... Other macros", then select Requirement Clarity Map

Provide
Parameter | Description |
|---|---|
Space Key | Confluence key of the space where your requirements pages are located |
Page Title | Root of the tree where you want macros to start processing |
| Whether or not you want to enable hints on the map usage |
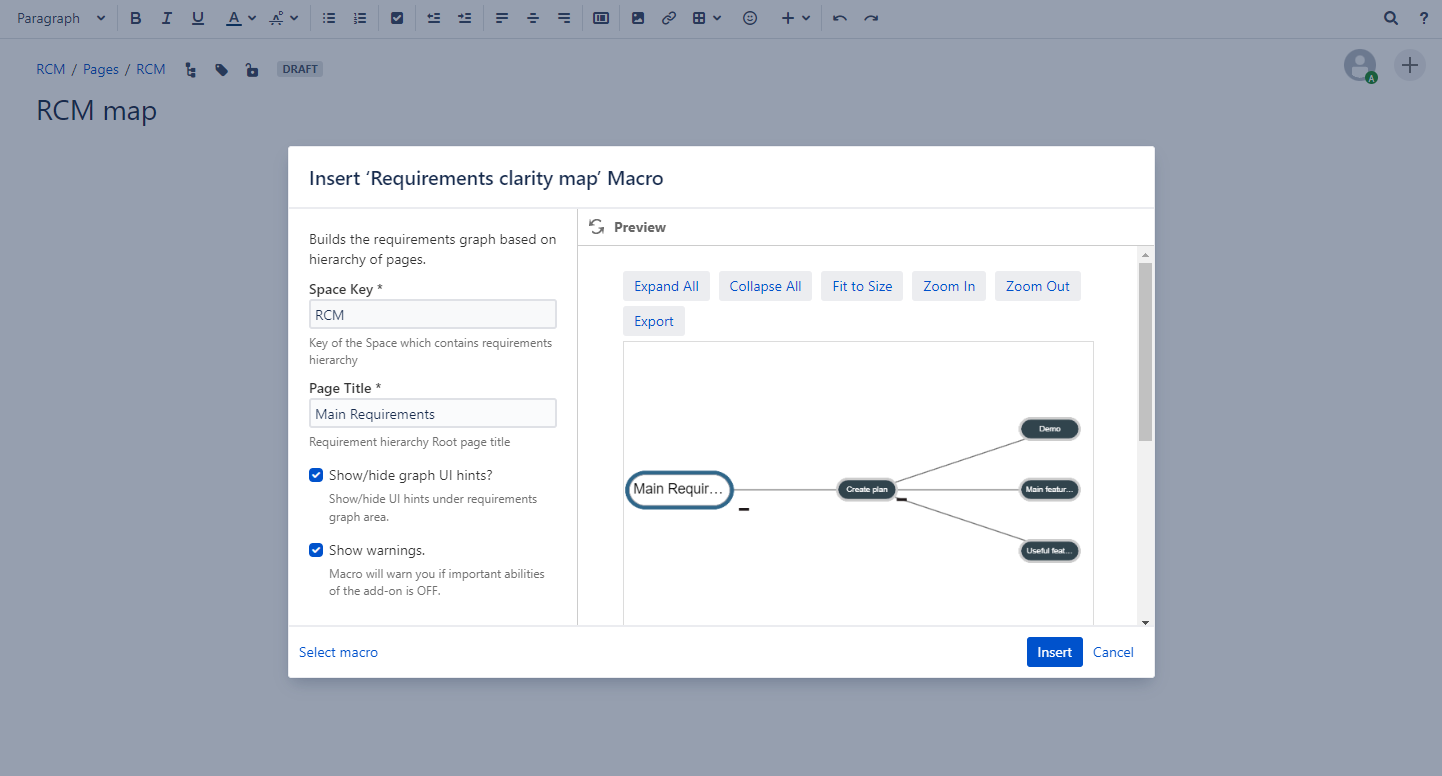
Insert adds a graph to your confluence page
What you can see and what you can do with a graph
Size

Clarity
How clear is a requirement is defined by one of three choices
UNKNOWN - team doesn't understand what risks are there, what effort is required for this to be implemented
UNCERTAIN - team has some understanding of what this requirements is about. There are some unclear items that needs to be researched or investigated
CLEAR - team understands complexity of requirement, understands implementation steps, acceptance criteria are defined

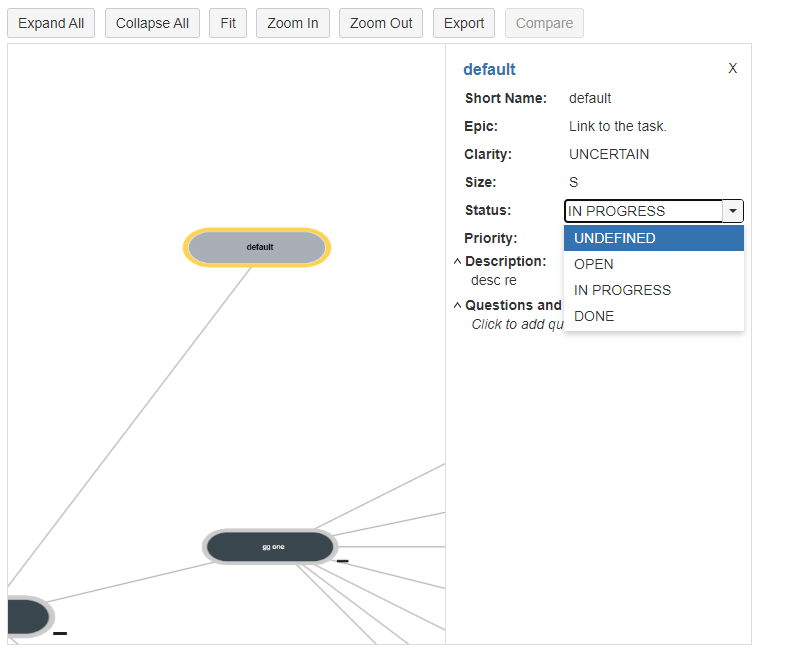
Status (only for RCM cloud)
Status of corresponding requirement is determined by status of associated Jira epic. In case no epic is yet created - status is NULL. On graph you can easily determine that by color of the bezel
Status | Defines status of this requirement. As soon as there is associated epic in Jira - Status is determined by status category of linked issue, before that - status is not defined |
|
|---|
The easiest way is to add the default “Jira” macro on a page and perform the authentication.
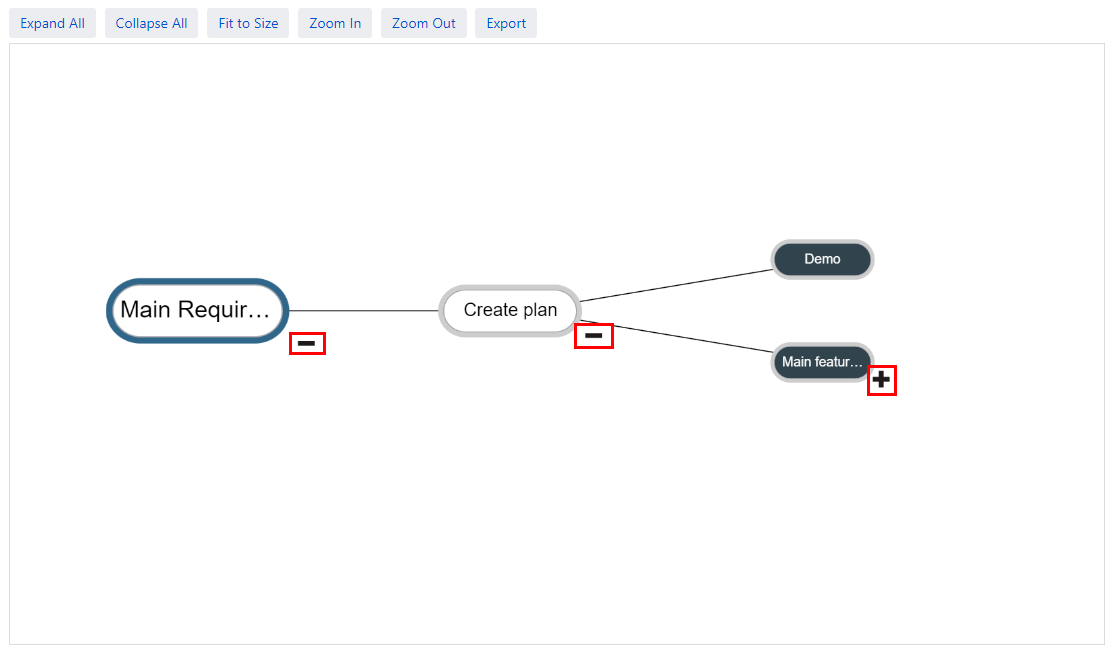
Hierarchy
Ray diagram represents the hierarchical structure of all requirements underneath provided root element. In the sample case "Family"
+ / - signs are options to expand/collapse corresponding node
Properties
Selecting a node - opens the property panel.
Following values are available for inline editing
Short name
Clarity
Size
Description
Questions and Answers
Timeline snapshots
The possibility to compare current condition of the graph to saved versions was added for server/DC version.
Enabling snapshot comparison
To benefit from Compare snapshot functionality you need enable and configure this feature in Space Tools. If functionality is not enabled - requirement macro shows the warning about that.

We get access to setting and administrating of comparison functioning after turning on comparison functionality in Space Tools.
Turn On/Off functionality
Snapshot interval field appears - intervals in which snapshot will be taken if there were change in content of pages related to requirements.
Snapshot table - List of snapshot available in history
Date of creation of the snapshot
Snapshot name (empty if not given), to give snapshot name you need to mouse over the snapshot line and click the "pencil" that appears, then give a name and click Enter
Remove snapshot - possibility to remove snapshot from history
Checkboxes to choose which snapshots to remove
Remove selected - bulk removal of snapshots, removes those selected
After snapshots settings in graph Compare button appears.
After clicking the Compare button, the snapshots list appears.
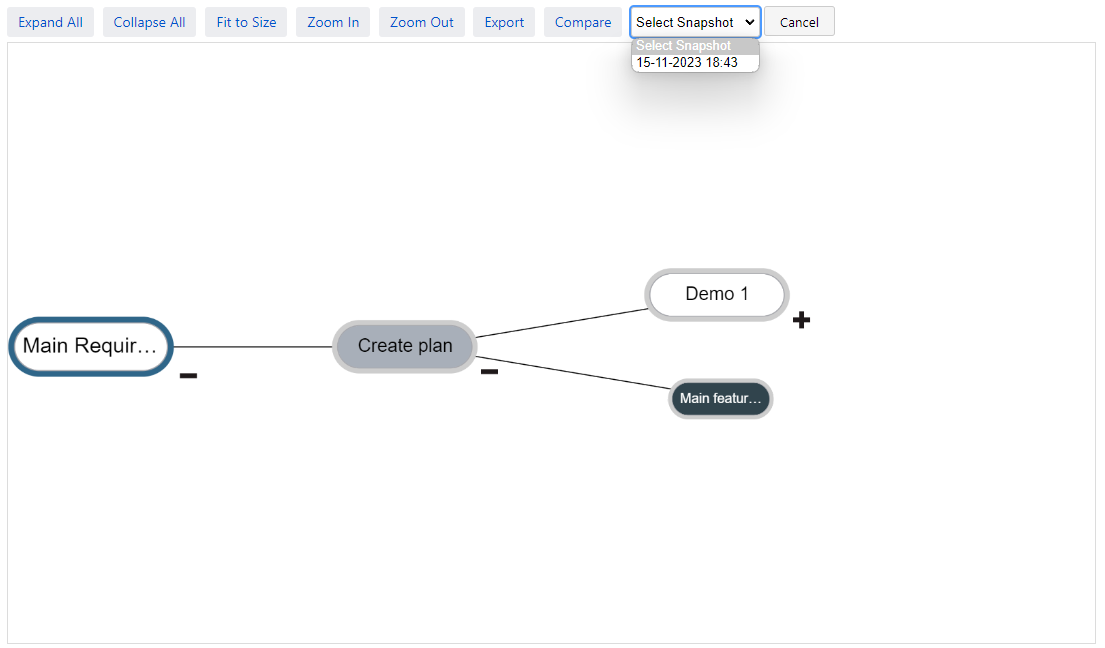
After selecting snapshot user is able to see the current version changes to compare to selected one, by three parameters:
Clarity
Size
Connections

Snapshot selected for comparison
Cancel button - hides snapshot selected pulldown
Clarity parameter change indication (left one is old, right one - current version)
Old connection
New connection
Size parameter change indication (pointer up - increased, pointer down - decreased)