
Tooltip
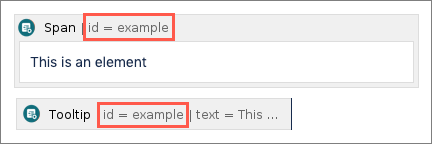
The Tooltip macro lets you assign a tooltip to another macro element on the page using the element’s ID. For example, you can assign a tooltip to a Span macro. This is a span with a tooltip attached. The Tooltip macro does not impact the appearance of a page by altering the appearance of your element.
To assign a Tooltip to an element, the targeted macro element must be created first. See the Parameters table for a list of macros that contain an ID parameter.
Walkthrough
Watch our video walkthrough to see the Tooltip macro in action.
Instructions
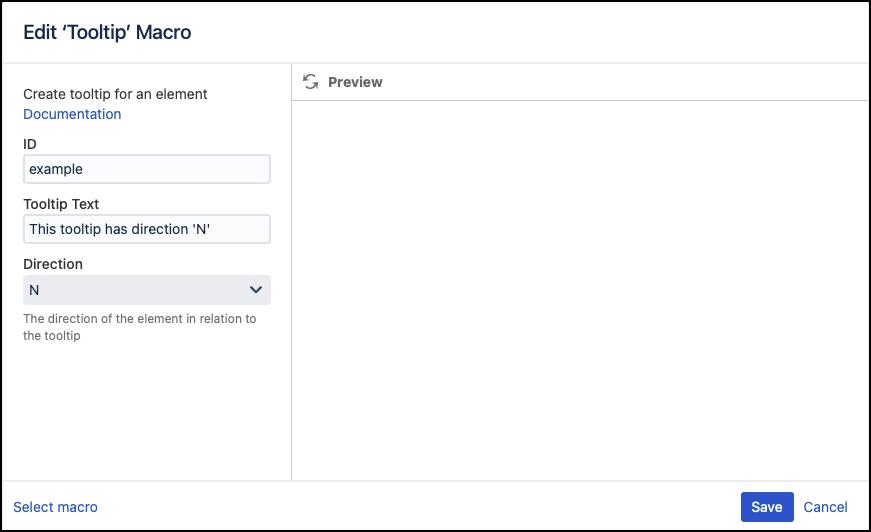
Navigate to the page that you want to edit.
Click Edit.
Click Insert More Content > Other Macros.
Select the Tooltip macro from the Macro Browser.
Customize the tooltip using the macro parameters.
Parameter Description Default Required ID
This should match the ID of the element you are applying the effect to.
ex. The ID parameter in a Div macro is target. Then the ID in the Tooltip macro should also be target.
none

Tooltip Text
Type the text to be displayed on the tooltip, e.g. This tooltip has direction 'N'.
none
Direction
Select the direction of the element in relation to the tooltip, e.g. if 'N' is selected, the tooltip will appear below the element.
This can be set to: N, E, S, W, NW, NE, SW, SENorth

- Select Save
Example
Published Result
This is an Element