HTML Image
The HTML Image macro allows you to display an image within a page with extended properties such as an 'alt' tag and an image map feature.
Instructions
- Navigate to the page you want to edit.
- Click Edit.
- Click the position where you want to add the image.
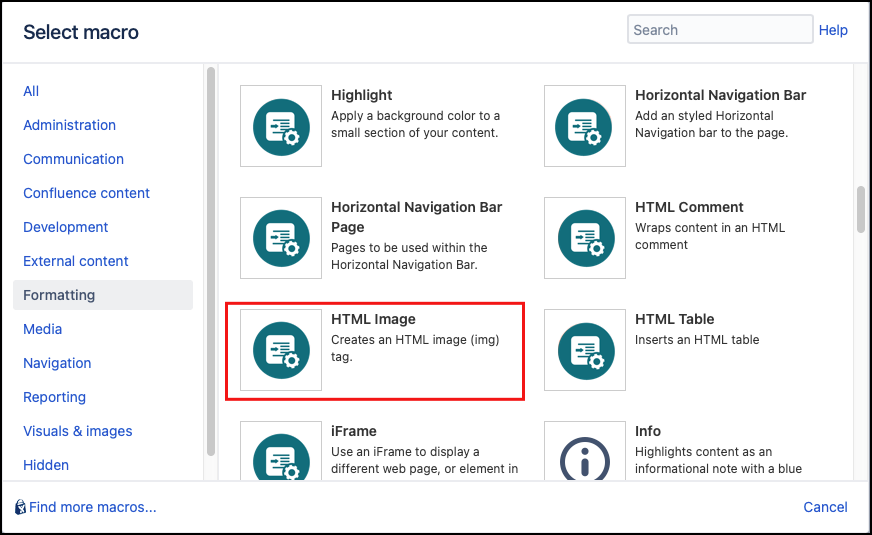
- Click Insert More Content > Other Macros.
- Select the HTML Image macro from the Macro Browser.
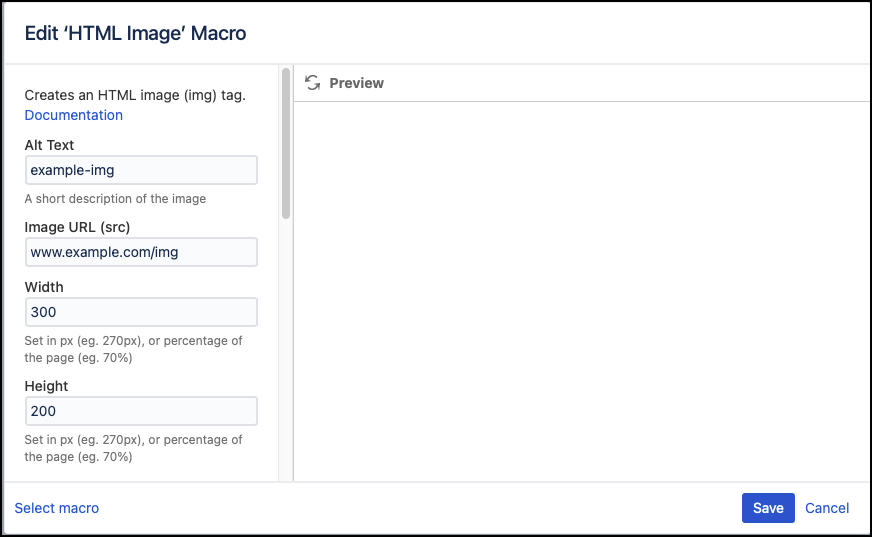
Complete the desired fields. The URL parameter must be specified for this macro to work.
Parameter
Description
Type
Default
Required
Alt Text
Defines a short description of the contents
string
none

Image URL (src)
Defines the URL of the image source
string
none

Width
Set the width of the image in px (eg. 270px), or percentage of the page (eg. 70%)
string
none
Height
Set the height of the image in px (eg. 270px), or percentage of the page (eg. 70%)
string
none
Class as Server-side Image Map
Select if you want to class the image as a server-side image map
checkbox
unselected
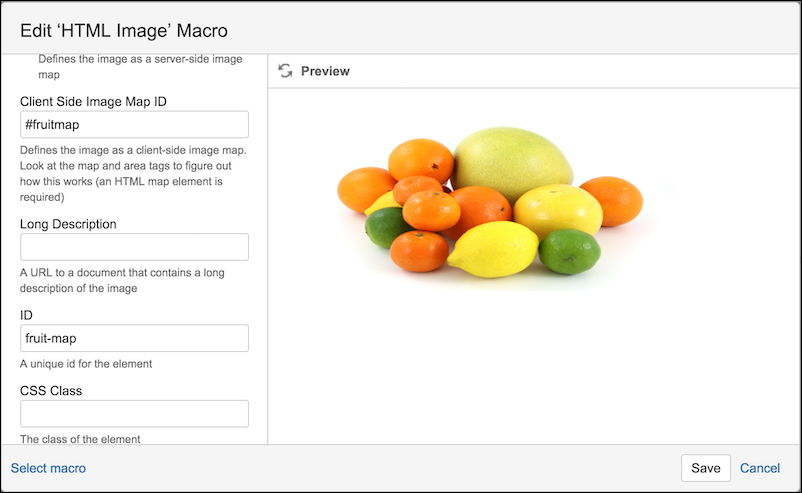
Client-side Map
Defines the ID for a client-side map, linking to HTML on the page that includes this map
string
none
Long Description
A URL to a page that contains a long description of the content
string
none
ID
Specify a unique ID for this element. Use this to link to Tooltip, Dialog, or Rollover Macros.
If using this parameter to apply styling to the element, do not include the # selector.string
none
CSS Class
Use in combination with Global Confluence CSS or a CSS Stylesheet macro that you have added to your page.
Enter the CSS class name(s) to apply to the macro (case sensitive); multiple classes can be separated by a space or comma. Do not include the.selector in the class name.string
none
Inline Style
Option to apply an inline style, using CSS, to an individual div tag body content; useful for adding borders or padding, e.g.
border: 3px solid-red.This style does not need to be defined in a CSS Stylesheet macro.
string
none
Title
Text to display in a tooltip
string
none
Text Direction
You can choose ltr (left to right) or rtl (right to left)
single select
none
Language Code
Enter a language code if you want to specify that the element content language is different from the default language of your page, e.g.
defor German. Browsers will identify that the content is written in German.string
none
Click Insert. The macro placeholder displays.

Save the page to render the image.
Published Result

Examples
Basic example
Display an HTML image on a page:
Client-side image map
Atlassian's HTML macro must be enabled to use the client-side image map parameter. This action requires administrator permissions and the security risks should be understood before doing so.
See Atlassian's HTML macro documentation for more information. Once the HTML macro is added to a page, an image map can be defined.
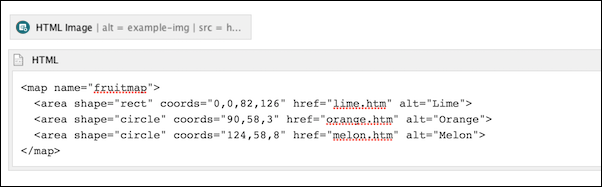
The name of the map should be the same as the 'Client-side image map' parameter for the HTML Image macro, as follows.